

The next (and Final) step of the Adapter Wizard performs the translation tasks and allows you to map the input fields from the data source, to the output fields, which makes up the CA Business Service Insight “Event”. There are two options to continue with here, depending on whether the “Event Type” is already created in the system or not. There are also a number of other options that you can choose to configure and ensure naming standards are followed. Most of these are optional however, to ease the process and reduce the steps required. Mandatory steps are noted below.
Steps to configure the Mapping step are as follows (includes optional steps):
When choosing to create a new Event Type, a new window pops up and is pre-populated, based upon the Input Format on the main screen. You still need to enter the Event Type name, and also assign a Resource Type to the Event Type.
Once complete, you can “Save and Close” and the mapping is completed automatically.
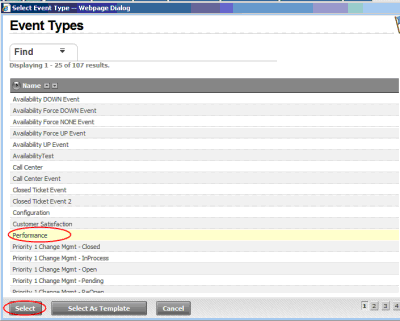
If you choose the “Select Event Type” option, you are presented with a list of the existing Event Types in the system to choose from. When proceeding however, only fields from the Input with matching name and data type from the Event Type are linked automatically. The remaining fields have to be mapped manually.
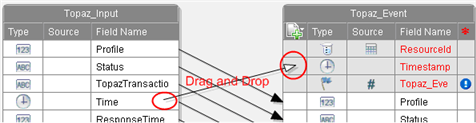
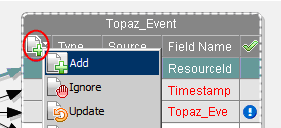
Next step is to configure the ResourceId, Timestamp and Event Type. If the fields exist already (they should be created in previous steps if not) they can be linked to these fields as required.
The interface supports a Drag and Drop style of association. If the associated does not persist after setting it, ensure the Type of each one matches. (i.e. Time/String/Integer etc.).
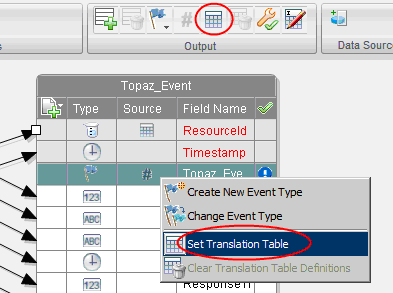
Following this, a pop-up window is presented.
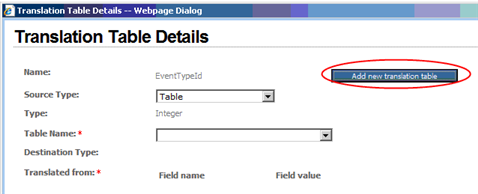
If the translation table for this value field already exists, it can be chosen here, or alternatively a new translation table can be set up for this. The button on the screen above can be used for this purpose.

Once the table is created, you need to specify which of the Input fields is maped to the “Source Fields” specified above.
If you wish to specify a different translation table for the resources of the adapter, this should also be done at this point. This is done using a similar process to that described above for the Event Type.
Note: By default, the Adapter Wizard allocated all resources to a pre-existing Translation Table called “Default_Translation_Table” if not otherwise specified. This may be correct for simple implementations but, for more complex implementations (and for data separation purposes) CA recommends using a different table. It is also mandatory when the “Source Fields” of the adapter mapping section are different, or contain greater than one value.
The last step of the Mapping step is to configure the “OnDuplication” setting for the adapter. This setting describes the action taken when a second event, with matching values for all of the “key” fields, is received. This unique “key” can be defined for each Output of the adapter (see further below for more information on this). By default this “OnDuplication” value is set to “Add”, so only needs to be changed if a different action is required. The values available are:
Use of the options other than “Add” may impact the performance of the adapter and should be carefully considered before implementing, especially where data volumes are very large.
If the value is set to anything other than “Add”, the Output structure displays a series of check boxes which are used to define the unique “key”. The “key” consists of each of the items with a check against them. The choice of key should be decided based upon the requirements after careful analysis.

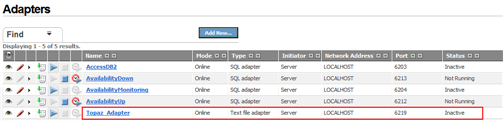
Once the configuration of the mapping section is complete, click the Finish button in the bottom right of the screen. You are returned to the list of adapters in the system, and should now be able to see the adapter you created with a status of “Inactive”.
|
Copyright © 2013 CA.
All rights reserved.
|
|