After you install the third-party prerequisites, install the CA Process Automation component.
- Click Next on the CA Process Automation installation window.
The License Agreement window opens.
- Read the License Agreement, select the I accept the terms of the License Agreement option, and click Next.
The Java Home Directory window opens.
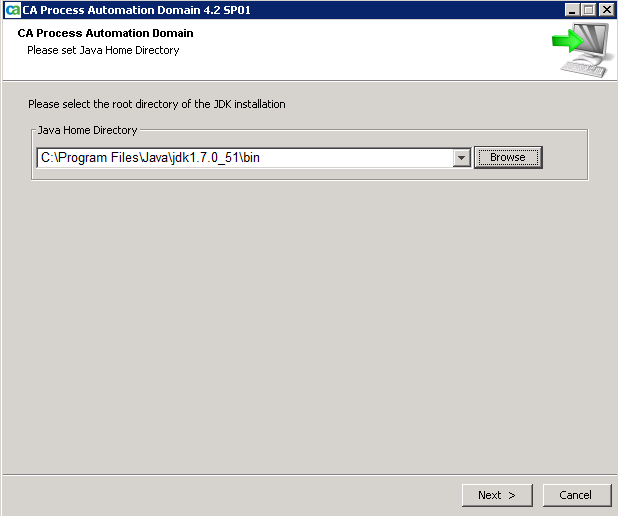
- Specify the file path of the Java Home Directory, or click Browse and navigate to the directory path, then click Next.
The installation begins.
Note: The files take several minutes to copy.
The CA Process Automation Domain Configuration window opens.
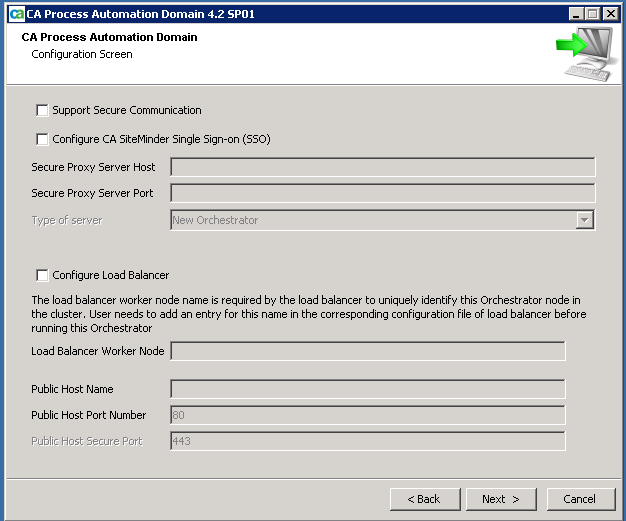
- Verify that the Configure Single Sign-on and Configure Load Balancer check boxes are cleared. This functionality is not needed in CA Automation Suite for Clouds. Click Next.
The Please enter company window opens.
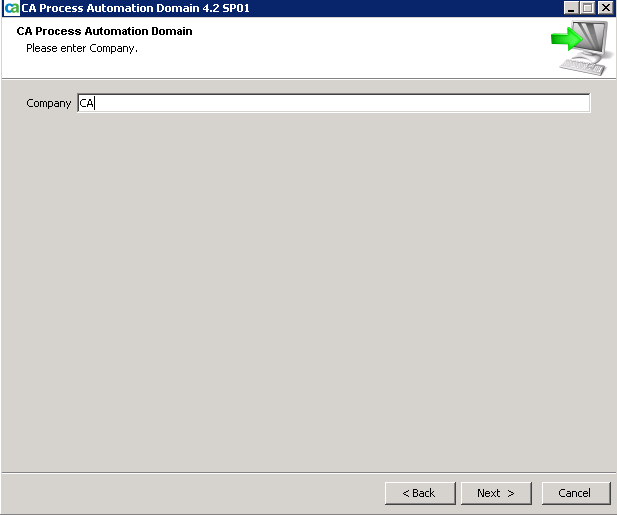
- Type your company name, and click Next.
The Set Certification Password window opens.
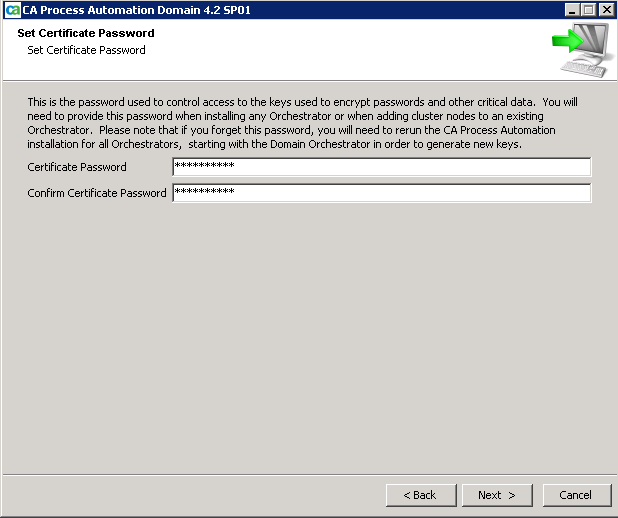
- Type the Certificate Password twice, and click Next.
Important! This password controls access to the keys used to encrypt passwords and other critical data. Record this password on the Installation Worksheet to refer during the installation.
The Select Start Menu Folder window opens.
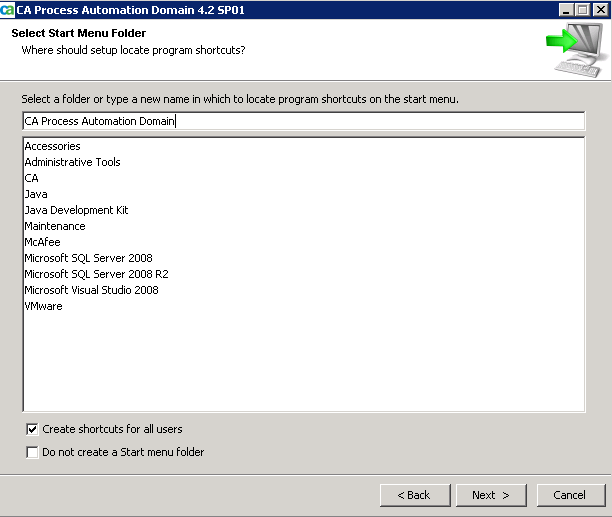
- Create a folder named CA Process Automation Domain.
- Select the Create shortcuts for all users check box.
- Ensure Do not create a Start menu folder check box is cleared.
These options create a folder that stores program shortcuts and is accessible from the Start Menu.
- Click Next.
The General Properties window opens.
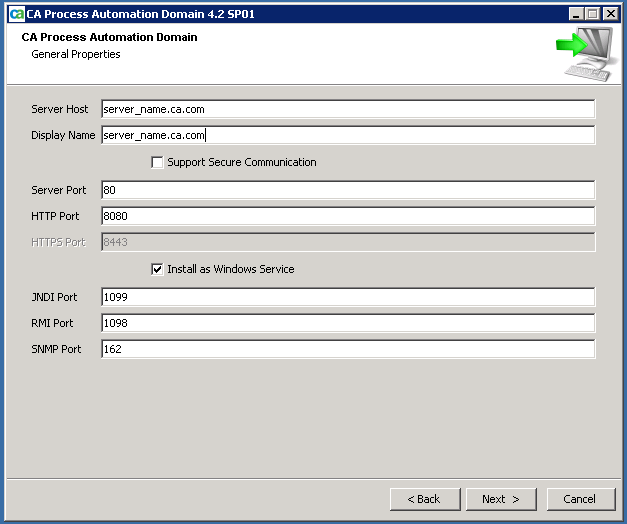
- Type the General Properties for the CA Process Automation domain. Use the appropriate default values that are found on the CA Automation Suite for Clouds Solution Worksheet.
Note: CA Process Automation and CA Service Catalog both use HTTP Port 8080 by default. If installed on the same server, change one of the port numbers to avoid a conflict.
- Ensure that the Support Secure Communication check box is cleared, selecting this option changes the port number.
- Select Install as Windows Service.
- Click Next.
The Set the temporary directory to execute scripts window opens.
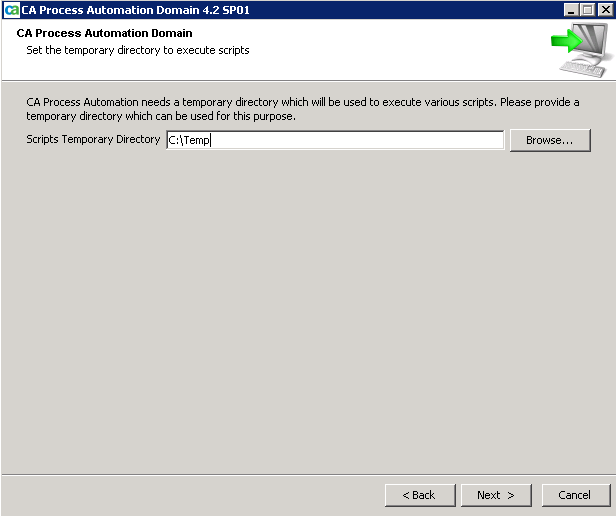
- Set the Scripts Temporary Directory to C:\TEMP, and click Next.
Note: The preferred directory is \TEMP. All users must have the permission to access this directory.
The Set Powershell execution Policy window opens.
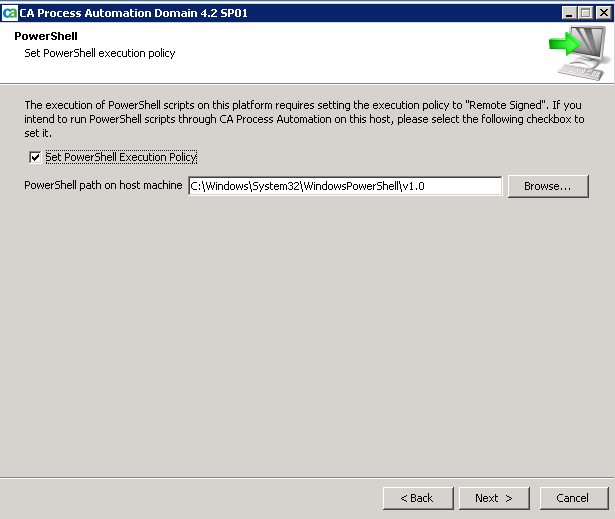
- Select the Set PowerShell Execution Policy check box.
- Accept the default path (C:\Windows\System32\WindowsPowerShell\v1.0) to the PowerShell.exe, and click Next.
PowerShell scripts are enabled on the system.
The CA EEM Security Settings window opens.
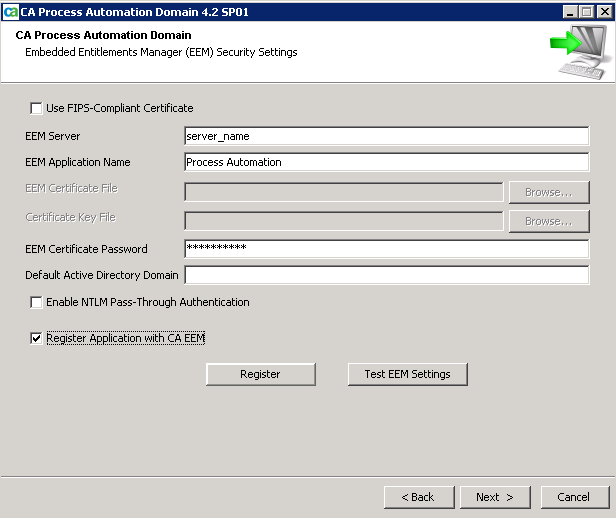
- Specify the directory server properties for CA EEM and register the CA Process Automation component to the CA EEM server. Use the appropriate values that are found on the Installation Worksheet.
Note: Do not enter any values to the EEM Certificate File and the Certificate Key File fields because the solution does not use them.
- Verify that FIPS-compliant Certificate is cleared.
Data that is transferred between the CA Process Automation and CA EEM servers is encrypted using the MD5 algorithm.
- Type the fully qualified CA EEM server name.
- Verify that the CA EEM Application Name is Process Automation.
- Type the CA EEM Certificate Password.
- Ensure that the Enable NNTLM Pass-Through Authentication check box is cleared.
- Select Register Application with CA EEM.
- Click Register.
The EEM Credentials window opens.
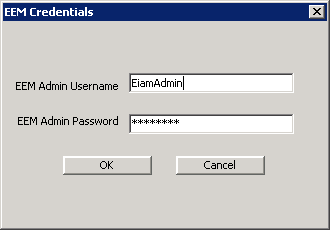
- Type EiamAdmin for the CA EEM Administrator Username and password for the EiamAdmin user.
- Click OK.
CA Process Automation is registered to the CA EEM server. A confirmation window opens stating that the application is registered.
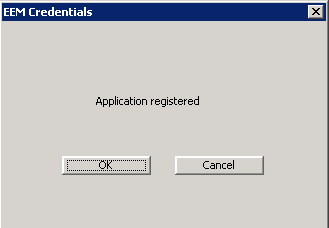
- Click OK to return to the CA EEM Security Settings window.
On the CA EEM Security Settings window, verify that the CA EEM Certificate File field is populated with the location of the PAM.p12 file.
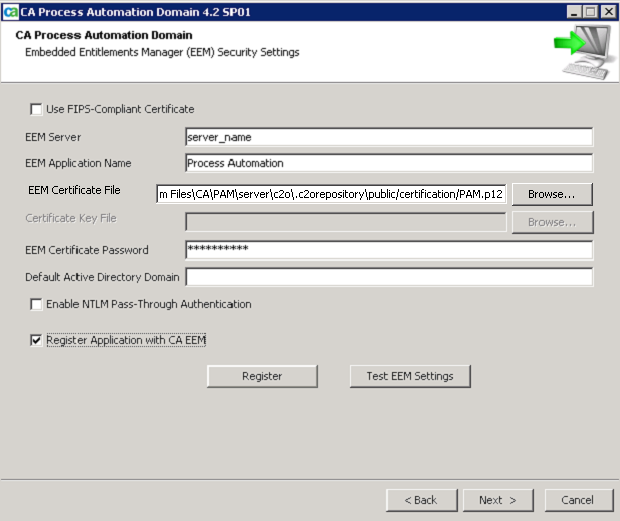
- Click the Test EEM Settings to test CA Process Automation administrator settings that are defined in the CA EEM directory.
A message appears.
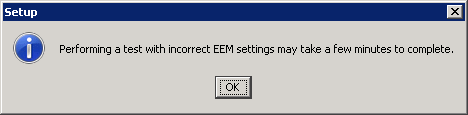
Note: The authentication fails if the appropriate users were not added during the CA EEM installation.
- Click OK.
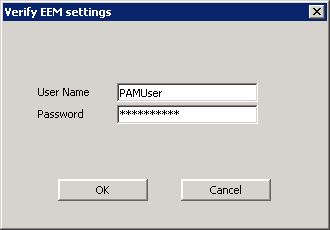
The Verify EEM Settings window opens.

- Type the default username of PAMAdmin, and the password that was created in the Install CA EEM section, and click OK.
The CA EEM settings for the PAMAdmin are authenticated in the CA EEM directory.
- Verify the CA EEM settings for the PAMAdmin. The status must appear as follows:
- Connect: OK
- User provided belongs to User Group: OK
- User is an Admin: Yes
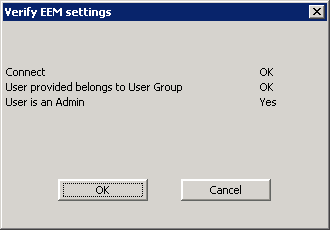
- Click OK.
- Click the Test EEM Settings to test CA Process Automation user settings that are defined in the CA EEM directory.
A message appears.
Note: The authentication fails if the appropriate users were not added during the CA EEM installation.
- Click OK.
The Verify EEM Settings window opens.
- Type the username for PAMUser and the password that was created in the Install CA EEM section, and click OK.
The CA EEM settings for PAMUser are authenticated in the CA EEM directory.
- Verify the CA EEM settings for the PAMUser. The status must appear as follows:
- Connect: OK
- User provided belongs to User Group: OK
- User is an Admin: No
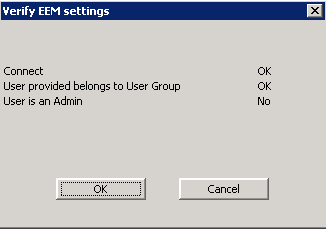
- Click OK when settings are displayed.
- Click Next after you have tested the CA Process Automation Administrator and Users on the CA EEM Security Settings window.
The Database Settings window opens.
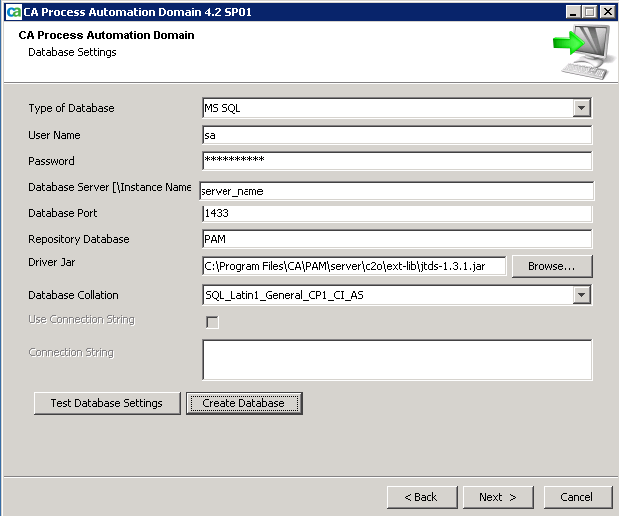
- Make the following changes, in the Database Settings to create a CA Process Automation database. Use the appropriate values that are found on the Installation Worksheet.
- Change the Type of Database from the drop-down list to MS SQL.
- Type a User Name for a Microsoft SQL Administrator that can access the Microsoft SQL Server using the Microsoft SQL Authentication method.
- Type the Password for the Microsoft SQL Administrator user.
- Change the Database Server to the Microsoft SQL Server host name.
- Verify the Database Port of the Microsoft SQL Server host.
Note: If SQL is using a Named Instance, type the Dynamic TCP/IP Port.
- Verify that the Repository Database name is PAM.
- Verify that the Driver Jar location is set to the sqljdbc.jar file path.
- Verify that the Database Collation is set to SQL_Latin1_General_CP1_CI_AS.
- Click Create Database.
The CA Process Automation database is created and a confirmation message appears.
- Click OK.
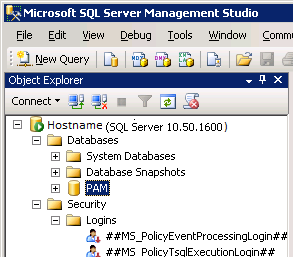
- (Optional) Verify that the PAM Database has been created successfully.
- Open Microsoft SQL Server Management Studio and expand Databases.
- Confirm that the PAM database has been created.
The PAM Database in MS SQL Server.
- Exit SQL Server Management Studio and return to the installation window.
- Click Next after the Database has been created successfully.
The Runtime Database window opens.
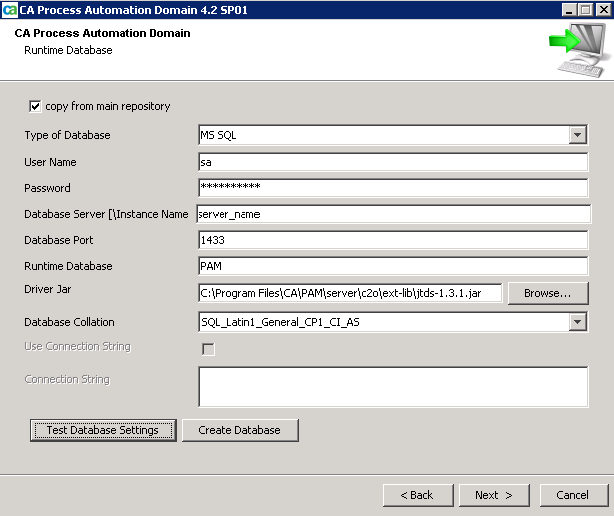
- Select the copy from main repository check box, on the Runtime Database window.
- Verify that the information is populated correctly from the Database Setting window.
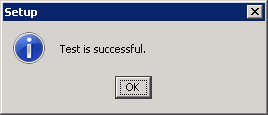
- Click Test Database Settings and ensure that you receive a message indicating the test was successful.
- Click OK to close the Setup window and return to the Runtime Database window.
- Click Next.
The Reporting Database window opens.
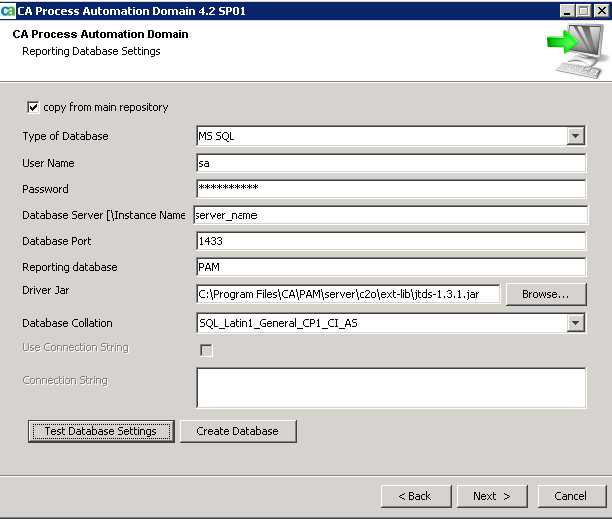
- Select the copy from main repository check box and verify that the information is populated correctly from the Database Setting window.
- Click the Test Database Settings button and ensure that you receive a message indicating the test was successful.
- Click OK to close the Setup window and return to the Reporting Database Settings window.
- Click Next.
The Additional Jar for Installation window opens.
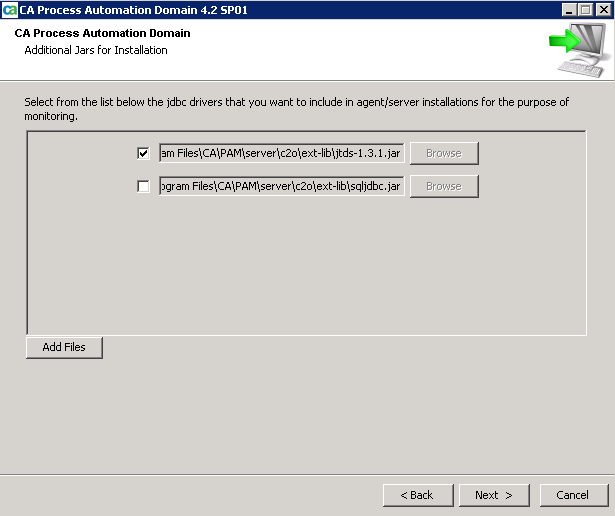
- Select the check box and verify the location for the sqljdbc.jar file, then click Next.
The installation begins and takes several minutes to finish.
The Completing CA Process Automation Domain Setup wizard opens.
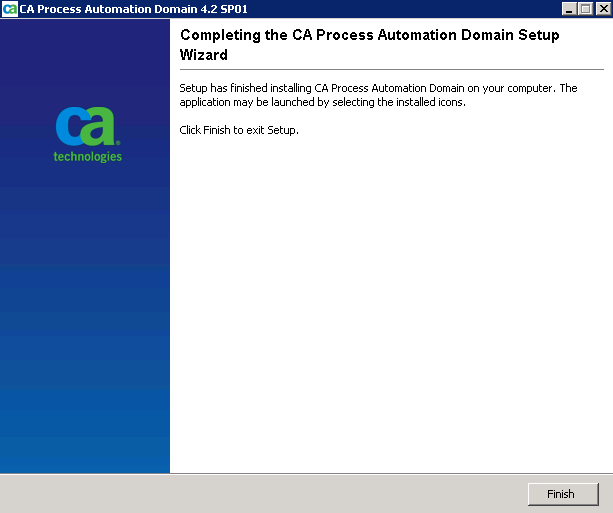
- Click Finish.
The CA Process Automation component is installed.
- Go to Start, Run, and Type services.msc.
The Services page opens.
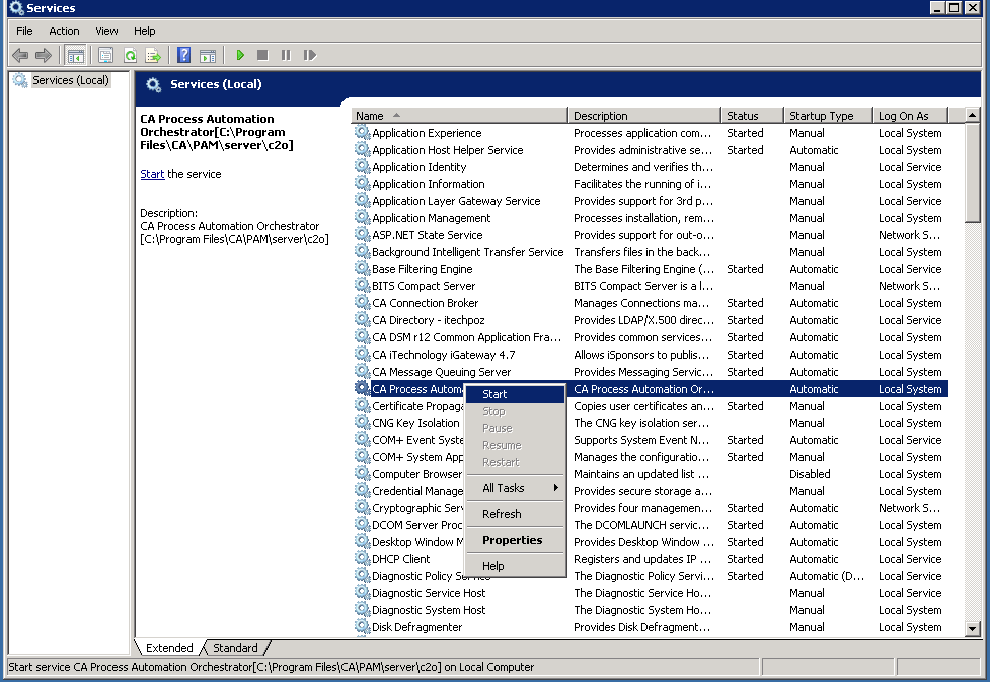
- Verify that Startup type for CA Process Automation service is set to Automatic.
- Right-click the CA Process Automation Orchestrator and select Start in the menu bar.
The service takes 5 to 10 minutes to start. The CA Process Automation service is set to start automatically whenever the server is started or rebooted.
The CA Process Automation installation is complete.

