Perform the following steps to import Business Intelligence Archive Resource (BIAR) file.
- Set Java home on the CA BI Reporting server.
- Right-click My Computer on your desktop and select properties.
- Click the Advanced Tab.
- Click the Environment Variables.
- Under System Variable, click New.
- Enter the variable name as JAVA_HOME.
- Enter the variable value as the install path for the Development Kit.
Example: C:\Java\JDK
- Click OK.
- Click Apply Changes.
- Copy the BIAR folder from the CA Business Intelligence media\Disk1\cabi\biconfig directory to the CABI Machine in any directory(for example, C Drive(C:\biconfig)).
Note: If the biconfig folder does not exist under the C drive, then create the biconfig folder.
- Copy the SLCM_universe.biar file from \\<SLCM Application Server>\C$\Program Files\CA\Service Catalog\reporting\CABI\biar to the C:\biconfig folder.
- Copy xml_biar_import.xml file from the biconfig\Samples folder into the biconfig root folder and rename to xml_biar_import.catalog.xml.
- Edit xml_biar_import.catalog.xml file so that it reads similar to the following example, which is outlined more generally in Step 4:
<?xml version="1.0"?>
<biconfig version="1.0">
  <!-- Import BIAR file -->
  <step priority="1">
    <add>
    <biar-file name="C:\biconfig\SLCM_universe.biar">
            <networklayer>ODBC</networklayer>
            <rdms>MS SQL Server 2008</rdms>
            <username>sa</username>
            <password>password</password>
            <datasource>ASC</datasource>
            <server>Catalog Server Name</server>
        </biar-file>
    </add>
  </step>
</biconfig>
Note: Verify that the name for <datasource> matches the DSN name specified in the Installation Worksheet under CA Business Intelligence, CA BI Data Source Name to MDB. For example, in the screenshot above, the DSN name is ASC.
- In the Command Prompt window, change the directory to the C:\biconfig location, and then execute biconfig.bat to import the BIAR file using the following command:
biconfig -h “<CABI_Server_Name>” -u “<administrator>” -p “<admin_password>” -s “secEnterprise” -f “xml_biar_import.catalog.xml”
- Verify the import, as follows:
- Review the biconfig.log file in the biconfig folder:
This file lists the status of the import. This file also includes error messages if the BIAR file is not imported successfully.
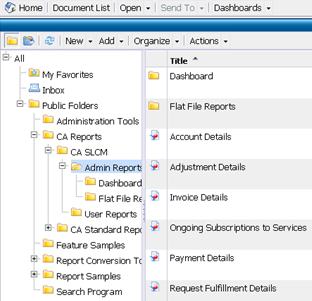
- Log in to InfoView as a BusinessObjects Enterprise administrator.
- In InfoView, verify that you can view the CA SLCM Reports under Public Folders/CA Reports/CA SLCM.
- Change the catalog administrator password (default: spadmin).
Note: The new password must match the password that spadmin uses to log in to CA Service Catalog.
To set the password, perform the following steps:
- Log in to the BusinessObjects Enterprise Central Management Console.
- Click Users and Groups link under the Organize column.
- Click User List.
- Double-click spadmin to open the Properties page.
- Specify the password in both the Password and Confirm fields.
- Click Save & Close. Log out from the Central Management Console when done.
Importing of the CA Service Catalog reports is complete. See CA Service Catalog Integration Guide for complete steps on importing CA Service Catalog reports.

