

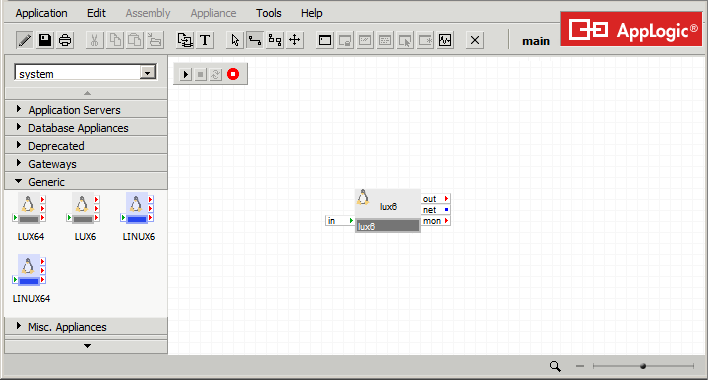
The system catalog contains generic appliances that developers drag and drop on the canvas. This action instantiates the appliance inside the application. However, the catalog class still manages the appliance. When you update the catalog, all appliances that are instantiated from that class are partially re-imaged to match the updated class.
To create your own classes for delivery in the catalog, you must break the connection from the existing class. This break allows your development to exist independent of the original class. The breaking the connection is named branching the class. Branching the appliance creates a standalone entity that is named a singleton.
The first step is creating a sandbox application to configure your appliance. Once created, you select and drag a generic appliance to the canvas. You then create a class instance by branching the generic appliance.
The following two generic appliances are available in the system catalog:
This appliance has a 200MB volume with a minimum installation of Linux.
This server has a 2GB volume with a standard server installation of Linux.
Create Sandbox Application
Follow these steps:
The New Application dialog displays. You can create a new application to use as a sandbox application to configure your appliance. When complete, you can delete the sandbox application.
The application names consist of alphanumeric characters, underscores, and dashes. No other special characters are permitted.
The creation message displays. When complete, the application displays in the Application List.
The application displays in the Infrastructure Editor. You can now set the class boundary.
Select Appliance
Follow these steps:
The confirmation prompt displays.
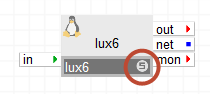
The Class Branch window displays the branching status. When complete, the success message displays.
The Instance Settings window displays.
The new class displays an S to signify the class is now a singleton.
|
Copyright © 2013 CA Technologies.
All rights reserved.
|
|