

Use this method to import the virtual machine nodes from a Microsoft Hyper-V server.
Follow these steps:
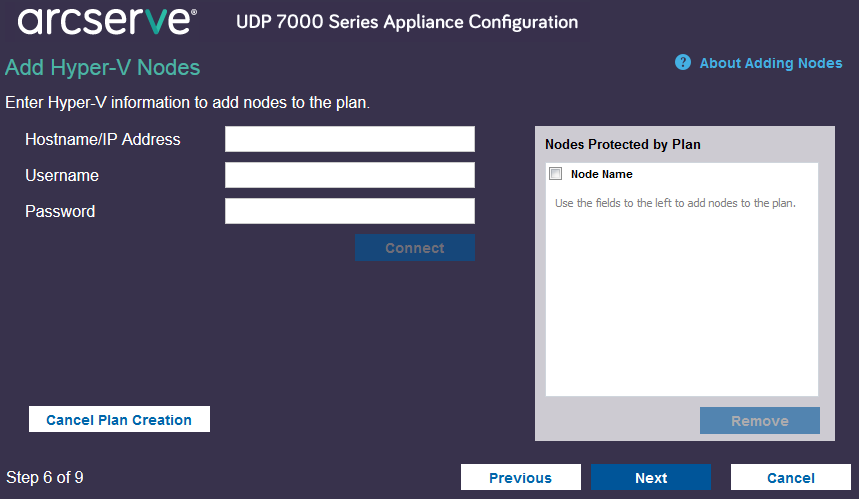
Specifies the Hyper-V server name or the IP address. To import virtual machines that are in Hyper-V clusters, specify either the cluster node name or Hyper-V host name.
Specifies Hyper-V user name having the administrator rights.
Note: For Hyper-V clusters, use a domain account with administrative privilege of the cluster. For standalone Hyper-V hosts, we recommend using a domain account.
Specifies the password of user name.
Cancels the plan that you just created.
The discovered hostnames are displayed. Expand a hostname to see the nodes.
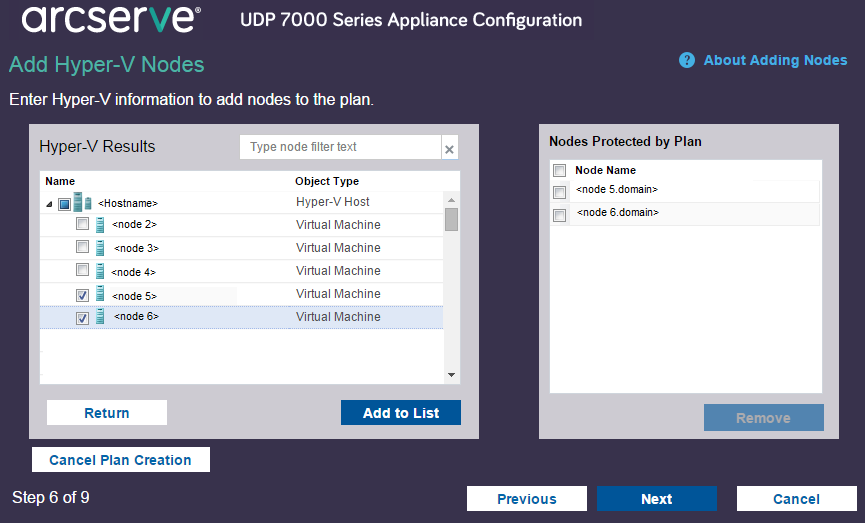
The selected nodes are added to the right pane.
The nodes are added to the plan.
Using UDP Appliance, you can create backup plans for Windows, Linux, and virtual machines. You can also write data to a tape device and create a virtual standby machine.
You can back up Linux nodes from the Appliance Console. The Linux Backup Server is already added to the Console.
Follow these steps:
Note: For more information about each of the configurations, see How to Create a Linux Backup Plan in the Solutions Guide.
|
Copyright © 2015 Arcserve.
All rights reserved.
|
|