
To see and manage EC2 instances in the Cloud View panel, you must first add a new cloud account using your AWS credentials.
To add a new cloud account
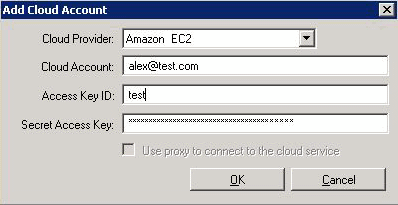
The Add Cloud Account dialog opens.

Specifies the name of the cloud provider service.
Specifies the cloud account; typically this is the email address you used to register your AWS account.
Lets you enter the access key ID for your AWS account.
Lets you enter the secret access key provided by your AWS account.
Lets you specify whether to use a Web proxy to communicate with the AWS web services server. If you select this check box to enable this option, ensure that you have first configured this proxy.
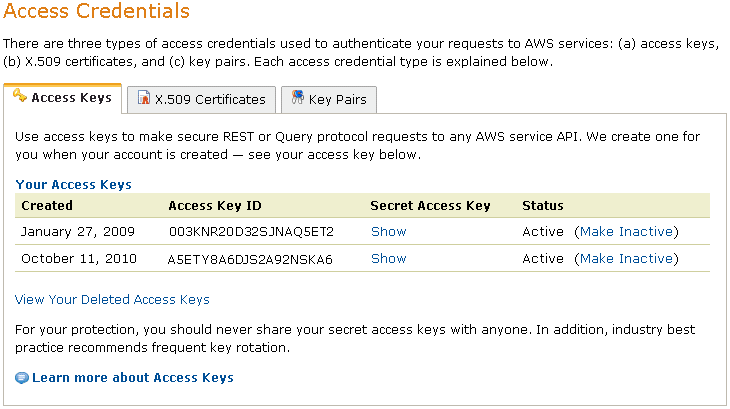
Note: The information required for these fields can be obtained from your AWS account home page using the Security Credentials tab, as shown here:

The Add Cloud Account dialog closes. The cloud account displays in the Cloud View panel as a registered cloud account, and it displays all of the EC2 instances that belong to that account.
|
Copyright © 2014 Arcserve.
All rights reserved.
|
|