Previous Topic: Overview of Installing the BFCNext Topic: Performing a Non-interactive BFC Installation


Installing on an Existing CentOS System

Hardware Requirements Document

Review the Hardware Requirements on the CA 3Tera AppLogic bookshelf to verify that you servers meet the minimum requirements and that you understand the required network topology. In addition, it is beneficial to read the BFC Control Node Requirements.

CentOS Install/Configure

On the server you will be installing the BFC onto, install a "standard" package configuration of CentOS 5.5 32bit.

  1. Before you begin, verify that there are there are interfaces configured for the backbone and external networks (doesn't matter what eth<x> they're on)
  2. On a standard CentOS install, the runlevel is set to 5. This may cause error messages in the logs when X is not installed. We recommend setting the runlevel to 3.
  3. Post install, verify that SELinux is disabled and then reboot the node if you had to make a change.
    1. view /etc/selinux/config
    2. file should contain the line:
          SELINUX=disabled
      
    3. If the file does not contain this line:
      • Put "SELINUX=disabled" in the /etc/selinux/config file without quotes.
      • Run "setenforce 0" from the shell (without quotes) to disable it in the current session.
  4. If there is no internet access to the control node, configure yum updates to point at a local install image (this allows the system to bring the node up to the requirements necessary to run the BFC Controller):
    1. Mount the ISO image for CentOS 5.5 32-bit DVD so the system can use it as a yum repository to bring the currently installed OS up to date with version 5.5.
      • (for example, mkdir -p /mnt/CentOS/5.5)
      • (for example, mount -r -o loop /tmp/CentOS5.5/centos_5.5.iso /mnt/CentOS/5.5)
    2. service yum-updatesd stop
    3. chkconfig yum-updatesd off
    4. rename /etc/yum.repos.d to something else like yum.repos.d.orig
    5. add the following to /etc/yum.conf (verify there are no spaces before the text below when pasted into the file)
      [iso]
      name=iso
      baseurl=file:///mnt/CentOS/5.5
      
    6. Verify the yum modifications work:

      rpm -import /mnt/CentOS/5.5/RPM-GPG-KEY-CentOS-5

      yum list (should list a pile of yum packages)

    7. Alternately, a proxy can be configured for the control node to get to the internet.
    8. Run the “date” command and assure that the system time is correct.
Get the BFC installer from download.3tera.net
  1. On a server that has internet access and you are logged into as the user whose public SSH key you provided to CA for download access, run one of the following commands to copy over the BFC installer. It is preferred to use the rsync command to perform the copy operation as it can checksum the data too. If you’re on a machine with only SSH then you can use the scp command provided but make sure to compare the MD5 hashes provided in the packing.slip file post download to verify that the download completed successfully.
    1. (PREFERRED METHOD)
      • cd to the directory where you want to download the BFC installer media.
      • "rsync -avcLP --delete -e 'ssh -i full_path_to_key' applogic@download.3tera.net:~/BFC/current ."
    2. (OPTIONAL METHOD)
      • cd to the directory where you want to download the BFC installer media.
      • "scp -r -i full_path_to_key applogic@download.3tera.net:~/BFC/current ."
      • cd into the ‘current’ directory created in the above command.
      • "md5sum -c packing.slip" which will verify each file automatically and show an OK status for each file.
Install BFC
  1. Log into the BFC control node as root using SSH.

    Note: Before you install the BFC, make sure that SSH password authentication is diabled on the BFC control node. To restrict SSH to key-based logins, do the following:

  2. Copy the BFC installer ISO’s sync’d above to /tmp/BFC

    Note: Do not copy the files to /opt/bfc as that is the default directory for the installation of the BFC and is removed and recreated during the installation process).

  3. Mount the BFC ISO.
    mkdir -p /mnt/cdrom
    mount -r -o loop /<path to bfcinstall.iso> /mnt/cdrom 
    

    (for example, mount -r -o loop /tmp/BFC/bfcinstall.iso /mnt/cdrom)

  4. Run the BFC installer.
    /mnt/cdrom/fcinstall.sh -x /<path to bfcext.iso> 
    

    (for example, /mnt/cdrom/fcinstall.sh -x /tmp/BFC/bfcext.iso)

    To install the BFC in a non-default location, use the following command:

    /mnt/cdrom/fcinstall.sh -x /<path to bfcext.iso> -t <non-default-location-path> 
    
  5. Indicate if you want to attempt a recovery of the BFC from a database replica.

    BFC database recovery prompt

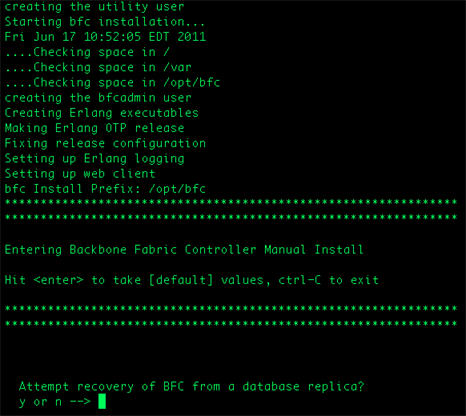
    Database replication enables you to specify a location (preferably on a network storage device or on a network-mounted volume) where the BFC database will be replicated. If you need to restore a BFC (due to a hardware failure, disaster, or anything else), you simply run the installation program on the new BFC machine and specify the directory location of the replicated database. The new BFC will then be installed with the replicated database. Once the new BFC is installed, it will become aware of the existing grids and be able to control them as before.

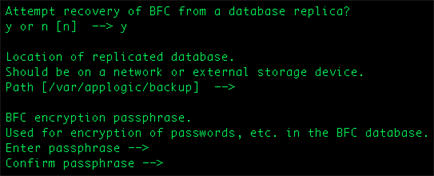
    If you select Y, specify the values for the following parameters:

    Location of replicated database

    Location (preferably on a network storage device or on a network-mounted volume) where the BFC database will be replicated.

    Note: The replica path should be writable by the bfcadmin account. You can run the chown or chmod commands to provide the required access to the replica path. For example:

    chown bfcadmin <replica path>
    chmod 777 <replica path>
    
    BFC encryption passphrase

    The passphrase to use for encryption of the replicated database.

    BFC install database replication prompt

  6. Indicate a password for the admin account in the BFC application. The password must be 6-20 characters, and contain no whitespace.
  7. Indicate the IP address of this machine on the backbone network. The machine must have an active interface configured at this address. You must have only one backbone network before you can create your grids. Typically, the address of the backbone network is 192.168.0.0/24.
  8. Indicate the IP address of this machine on the external network. The machine must have an active interface configured at this address. You must have at least one external network before you can create your grids.
  9. The "BFC install was successful" message appears when the installation completes.
  10. With the BFC installed and running, use a secure web browser to navigate to the BFC server. Specify either the DNS name or the dotted decimal address. For example, enter http://mygrid.company.com/.

    You are prompted to enter a userid and password. When the credentials and License Agreement are accepted, you know the BFC component is working.