Using CA XCOM Management Center Through the Internet › Schedule Transfer › Save Transfer Records in a Configuration File
Save Transfer Records in a Configuration File
After building transfer records, you can save one or more transfer records as a configuration file in the Configuration database. The configuration files can then be:
- Loaded to display and edit transfer records
- Submitted for scheduling
- Exported to an XML file on the web server for later import
To save transfer records
- Click Schedule Transfer.
The main Schedule Transfer page appears.
- Build the transfer records (see Build Transfer Records).
- Enter the information for the local server on the main Schedule Transfer page (if it has not already been entered).
- Select the built transfer records from the Transfer Record table on the main Schedule Transfer page.
- Click Save.
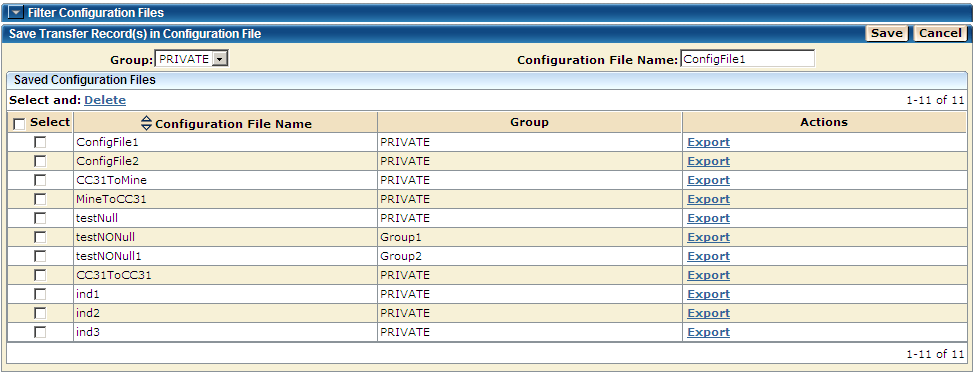
The Save Transfer Record(s) in Configuration File page appears.
Notes:
- If you want to save all the records in a configuration file, you can click the SaveAll button instead of performing Step 4 and Step 5.
- If you click the Cancel button on this page the save process is canceled and the main Schedule Transfer page appears.
- From the drop-down menu, select one of the following:
- The Group that you want the file to be saved under
- Private
Note: The Private configuration file is accessible only by the user who has saved the file. If configuration files are saved under a group name, they can be accessed by the users in that group if they have proper authority.
- Enter the name for the saved configuration file.
- Click the Save button.
The configuration file is saved.
Note: If the file already exists, a dialog opens to replace the file or cancel the process.
The following actions are also available on the Save Transfer Record(s) in Configuration File page.
- Select one or more configuration files listed in a table on this page and click the Delete link to delete them from the Configuration database.
A dialog opens, allowing you to confirm or cancel the delete process.
- Use the Export link under the Actions column of a configuration file listed in a table to export the selected configuration file as an XML file on the web server.
For more information, see Export a Configuration File in this chapter.

