

When you select option 4 from the Main Menu, the panel that allows you to manage the CA Vtape Data Set Filter List displays.
Note: If Enhanced filter mode is active, the Data Set Filter List Display Panel is disabled. To view the Data Set Filters, browse the appropriate filter list member in the parmlib. For more details about CA Vtape parmlib support and Enhanced filter mode, see the Configuration Guide.
The following illustration shows the DSN Filter List Display Panel:
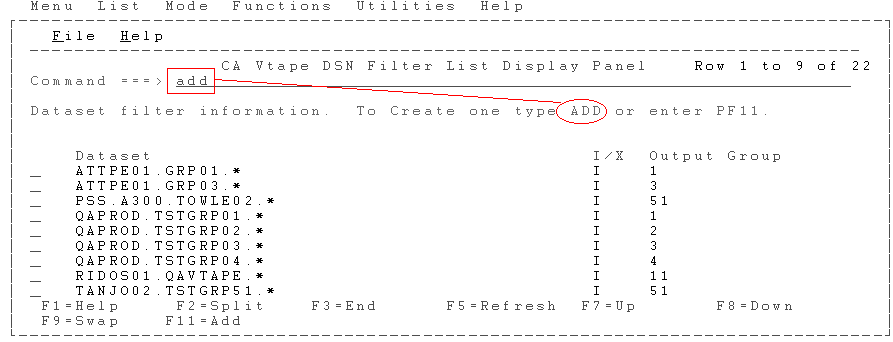
The information shown includes the following:
The partial or fully qualified DSN used for filtering. Partial names must end with an asterisk (*).
Specifies if the data set is included (I) or excluded (X).
The associated Externalization group for the data set.
When you type the ADD command on the command line, the ADD DSN Filter List Entry Panel appears.
The following illustration shows the ADD DSN Filter List Entry Panel:
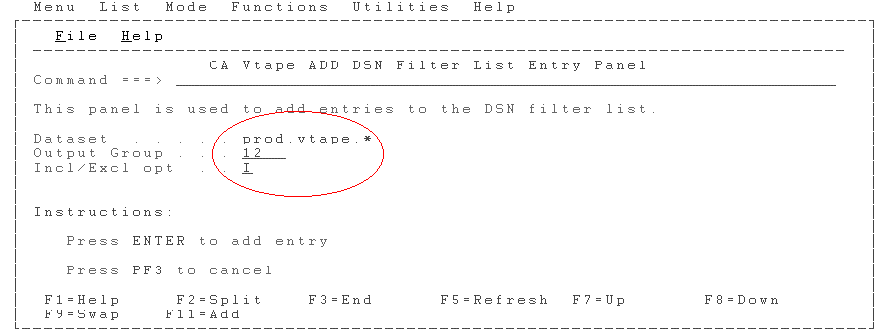
The information shown includes the following:
The partial or fully qualified DSN used for filtering. Partial names must end with an asterisk (*).
The associated Externalization group for the data set. The default is 1.
Specifies if the data set is included (I) or excluded (X). The default is to include the entry.
After you are done entering information, press Enter to accept the DSN filter into CA Vtape and the DSN Filter List Display Panel displays.
The following illustration shows the DSN Filter List Display Panel:
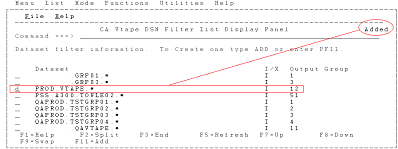
In the upper-right corner, the results of the ADD line command are shown. The Output Group for the new entry is shown as 12.
To change a filter entry, you must delete the entry and then issue the ADD line command again. An example of the d or delete line command, to delete the DSN filter just added, is shown in the DSN Filter List Display Panel displayed above.
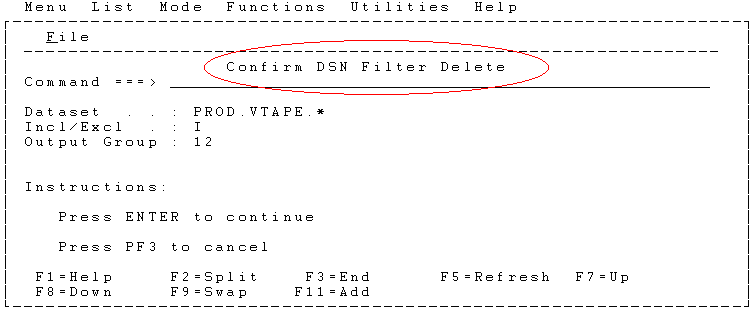
Pressing Enter in the DSN Filter List Display Panel (shown in the preceding illustration) opens the following Confirm DSN Filter Delete panel:
After you are done adding or deleting filters from CA Vtape, a final confirmation panel displays the following Confirm DSN Filter List Update Panel:
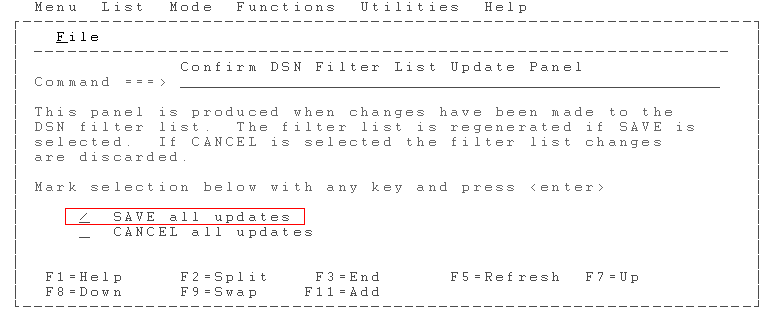
Select the SAVE option to save all the updates to the VCAT or select the CANCEL option to discard all changes during this session. A help panel is also available by pressing PF1.
|
Copyright © 2013 CA Technologies.
All rights reserved.
|
|