

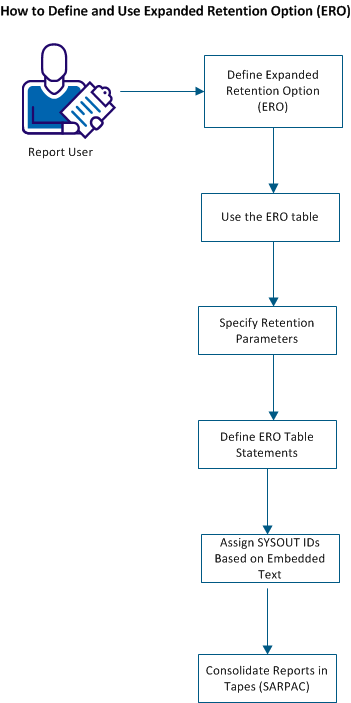
A report user can use the Expanded Retention Option (ERO) to provide additional retention capabilities for specific reports or groups of reports. Implementing ERO involves the configuration of the ERO initialization parameters and the creation of an ERO table.
ERO provides the flexibility to specify report retention options at the individual report level. This lets you match report retention to your business needs and Records Management policies.
The base CA View product allows retention based on database generations. A report may be retained in the database for a specified number of generations and on a backup tape for specified number of generations. The Expanded Retention Option allows for more flexibility in assigning retentions to individual reports.
Follow these steps:
You can define the retention options using the ERO table and the following SARINIT initialization parameters.
Follow these steps:
Set the following SARINIT parameters.
EROOPT, EROPRO, PRETAIN, POPT, PCOPIES
where
Specifies whether the ERO option is being used.
Indicates to CA View that only newly archived reports must be evaluated for Expanded Retention. Reports from older generations which are controlled by standard retention are not considered.
Indicates that all reports controlled by standard retention, either new or old, must be evaluated for Expanded Retention. If the name of the report matches an entry in the ERO table, the retention is switched to ERO control. The parameter is not reset to NEW at the end of the backup cycle.
Indicates that all reports controlled by standard retention, either new or old, must be evaluated for Expanded Retention. If the name of the report matches an entry in the ERO table, the retention is switched to ERO control. This is reset to NEW at the end of the backup cycle.
Note: We recommend that EROPRO be set to YES and left that way unless a large percentage of the database is under standard retention.
Important! The EROPRO parameter settings do not control when a report is removed from ERO control. Once a report has been defined to ERO, it remains under ERO control until its total ERO retention has expired. If you change a report's retention in the ERO table, the next standard backup cycle applies that retention to all past versions of that report – not just the new versions. If you remove a report entry from the ERO table, the system searches for a more generic match and uses the retention specified in that entry. If a more generic match cannot be found, the system defaults to using PCOPIES. The important thing to remember is that once a report is switched to ERO control it stays under ERO control until its ERO retention has expired.
Controls what happens to a report after its total ERO retention has expired. It controls whether a report must switch back to standard retention or be deleted.
where:
INIT indicates that the report is to switch back to standard retention unless the ERO table entry for this report contains the DELETE parameter. When the DELETE parameter is not specified, the report is kept until it exceeds the NGENT/NGEND specification, then it is deleted.
Indicates that the report is to be deleted.
We recommend setting PRETAIN=TABLE
Specifies the number of copies of each SYSOUT that are maintained for each unique SYSOUT identifier.
Valid values: 1-32767
Default: 2
You can use the ERO table to perform the following three functions:
SYSOUTs are given expanded retention status with entries in what is referred to as the expanded retention table, or ERO table.
Follow these steps:
All SYSOUT IDs that contain a particular character string are identified.
The terms expanded retention and permanent status are synonymous.
The Expanded Retention Option (ERO) of CA View uses a table to provide additional retention capabilities for specific reports or groups of reports. The base CA View product only allows retention based on database generations. A report can be retained in the database for x generations (NGEND initialization parameter) and on a backup tape for y generations (NGENT initialization parameter). Without ERO, all reports have the same retention.
ERO provides additional retention options based on generations, days, and copies.
Specify the following ERO retention parameters:
Displays the date the report was archived.
Refers to the number of versions that you wish to keep.
Displays the generation number when the report was created. This is the number that CA View assigns to all reports archived between standard backup cycles. If you specify GENS=2 and you archived the report in GEN 100, it will be scratched after GEN 101 has completed its standard backup.
Note: If no ERO retention parameter is specified (RETPD, COPIES, or GENS), the INIT PARM PCOPIES is used as the default.
Control statements specify the retention parameters in a sequential file that is accessible by the backup task through the SARPATAB DD statement. The control statements specify the reports that receive these retention options. The report name can be all 32 significant characters, or from 0 to 31 characters followed by the wildcard character, the asterisk (*).
Example
If the payroll register must be kept on the database for 30 days and on tape for 3 years, add a control statement to the ERO table as follows:
/PAYREG ALL DRETPD=30 RETPD=1095
If you have to keep all other payroll reports for only one year, add the following control statement to the ERO table:
/PAY* ALL DRETPD=30 RETPD=365
The backup cycle searches the ERO table from the top to the bottom using the report name as a search argument. The first entry that matches the most significant characters (and the wildcard character if present) is used to obtain the report's retention options.
Special considerations apply if this table is sorted, the '/PAY*' statement would appear in the file ahead of the '/PAYREG' statement, and the payroll register report would obtain the same retention options as the other payroll reports.
Important! If a '/* ALL …' default report retention statement was in the sorted file, it sorts as the first statement in the ERO table, and all reports would then obtain retention options from the first entry in the table.
Note: To prevent this type of sequence error from occurring, CA View validates the order of the ERO table before every backup cycle. When you change the ERO table, we recommend you run the SARVERO utility to validate the ERO table and prevent problems during the next CA View backup cycle.
ERO table statements are made up of SYSOUT IDs (including wildcards), parameters, and the values you set for those parameters.
Expanded retention table entries are input to the CA View started task using the SARPATAB DD statement.
The following example shows the keywords that can be specified in the ERO table statements:
/sysout-id  {ALL|MARK|LAST}
            RETPD=nnnnn  GENS=nnnnn  COPIES=nnnnn
            DRETPD=nnnnn DGENS=nnnnn DCOPIES=nnnnn
            IRETPD=nnnnn LRETPD=nnnnn
            STORGRP=storage-group-name
            DSK2DAYS=nnnnn
            DSK2NOTP
            D2RETPD=nnnnn
            REGDAYS=nnnnn
            VIEWTAPE={YES|NO}
            XCOND={YES|NO}
            EXCLUDE
            DELETE
Follow these steps:
If the ALL, LAST, or MARK parameter is not specified, the initialization parameter POPT is used as a default. We recommend that you specify MARK, ALL, or LAST in each statement, to understand and verify the effects of the statements in your expanded retention table.
Specifies that all reports for the SYSOUT ID from the current generation are evaluated for ERO processing.
Specifies that the last (most recent) report from the current generation is evaluated for ERO processing.
Specifies that all reports for the SYSOUT ID for the current generation are evaluated for ERO processing, only if marked manually.
Note: If you use one parameter, do not use the other two parameters. For example, if ALL is specified, MARK and LAST must not be specified.
If no parameter is specified, then the initialization parameter PCOPIES is used as the default.
The report is retained for nn days. Specifying the DRETPD parameter is the most efficient processing method, because CA View can use a simple arithmetic calculation on the archival date.
We recommend that you use only one tape retention parameter per entry; however, if you use more than one parameter, each parameter must be satisfied before a SYSOUT no longer has expanded retention (PERM) status.
Specifies the number of days (0 to 32767) that any page indexes defined for the reports are retained on disk.
Specifies the tape storage group for SYSOUT. These group names can be unique for your location; they are linked to STORGRP1 through STORGRP9.
Specifies the number of days (1 to 998) a report remains on the primary disk before it is migrated to the secondary disk is specified.
Specifies that the report resides on optical disk and the tape backup is deleted.
Specifies the number of days that a report is retained on optical or secondary disk (valid values are 0 to 32767).
D2RETPD is intended to be specified with DRETPD to provide separate retention for optical or secondary disk and primary disk.
If D2RETPD is not specified, DCOPIES, DGENS, and DRETPD governs the optical or secondary disk retention and the report is deleted from primary disk after it is migrated.
Controls the number of days that a report cannot be deleted in CA View. When the parameter is used in the ERO table, matching reports are flagged as non-deletable until a calculated REGDAYS date has been reached. (Valid values are 0 to 32767).
Note:
The REGDAYS date is calculated by adding REGDAYS to the report ARCHIVE date.
After a REGDAYS date is assigned to a report, it can only be extended and never shortened through changes in the ERO table.
The SARBCH /CHANGE ARCHDATE function fails with a message if the target report is under REGDAYS control.
Specifies that the SYSOUT can be viewed through the Expanded Access Server (SAREAS) if it only resides on tape.
Specifies whether CA View is to consider SYSOUTs that had exceptional conditions, for example, JCL errors, ABENDS, and so on, for ERO evaluation is specified.
Specifies that ERO does not retain the reports. These reports are retained in the database, based on the NGEND and NGENT initialization parameters.
Specifies that when the ERO retention TOTAL criteria expire, the report is deleted (and does not revert to the control of the CA View initialization parameters NGENT).
The following examples show initialization parameters and ERO table entries and the effects on reports within the CA View database.
Example 1
This example shows you how to keep:
Note: If a value for the NGENI parameter is not specified NGENT also governs master index backups.
Set the following initialization parameters:
NGEND=2
NGENT=3
Specify the following ERO table:
/ABC* ALL RETPD=90 DRETPD=30
*
* ALL APPLICATION 'ABC' REPORTS ARE
* ON DISK 30 DAYS, ON TAPE 90 DAYS
Example 2
This example shows you how to keep:
Set the following initialization parameters:
/ABCD* ALL RETPD=366 DRETPD=7
/ABC* ALL RETPD=90 DRETPD=7
*
* ABCD REPORTS ARE REQUIRED ON TAPE
* FOR ONE YEAR FOR LEGAL PURPOSES
*
Note: ERO uses the first match that it finds. If these entries were in reverse order, an error message (SARPAR08) is generated at the start of the backup.
You can have ERO assign SYSOUT IDs based on text within a report. For example, you can give compilation listings of a production program a SYSOUT ID that is the name of the program.
Follow these steps:
When the string is found, the preceding or following characters are extracted by ERO and assigned to the report as the SYSOUT ID. The text comprising that string must all be on one line of the report.
Note: CA Deliver reports have a fixed report ID. You cannot use PTEXTn to change the SYSOUT ID for a CA Deliver report.
The SARPAC tape consolidation utility is provided with ERO to consolidate backup tapes. SARPAC copies current reports (retained by CA View) and bypasses expired reports. The first CA View backup cycle (standard or interim) following a SARPAC consolidation uncatalogs the input tapes that are no longer needed.
SARPAC produces three reports:
Note: You can use storage groups to put reports with the same retention on the same tape, thereby minimizing the need for consolidation.
Follow these steps:
SARPAC mounts its input tapes directly. SARPAC does not use the expanded access server for tape and robotics to mount input tapes.
The tape status report is only produced and no actual tape consolidation is performed.
You can execute SARPAC by setting initialization parameters, consolidating the tape storage group, and consolidating one tape for a tape storage group.
It is not necessary to stop the SARSTC archival task to run the SARPAC utility. Consolidation can occur concurrently with report archival and the CA View backup cycle.
Follow these steps:
The job control statements, JOB, EXEC, STEPLIB DD, SARDRLST DD, SYSPRINT DD, SYSIN DD, SORTLIB DD, SYSOUT DD, and SORTWKnn DD are required to execute SARPAC.
If you use tape storage groups, we recommend that you consolidate one tape storage group at a time. Include the following SYSIN control statement to decrease the number of tape mounts:
STORGRP=storage-group-name
If you must terminate SARPAC before it has completed processing, you can use an MVS STOP command to cause SARPAC to terminate normally. SARPAC acknowledges the STOP command with the following message:
SARPAC99 Operator issued STOP command - PROCESSING TERMINATED
If you have a tape management system and you cancel SARPAC, it is possible for your tape management system to override the CA View tape retention criteria. We recommend that you always let SARPAC run to completion.
If you must cancel SARPAC, any output tapes it created must be excluded from a scratch and clean run because CA View still controls those tapes. This exclusion applies to primary, duplex, and DR tapes. You can run the SARTCHK utility to determine if any tapes were un-cataloged that are required by CA View.
Note: You must run a standard or interim backup cycle to assign reports to tape storage groups. Storage groups are only for reports residing on the CA View database since the last backup cycle.
|
Copyright © 2015 CA Technologies.
All rights reserved.
|
|