Previous Topic: Gather Details for CA IT PAM IntegrationNext Topic: Design Queries for Events to Send to the Event/Alert Output Process


Example: Run an Event/Alert Output Process with Selected Query Results

All users are authorized to run a CA IT PAM process on demand. You can run the configured CA IT PAM event/alert output process with selected query results for any of the following purposes:

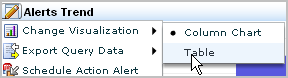
You can run a CA IT PAM process from a displayed query result row. This assumes the results are displayed as a table rather than a chart. You can display query result rows in any of the following ways:

Note: The following topic assumes that a query result row displays when you select the query from the query list.

To become familiar with what data is returned for the CEG fields, see the Common Event Grammar (CEG) Reference guide in online help.

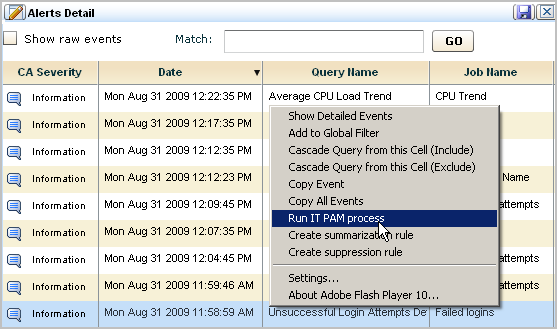
To run the configured CA IT PAM process manually based on a displayed query result row

  1. Click the Queries and Reports tab and the Queries subtab.

    The query tag filter and the query list appear.

  2. (Optional) Enter search criteria, such as default accounts, on the query list.

    Events that reflect logins by default accounts are good candidates for forwarding to your CA IT PAM event/alert output process.

  3. Select the query from the query list for which you want to view results.

    As an alternative, you can display the Reports subtab, select an option from the Report List, switch to individual query view, and select the query from this view.

  4. If the results display in a chart, select Change Visualization from the query name drop-down list and select Table.

    Change Visualization lets you swtich display from chart to table format.

  5. Select the query result row for which you want to run the CA IT PAM process.
  6. Right-click this query result row and select Run IT PAM process from the drop-down list.

    Select Run IT PAM process.

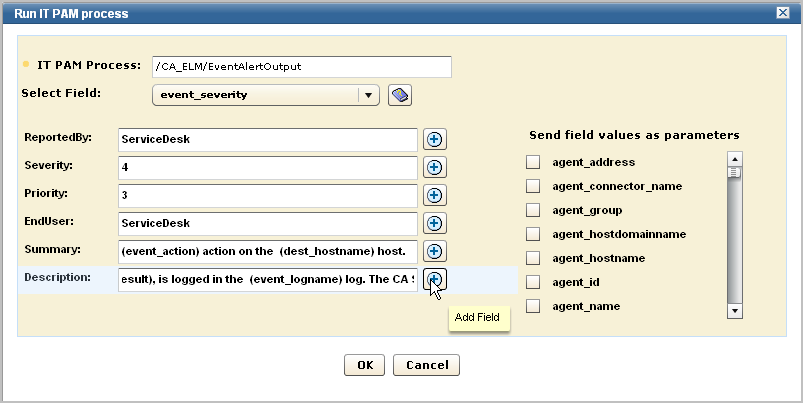
    The Run IT PAM process dialog appears. It contains the process name and process parameters defined in the IT PAM configuration of the Report Server service. Additionally, it contains a Select Field drop-down list that allows you to enter variable data returned to the selected CEG field.

  7. Complete the fields as follows:
    1. Review the default values shown for the displayed process parameters and identify any values that need to be changed.

      These parameters and their values are derived from the CA IT PAM integration configuration.

    2. To change the displayed default value, type the new value.
    3. To specify a variable value, select that CEG field from the Select Field drop-down list at the top of the dialog, then click Add Field next to the text box to which it applies.
    4. For any field that is blank, type a value, select a variable and add it, or type a sentence that includes selected variables.

      Example Summary: On (event_datetime), the (dest_username) account performed a (event_action) action on the (dest_hostname) host.

      Example Description: The action result (event_result), is logged in the (event_logname) log. The CA Severity is (event_severity).

    5. If the CA IT PAM process specifies parameters that refer to additional CEG fields, select these fields from the displayed list to send as parameters.

    An example follows. Your display may include other fields defined in the custom IT PAM event/alert output process.

    Override default values and enter strings with variables, as needed.

  8. Click OK.

    The progress dialog appears, followed by a message indicating whether the CA IT PAM process ran successfully, and if so, the results of running the process.

    An example follows, where the result is Request 4590 created in Service Desk.

    Example information message for successful run includes the request number.

  9. Click OK.
  10. To see the results in CA Service Desk, log on and search for "Request" with the number in the message.

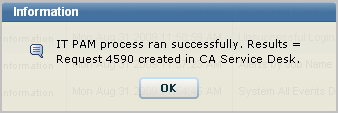
    For example, select Request and enter 4590.

    Enter Request and enter the ticket number.

  11. Service Desk results similar to the following appear.

    The Service Desk displays the summary and description information with data for the variables you entered.

  12. Compare the planned summary and description data determined in Step 7 with the summary and description data displayed under Summary Information. It includes the CA Severity data.