

Managing Microsoft SQL Servers › Registering Microsoft SQL Servers › Using the CA SRM SQL Registration Wizard
Using the CA SRM SQL Registration Wizard
You can run the CA SRM SQL Registration Wizard from any computer on which the CA SRM Windows Client is installed. You can collect data from any managed computer that has Microsoft SQL server client software installed and that belongs to the same domain as the machine on which the SQL server is installed.
To run the CA SRM SQL Registration Wizard, follow these steps:
- From the Open Systems menu of the CA SRM Windows Client, select Register, SQL Servers. You can also start the CA SRM SQL Registration Wizard by selecting Configuration, Register from the SQL Servers table.
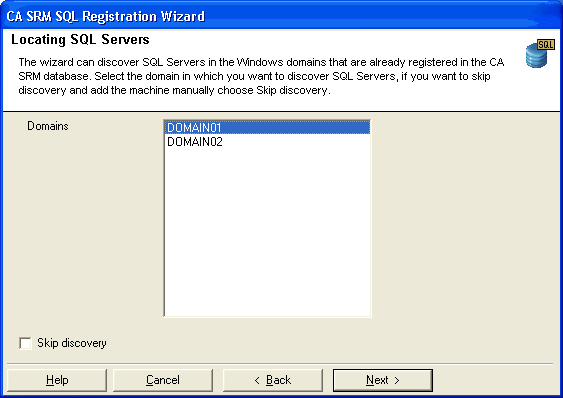
- Select the name of the domain in which the Microsoft SQL server is located. If you want to skip the discovery process and manually add SQL servers, check the Skip discovery box:
In the Setting properties for the servers that will be configured dialog, do one of the following:
- Check the Register boxes next to the servers that you want to register. The Add SQL Server dialog opens. Go to Step 4:
- Click Add to add a Microsoft SQL server manually. The Add SQL Server dialog opens. Enter the name of the server you want to add. Go to Step 4.
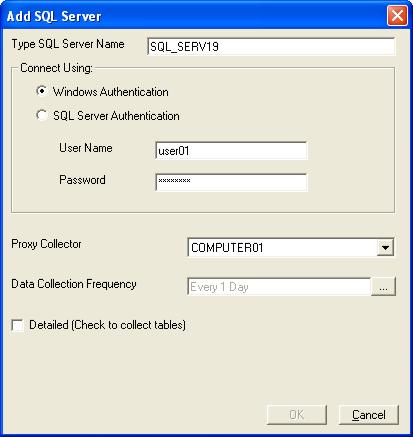
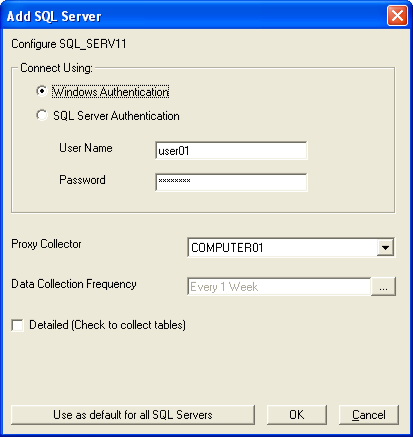
- In the Add SQL Server dialog do the following:
- Select the connection type:
Windows Authentication—The data collection uses the access parameters defined for the domain on which the SQL server is running.
SQL Server Authentication—Enter the User Name and Password of the user with administrator privileges to the Microsoft SQL server.
- Select the managed server that you want to use as the proxy collector. The proxy collector must be a member of the same domain as the Microsoft SQL server and it must be a managed computer in CA SRM. If the Microsoft SQL server is on a managed computer, it is the default selection.
- Click the browse button and select the data collection frequency. Check the Detailed check box if you want to collect detailed data.
- If you want to apply these definitions to all of the servers you selected in Step 3, click Use these definitions for all SQL Servers.
Click OK. The Setting properties for the servers that will be configured dialog reappears. Click Register.
- (Optional) You can add a location, organization or contact to the machine you want to register.
- To attach a geographic location to the computer or server, select one from the drop-down list. You can manually add a location by clicking New Location. This opens the Create New Location dialog. Enter the location information and select a contact. You can add a contact by clicking New Contact. This opens the Create New Contact dialog. Enter the name, phone number and email address of the new contact person. Clicking OK returns you to the New Location dialog.
- To attach an organization to the computer or server, select one from the drop-down list. You can manually add an organization by clicking New Organization. This opens the Create New Organization dialog. Enter the organization name and select a contact.
- Add a contact by clicking New Contact in the Organization or Location dialogs. This opens the Create a New Contact dialog. Enter the name, phone number and email address of the new contact person. You can access your default address book by clicking the To: button and select the email address from there. Clicking OK returns you to the New Location or New Organization dialog.
- When finished, click Register.
Copyright © 2016 CA Technologies.
All rights reserved.
|
|