

Managing Veritas NetBackup › Registering Veritas NetBackup Servers › Using the CA SRM Backup Registration Wizard
Using the CA SRM Backup Registration Wizard
You can run the CA SRM Backup Registration Wizard only from the computer running the Application Server. Also, you can initiate data collection only from the Application Server.
To register a Veritas NetBackup server using the CA SRM Backup Registration Wizard, follow these steps:
- From the Open Systems menu, select Register, Backup Servers.
- In the Backup Server Type dialog select Veritas NetBackup and select the operating system type from the drop-down list.
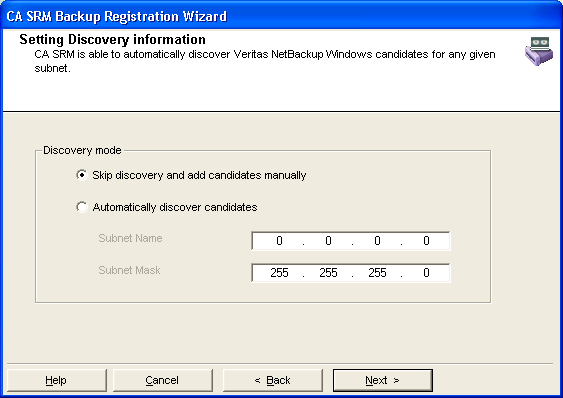
- In the Setting Discovery information dialog select one of the following:
- To add backup servers manually, select Skip discovery and add candidates manually. Go to Step 4.
- To automatically discover backup servers, select Automatically discover candidates and enter the Subnet Name and Subnet Mask. Go to Step 6:
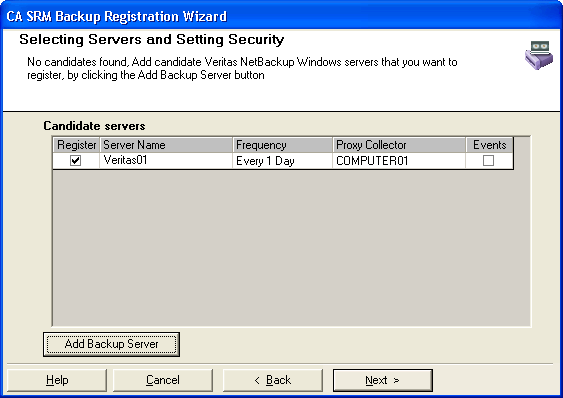
- In the Selecting Servers and Setting Security dialog click Add Backup Servers.
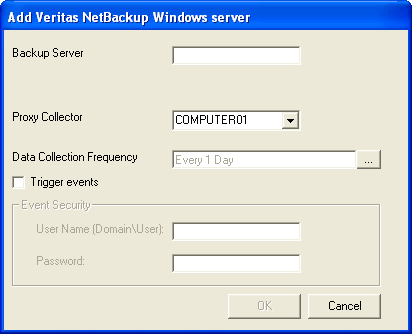
- In the Add server dialog:
- Enter the name of the backup server.
- Select the proxy collector from the drop-down list.
- Select the data collection frequency.
- Check the Trigger events box receive information about events that were generated on the Veritas server. These events are specified to Veritas while installing the VNBiSponsor.
- Enter the user name and password necessary to allow the trigger event:
- Select the backup servers from the list of candidate servers that you want to register. You can change the proxy collectors, data collection frequencies, and trigger events for each server by clicking in the corresponding boxes. When finished, click Register:
- Edit the fields in this dialog if you want to add a different location, organization, and contact:
- Location-Lets you attach a geographic location to the computer or server. Select a location from the drop-down list. You can also click New Location to add the details of the new location in the Create New Location dialog. Click OK to exit the dialog.
- Organization- Lets you attach organization to the computer or server. Select an organization from the drop-down list. You can also click New Organization to add the details of the new organization in the Create New Organization dialog. Click OK to exit the dialog.
- Contact- Lets you add a contact. Click New Contact to add a contact using the Create New Contact dialog. Enter the name, telephone number, and email address of the new contact. You can access your default address book by clicking the To: Button and select the email address from there.
Note: You can also add new contacts by clicking New Contact in the Create New Location dialog or Create New Organization dialog.
- Click Register to finish.
Note: When CA SRM collects data from a Veritas NetBackup machine, if there are any drives which do not have a serial number, SRM names these drives automatically, using the following naming pattern:
sn_<number>-<server_name>
where <number> is a unique number and <server_name> is the name of the Veritas server.
Copyright © 2016 CA Technologies.
All rights reserved.
|
|