

You can run the CA SRM TSM Registration Wizard from any CA SRM client computer.
Follow these steps:
The Backup Registration Wizard opens.
The Backup Server Type screen appears.
The Select the TSM Version and a Proxy Collector screen appears.
The list of proxy collectors is based on computers where the TSM ODBC driver or IBM DB2 ODBC driver for TSM 5.5 or 6.x is already installed.
The Select a TSM Server dialog appears.
Note: Contact your TSM administrator if you do not have this information.
The Create New DSN dialog appears.
Provide the following information:
Specifies the name of the host where the TSM DB2 server is running.
Specifies the port used by the target instance on this server.
Specifies the Data Source Name using which you connect to the database. When creating the DSN using the TSM Registration Wizard, the name cannot exceed 32 characters.
Specifies the alias name for the database from that you want to collect data.
Specifies the database from that you want to connect and collect data.
Specifies the description of the connection.
Note: The default is 180.
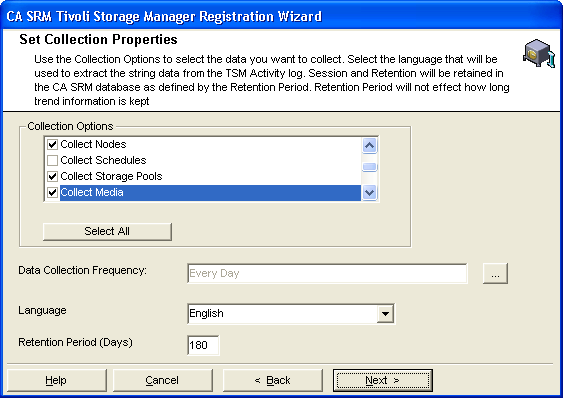
Note: Collecting processes give you additional data about the TSM server, but can slow down the data collection process.
To attach a geographic location to the computer or server, select one from the drop-down list. You can manually add a location by clicking New Location. Type the location information and select a contact in the Create New Location dialog.
To attach an organization to the computer or server, select one from the drop-down list. You can manually add an organization by clicking New Organization. Type the organization name and select a contact in the Create New Organization dialog.
Add a contact by clicking New Contact in the Organization or Location dialogs. Type the name, telephone number, and email address of the new contact person in the Create a New Contact dialog. You can access your default address book by clicking the To: button and select the email address from there. Clicking OK returns you to the New Location or New Organization dialog.
You have successfully registered TSM server.
|
Copyright © 2016 CA Technologies.
All rights reserved.
|
|