

Troubleshooting › SQL Database Migration
SQL Database Migration
The following section lists detailed instructions to perform the SQL database migrations for CA SRM and SRM Web Reporter.
Problem:
How do you configure CA SRM when SRM databases are moved from one SQL Server instance to another?
Solution:
CA SRM database includes ENTRPRIS, QUERIES, and SAVED USER QUERIES. Backup the GNS_DUMP.TXT file from the ...\BrightStor SRM Data\Database\GNS\ folder.
Follow these steps:
- Open Bos.ini file from <Drive:>\BrightStor SRM Data\Database\Configuration and update the DbInstance under [DBA] section as follows:
DbInstance=<New SQL instance name>
- Open Services wizard and select the CA SRM Bos Service properties.
- Type GnsOnly in the Start Parameters text box of the properties window.
- Click Start.
- Open SRM Windows Client click Host List icon.
The Host List dialog opens.
- Right-click and select Host Definition.
The Host Definition dialog opens.
- Change the SQL server instance and provide user credentials.
- Save the Host Definition properties and close the Windows Client.
- Restart SRM BOS Service in normal mode and start the Application Server service.
The Windows Client now fetches the data from the new SQL server instance.
Problem:
How do you configure CA SRM Web Reporter after you migrate the CASRMCentralDB from one SQL server to another server?
Solution:
During the SRM Web Reporter installation, the CASRMCentralDB database is created on the SQL server instance. The database also creates a Designer connection named SRM_ODBC, which is used to view the reports from CA SRM Web Reporter Java Info View. This connection internally uses the system DSN to connect to the SQL server. CA SRM creates the CASRMCentralDB DSN using the SQL Server Native Client.
Consideriing the scenario mentioned, perform the following tasks, after you migrate the CASRMCentralDB from one SQL server to another SQL server.
- Modify the system DSN details.
- Modify Designer connection details.
- Modify the CASRMCentralDB credentials from Web Reporter Control Panel.
Important! Log in to the CA SRM Web Reporter computer with the same user credentials that you used for installing CA SRM Web Reporter.
Modifying the system DSN details
Follow these steps:
- Open the Data Sources (ODBC) from the Windows Control Panel.
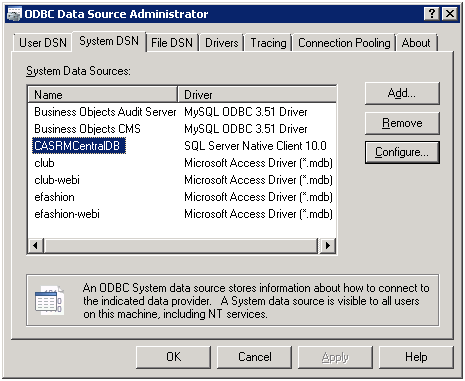
The ODBC Data Source Administrator dialog opens.
- On the System DSN tab, select the CASRMCentralDB from the System Data Sources section, as shown in the following image.
Note: Open C:\Windows\SysWOW64\odbcad32 if you are using a 64-bit machine
- Click Configure.
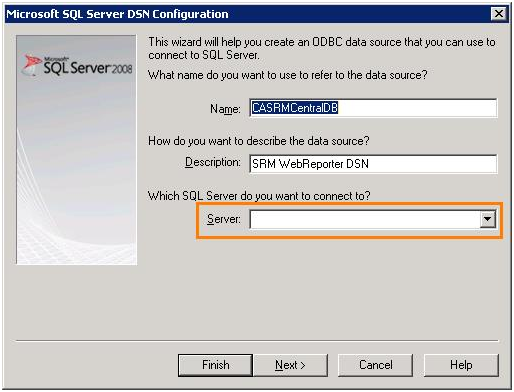
The Microsoft SQL Server DSN Configuration dialog opens.
- Select / type the server name in the Server field as shown in the following image.
- Click Next and select the Windows authentication.
- Retain or modify the default settings (as per your requirments) in the continued dialogs.
- Click Finish.
- Click Test Data Source in the ODBC Microsoft SQL Server Setup dialog.
The SQL Server ODBC Data Source Test dialog displays test results.
Modifying the Designer connection details
Follow these steps:
- Access the BusinessObjects and open the Designer.
The Universe Designer opens.
- Select Tools, and Connections.
The Wizard Connection dialog opens.

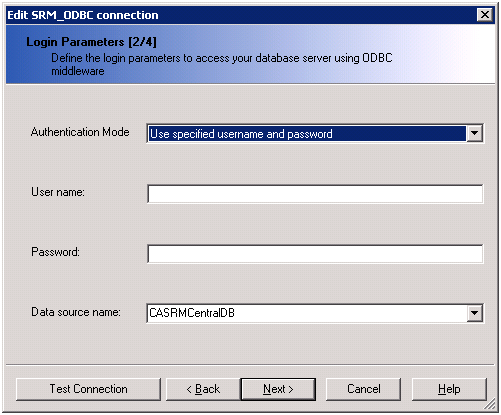
- Select the SRM_ODBC connection from the connections list.
- Click Edit and modify the user name and password credentials in the Edit SRM_ODBC connection dialog.
Note: The user must have access to the new SQL server machine for CASRMCentralDB.
- Click Next.
- Retain the default settings in the continued dialogs and click Finish.
The Wizard Connection dialog opens.
- Click Test to verify the connection.
The Test the connection dialog displays the test results.
Now you can view the reports from SRM Web Reporter Java Info View without any issues.
Modifying the CASRMCentralDB from CA SRM Web Reporter Control Panel
Follow these steps:
- Open the folder C:\Program Files (x86)\CA\CA SRM Web Reporter and backup a copy of the wrcp.ini file.
- Open wrcp.ini file and change the WRCP_CDB_SQLSERVERNAME property to the new SQL server instance and save the file.
Example: WRCP_CDB_SQLSERVERNAME =NEW_SQL_SERVER_INSTANCE_NAME
- Select File menu, Settings of the Web Reporter Control Panel.
The CA SRM Web Reporter Control Panel Settings dialog opens.
- Select the Modify Credentials tab.
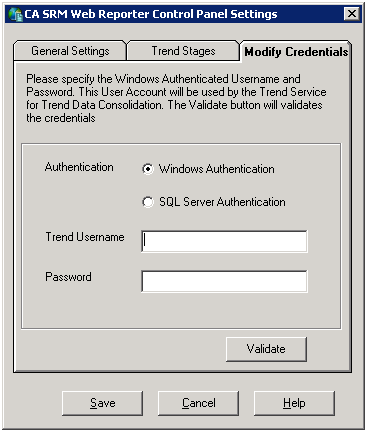
- Select the Windows Authentication option and provide the trend username and password credentials.
- Click Validate to validate the user credentials.
- Click Save.
The details are saved.
Copyright © 2016 CA Technologies.
All rights reserved.
|
|