This section describes how to create a TSM Message Scanner server service. To do this, follow these steps:
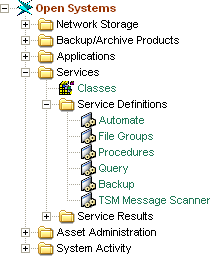
- You can access this service from the Open Systems menu by selecting Create Services, and TSM Message Scanning. You can also access the service by expanding the CA SRM Object Tree, selecting Open Systems, Services, and then Service Definitions, as shown in the following diagram:
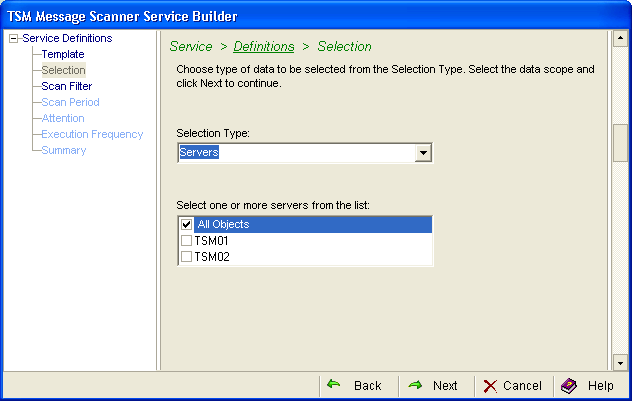
- Select the data you want to scan in this service. Select the data type from the Selection Type drop-down list:
Select the objects from the object list. This list varies depending on whether you selected servers or classes in the previous step. If you select classes, then all of the records from the Class table display. If you select servers, then all of the TSM servers registered in the CA SRM database display:
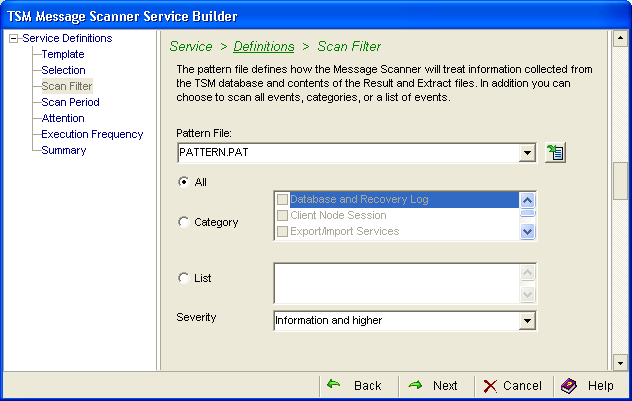
- Select a pattern file and event categories. In the Patterns field, enter the path name of the file containing the text patterns for which you want to search the log file. You can use the Edit icon to modify it. See Working with the Pattern File.
In the event categories section you can select one of the following options:
- All—Scan all of the events.
- Category— Select one or more predefined categories from the list.
- List—Enter the actual message number or the range of message numbers that you want to scan. You can only use numbers and dashes in this box.
After you select an option you can designate the severity from the drop-down list. Select the lowest severity level that you want to include in the scan. The service scans messages with the selected severity level and higher:
- Select one of the following:
- Since Last Scan—Scans from the last scan. The first scan is done by default 7 days after the current date. This 7 days time interval is fixed. You cannot alter it. After the initial scan, the subsequent scans (depends on execution frequency) occur from the last scan date to the current date.
If you change the proxy collector machine, the scan interval is once again 7days after the current date.
- Interval—Scans at a time interval that you define. Enter a range of dates in the From and To fields. You need to enter the time in the format <date> or <date> at <time> (1/1/2006, or 1/1/2006 at 12:30 PM). You can also use keywords TODAY (representing 12 AM) and NOW (the present time), together with offsets in days and hours (for example, TODAY+8 hours refers to 8 AM).
If the From and To fields are left empty, the service assumes From to be TODAY-1 DAY (12 AM of the previous day) and To to be NOW:

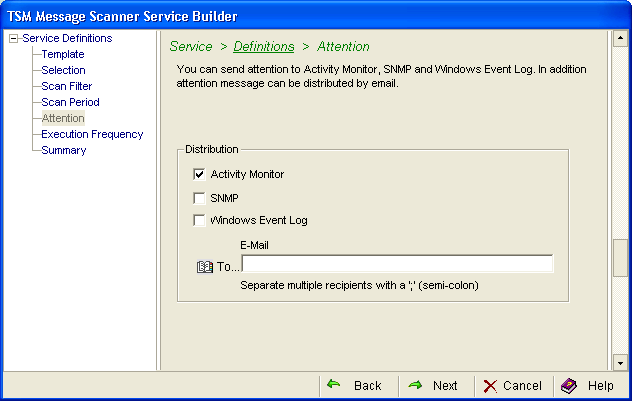
- (Optional) Select attention messages. The messages contain the Attention text (as defined in the Pattern file). Select one or more of the following:
- Activity Monitor
- SNMP
- Windows Event Log
- E-Mail Address
If you select email, the recipient receives the Attention text in the body of the email and all of the Result files in an attachment:
- Select the execution frequency. The service can operate:
- Immediately—Collection occurs immediately but only once.
- Execute once—Collection occurs at a future date but only once. Click the drop-down list to enter the date in the calendar.
- Execute periodically—Collection occurs at regular intervals. Designate the interval in the Every box. Enter a number then select the frequency:
- Hours
- Days
- Weeks
- Months
- Business Days
If you select Weeks, you can choose a specific day in the On box. The On box is inactive for the other frequencies.
The Retain Historical Data (Trending) option is only available when you enable periodic execution.
- Specific Time—Collection occurs at, or as soon as possible after, a specific time of day. If a server is down and CA SRM cannot collect at the specified time, CA SRM collects as soon as it can that day (prior to midnight).
If you want to collect at a specific time check this box. This only works in conjunction with the Execute once and Execute periodically options. Use the spin box to designate the time of day you want the collection to occur.
Hold—This option keeps the service available but the service does not run. It remains on hold until you change the option to one of the frequencies listed above. You can use the Hold option for situations where you want to kickoff this service from outside of CA SRM using the command line option. Hold is not available for every service.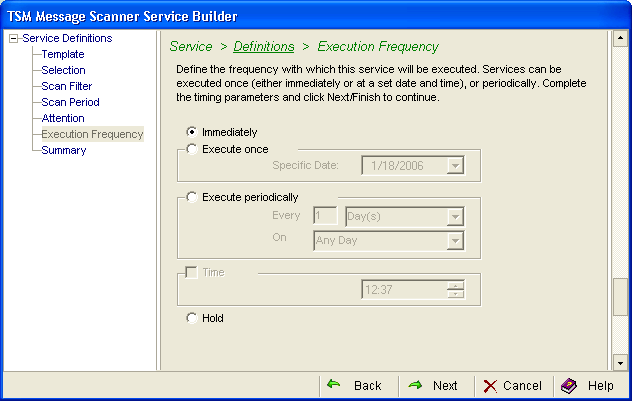
- Keep the service or the changes you made by clicking:
- Save—To save the service without it executing immediately.
- Launch—To save your changes and execute the service immediately.
The Summary dialog provides a detailed description of the service you created or modified. If you do not want to keep the service or the changes you made, click Cancel to close the wizard. You can use the Back button to go back to a specific dialog and make any corrections necessary.

