

|
|
|
The SessionLinker synchronizes a SiteMinder session with a third-party application session (such as SharePoint) for better security. If a user logs out from SiteMinder, the SessionLinker invalidates the related session of the third-party application.
Part of this synchronization process uses cookies from the third-party application. The SessionLinker requires certain information about these third-party cookies to link the sessions.
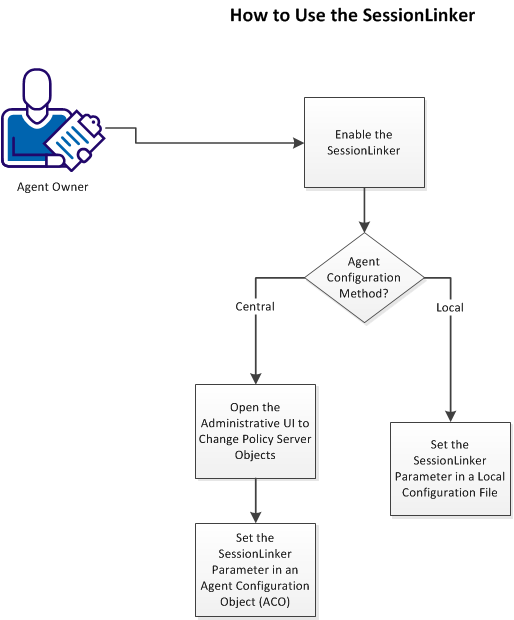
Follow these steps:
Because the SessionLinker operates on a server, enable it on the server first.
Follow these steps:
Agent-for-SharePoint_Home\proxy-engine\conf\defaultagent\WebAgent.conf
Indicates the directory where the Agent for SharePoint is installed.
Default: (Windows) C:\Program Files\CA\Agent-for-SharePoint
Default: (UNIX/Linux) /opt/CA/Agent-for-SharePoint
(Windows) #LoadPlugin="Agent-for-SharePoint_Home\agentframework\bin\SessionLinkerPlugin.dll"
(UNIX/Linux) #LoadPlugin="Agent-for-SharePoint_Home\agentframework\bin\LibSessionLinkerPlugin.so
The SessionLinker is enabled.
| Copyright © 2012 CA. All rights reserved. |
|