

Alternate access mappings can direct users who request an external URL to a specific web application on your SharePoint servers. Create alternate access mappings between your external URLs and the web applications on your SharePoint servers.
The Agent for SharePoint uses proxy rules in a similar fashion. Users who authenticate through the Agent for SharePoint are redirected to the internal web application hosted in SharePoint.
Important! The proxy rules in the Agent for SharePoint must match the alternate access mappings for your SharePoint web application.
The following graphic describes how to create alternate access mappings:
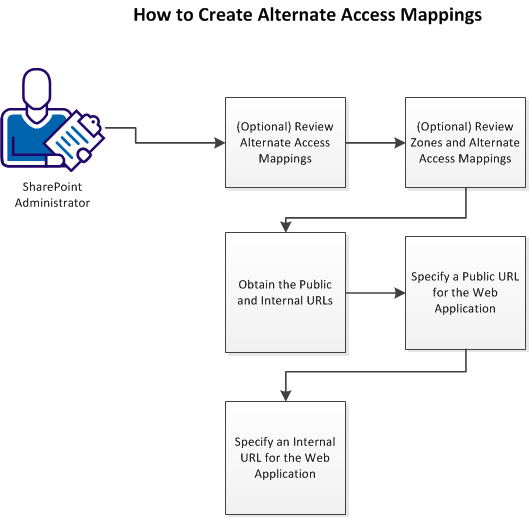
Follow these steps:
SharePoint central administration servers let you create alternate access mappings between external and internal URLs.
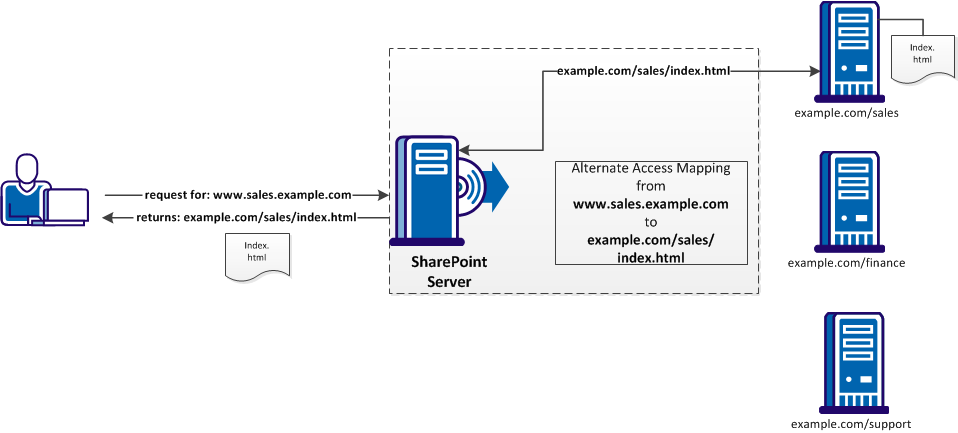
An alternate access mapping creates an association in SharePoint between your external login URL and the login server in the back end. For example, the SharePoint server directs all the requests for www.login.example.com to the login123.example.com server as shown in the following graphic:
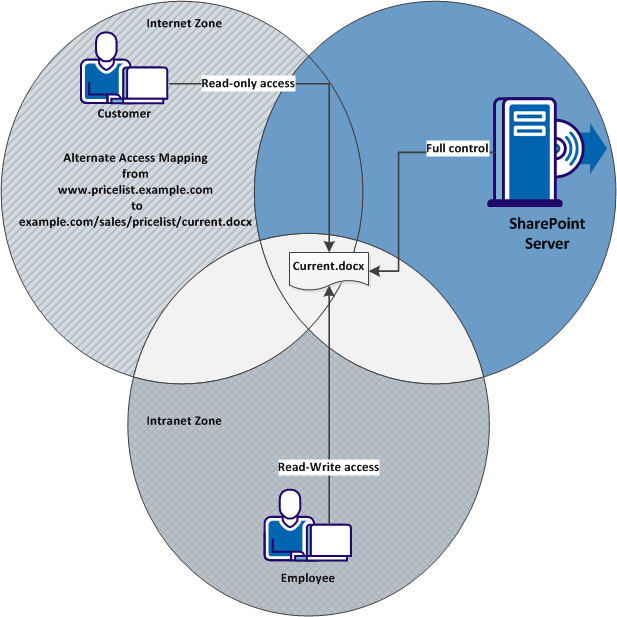
Alternate access mappings also support zones. Zones let you configure different access paths to a single web application on your SharePoint server. Creating alternate access mappings across different zones can accomplish the following goals:
The following graphic describes how different zones permit different levels of access to the same document for external customers and internal employees:
The following graphic describes how multiple authentication methods apply to the same document by extending the associated web application to multiple zones:
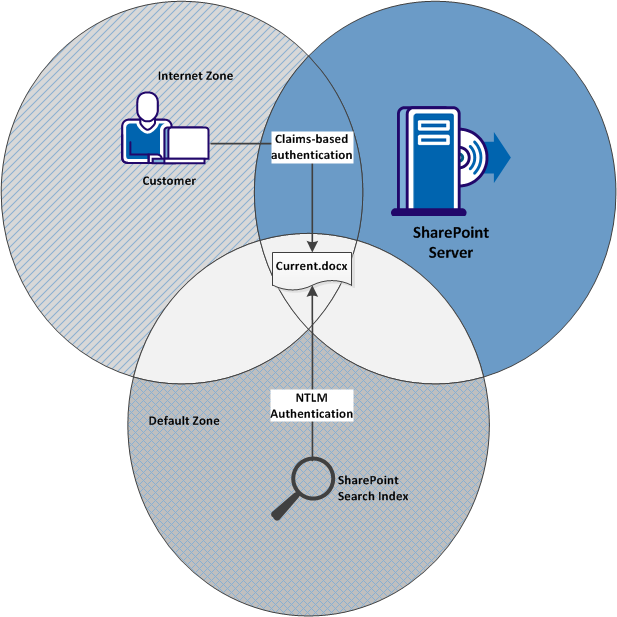
To accommodate the SharePoint search index, the web application must be extended into one zone that uses NTLM authentication.
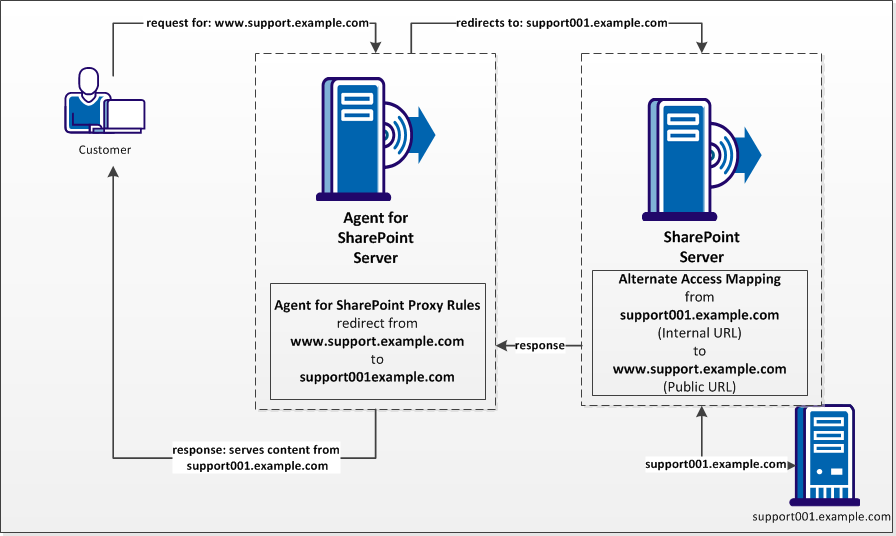
The Agent for SharePoint runs on a proxy-server. The Agent for SharePoint forwards requests to the web applications in your SharePoint environment using proxy rules. These proxy rules direct traffic from the public URL (the server hosting Agent for SharePoint) to your SharePoint web applications (the internal URLs).
For example, customers who access support.example.com are authenticated by the Agent for SharePoint. Next the user is redirected to a SharePoint web application hosted on a server named support001.example.com. The web application serves the content from support001.example.com back to the user who requested the support.example.com page.
The following graphic describes the relationship between proxy rules and alternate access mappings from the previous example:
Follow these steps:
Agent-for-SharePoint_home\proxy-engine\conf\proxyrules.xml
<nete:forward>http://server2.company.com$1</nete:forward>
Note: In a typical environment, the URL in the Step 5 matches the Internal URL for your SharePoint web application.
The public URL is an external URL through which your customers or external users connect to your organization. The public URL appears in the web browsers of your users.
When you use the Agent for SharePoint in front of your SharePoint server farm, use the URL of the server hosting your Agent for SharePoint as the public URL.
Important! The proxy rule settings of the Agent for SharePoint must match your alternate access mappings.
This procedure describes creating alternate access mappings for the default zone. Adding another type of authentication to a single internal URL with an alternate access mapping is described in a separate scenario.
Follow these steps:
The Central Administration home page appears.
The Application Management page appears.
The Alternate Access Mappings page appears with a list of available web applications.
Note: If the web application that you want is not listed, click the Alternate Access Mapping Collection drop-down list. Pick the web application that you want.
The Edit Public URLs page appears.
|
Copyright © 2013 CA.
All rights reserved.
|
|