

Agent for SharePoint Guide › Advanced Options › How to Modify the Sign-In URL of your CA SiteMinder Trusted Identity Provider
How to Modify the Sign-In URL of your CA SiteMinder Trusted Identity Provider
This scenario describes changing the sign-in URL of your CA SiteMinder trusted identity provider of an existing CA SiteMinder environment. For example, update the URL if you change the protocol of your sign-in URL from HTTP to HTTPS.
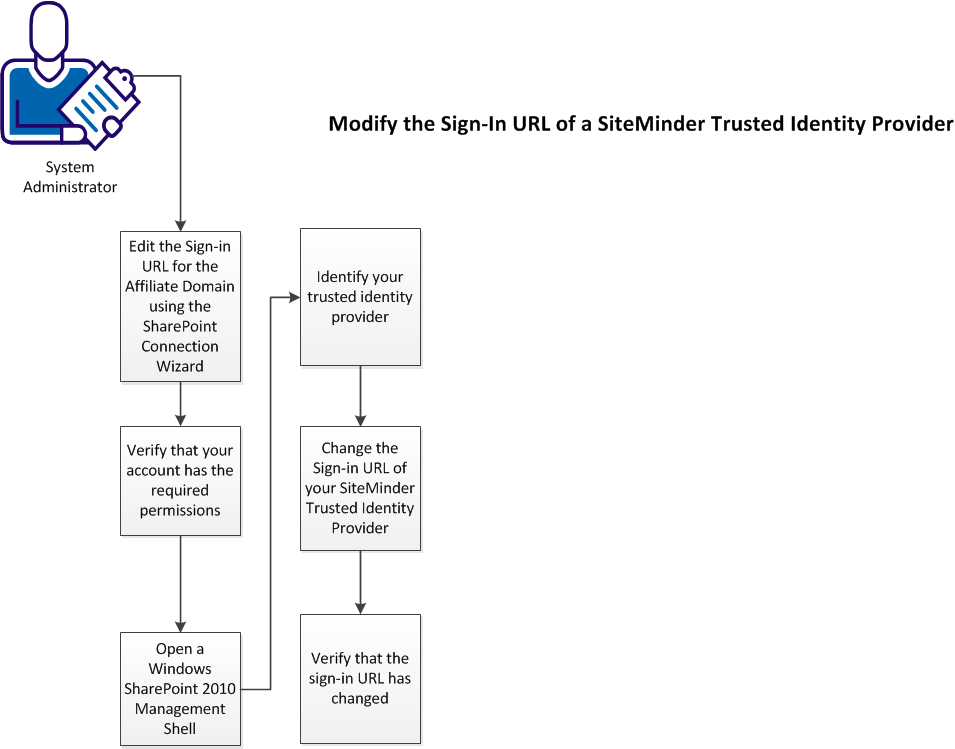
The following illustration describes the process of modifying the sign-in URL of your CA SiteMinder trusted identity provider:
To modify the sign-in URL of your CA SiteMinder identity provider, follow these steps:
- Edit the sign-in URL for the affiliate domain using the SharePoint connection wizard.
- Verify that your account has the required permissions.
- Open a SharePoint 2010 Management Shell window on your SharePoint Central Administration server.
- Identify your CA SiteMinder trusted identity provider.
- Change the sign-in URL of your CA SiteMinder trusted identity provider.
- Verify that the sign-in URL has changed.
Copyright © 2013 CA.
All rights reserved.
|
|