

Upgrading an agent for IIS to version 12.0.3 or higher requires removing the older version of the agent before installing the newer version. Some directory changes were introduced in 12.0.3 which also apply to the subsequent versions of the product. Running the new installation program without removing the previous version sometimes causes problems.
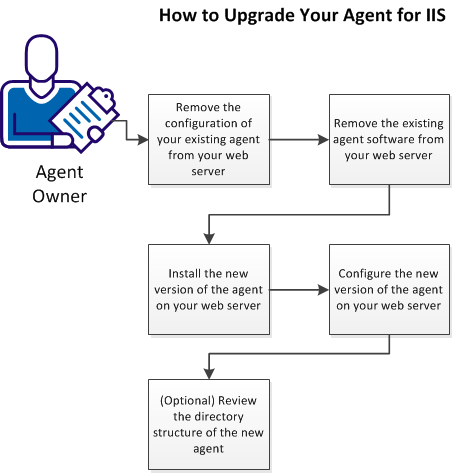
Follow these steps:
Before upgrading your agent to 12.0.3 or higher, remove the server configuration from the previous version of your agent using the configuration wizard. For example, if you are upgrading from 6.x to 12.52, remove the server configuration for the 6.x version of your agent using the configuration wizard.
Follow these steps:
The default method is to select Start, Programs, CA SiteMinder®, Web Agent Configuration Wizard. If you have placed the Wizard shortcut in a non‑default location, the procedure differs slightly.
Important! If you are running this wizard on Windows Server 2008, run the executable file with administrator permissions. Use these permissions even if you are logged in to the system as an administrator. For more information, see the release notes for your CA SiteMinder® component.
This name must match an Agent Configuration Object that already defined at the Policy Server.
The Web Agent files are installed.
Before you un–install the CA SiteMinder® Web Agent from a Windows operating environment, consider making backup copies of your registry settings and Web Agent configuration settings.
Follow these steps:
A list of installed programs appears.
The uninstallation wizard appears.
The wizard removes the web agent.
web_agent_home
Indicates the directory where the CA SiteMinder® Agent is installed on your web server.
Default (Windows 32-bit installations of CA SiteMinder® IIS Web Agents only): C:\Program Files\CA\webagent
Default (Windows 64-bit installations [CA SiteMinder® Web Agents for IIS only]): C:\Program Files\CA\webagent\win64
Default (Windows 32-bit applications operating on 64-bit systems [Wow64 with CA SiteMinder® Web Agents for IIS only]): C:\Program Files (x86)\webagent\win32
ca-wa-uninstall.cmd -i console
Important! Delete the ZeroG registry file from the following location after uninstalling the Web Agent: C:\Program Files\ZeroG Registry\com.zerog.registry.xml
After unconfiguring and removing the older version of your agent, install version 12.52 on your web server.
The installation program for the CA SiteMinder® agent installs the agent on one computer at a time using the Windows operating environment. This installation program can be run in wizard or console modes. The wizard and console-based installation programs also create a .properties file for subsequent installations and configurations using the unattended or silent method with the same settings.
For example, suppose the Agents in your environment use the same web server version, installation directory, Agent Configuration Object and Policy Servers. Use the installation wizard or console-based installation program for your first installation. Afterwards, you could create your own script to run the installation program with the .properties file the wizard or console-based installation program created.
Follow these steps:
executable_file_name.exe -i console
Use the information that you gathered previously to complete the installation.
After gathering the information for your Agent Configuration worksheet, run the Agent Configuration wizard. The configuration wizard creates a runtime instance of the Agent for IIS on your IIS web server.
Running the configuration wizard once creates a properties file. Use the properties file to run unattended configurations on other computers with same operating environment and settings.
Note: The configuration wizard for this version of the Agent for IIS does not support console mode.
Follow these steps:
A shortcut to the Web Agent Configuration wizard appears.
Important! If you are running this wizard on Windows Server 2008, run the executable file with administrator permissions. Use these permissions even if you are logged in to the system as an administrator. For more information, see the release notes for your CA SiteMinder® component.
The Web Agent Configuration wizard starts.
Complete the wizard.
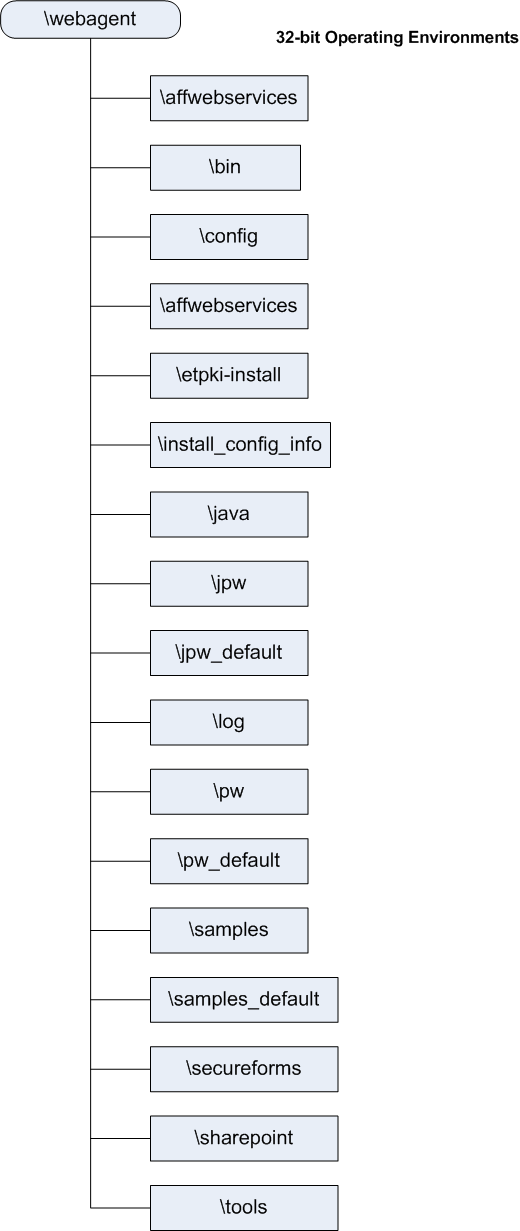
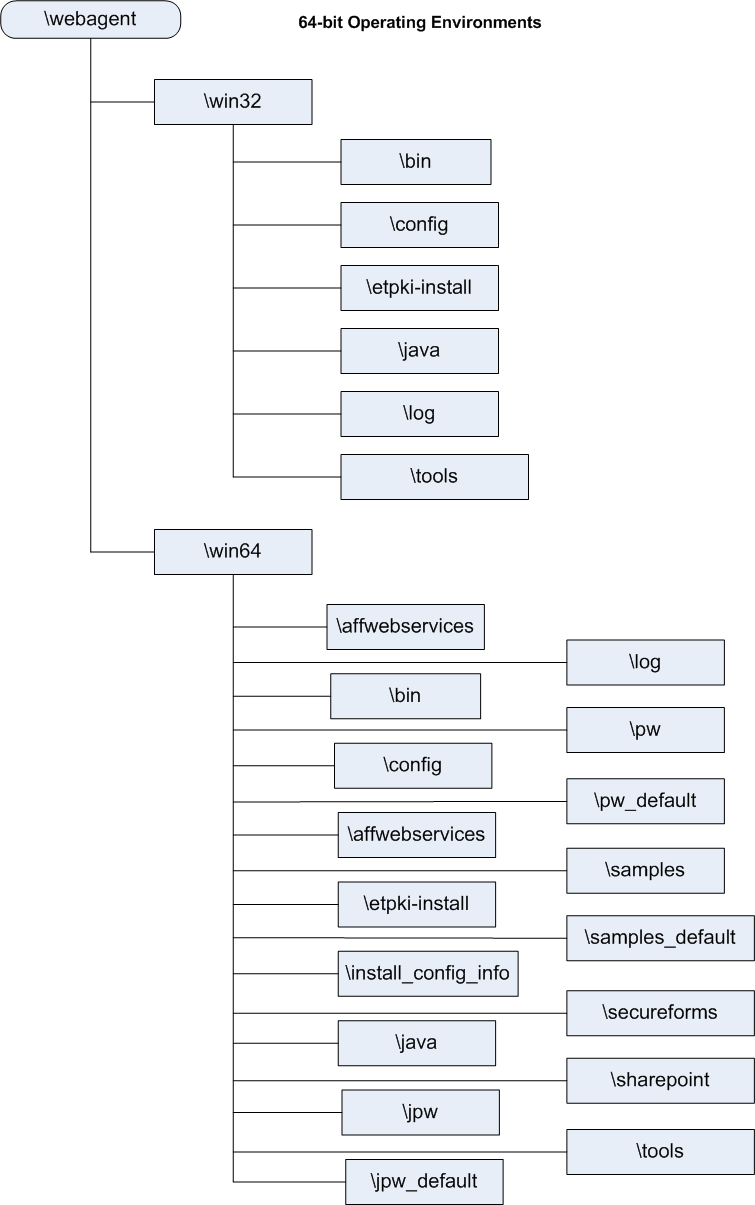
The directory structure added to your IIS web server for your Agent files varies according to the operating environment of your IIS web server. The following directory structures exist:
|
Copyright © 2013 CA.
All rights reserved.
|
|