
This section contains the following topics:
Partnership-Level Metadata Export
How To Enable WS-Federation Metadata Exchange
A local entity generates metadata to help a remote entity create its entities and form partnerships. Metadata makes the partnership configuration more efficient because many aspects of the partnership are defined in the metadata file. A remote partner can import metadata and can create a partnership or a remote entity that is based on the information in a metadata document.
You can export metadata from an existing local asserting or relying entity.
The Administrative UI offers several options for exporting metadata:
Regardless of whether you send metadata using a file or using the metadata exchange profile, the end goal of acquiring metadata is the same.
Note: For SAML 1.1, the terms in a metadata file are SAML 2.0 terms. This convention adheres to the SAML specification. When you import the SAML 1.1 data, the terms are imported correctly using SAML 1.1 terminology.
You can export data from a local entity. When you export metadata at the entity level, provide a partnership name for the data you are exporting. The export at this level defines basic partnership data.
Follow these steps:
The Export Metadata dialog opens.
Note: Click Help for a description of fields.
Only open it to view it.
The metadata is exported to the specified XML file. You can send this file to any partner.
You can export data from a local partnership. The export at this level defines basic partnership data.
Follow these steps:
The Export Metadata dialog opens.
Note: Click Help for a description of fields, controls, and their respective requirements.
Only open it to view it.
The metadata is exported to the specified XML file. You can send this file to any partner.
The Policy Server supports the Web Services Metadata Exchange profile for WS-Federation partnerships. This web service enables the CA SiteMinder® local partner to respond to requests from a remote partner for metadata. The exchange occurs as an HTTP request and response.
The use of the HTTP protocol lets a remote entity configure the federation programmatically. An application can use the URL to gather the necessary information.
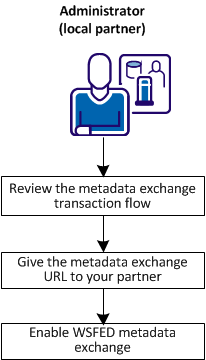
The following graphic shows the configuration steps for metadata exchange.

Complete the following configuration for metadata exchange:
A metadata exchange transaction has the following process flow:
The Policy Server generates the metadata document at the time of the request. This document is not stored at the local partner.
Before any metadata transaction occurs, give the URL for metadata exchange requests to your remote partners. A federated partner must send the request to the following URL:
https://server:port/affwebservices/public/FederationMetadata/partnership_name
server:port
Name of the system hosting the metadata exchange service.
partnership_name
Name of a configured partnership.
Enable the metadata exchange feature at a local WS-Federation partner.
Follow these steps:
The Metadata Exchange Configuration screen displays.
Metadata exchange is now configured for the partnership.
|
Copyright © 2014 CA.
All rights reserved.
|
|