

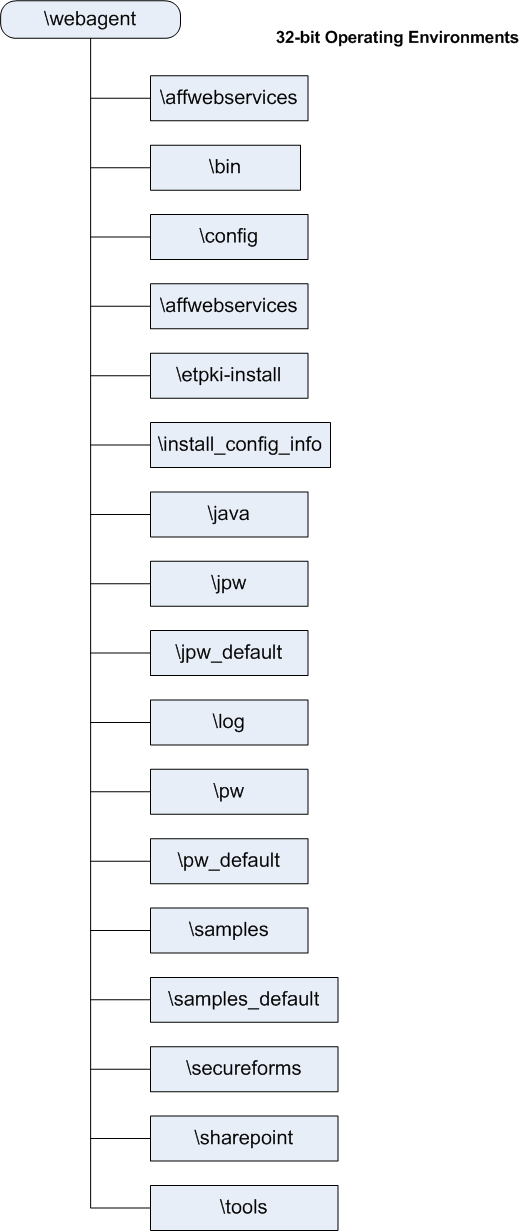
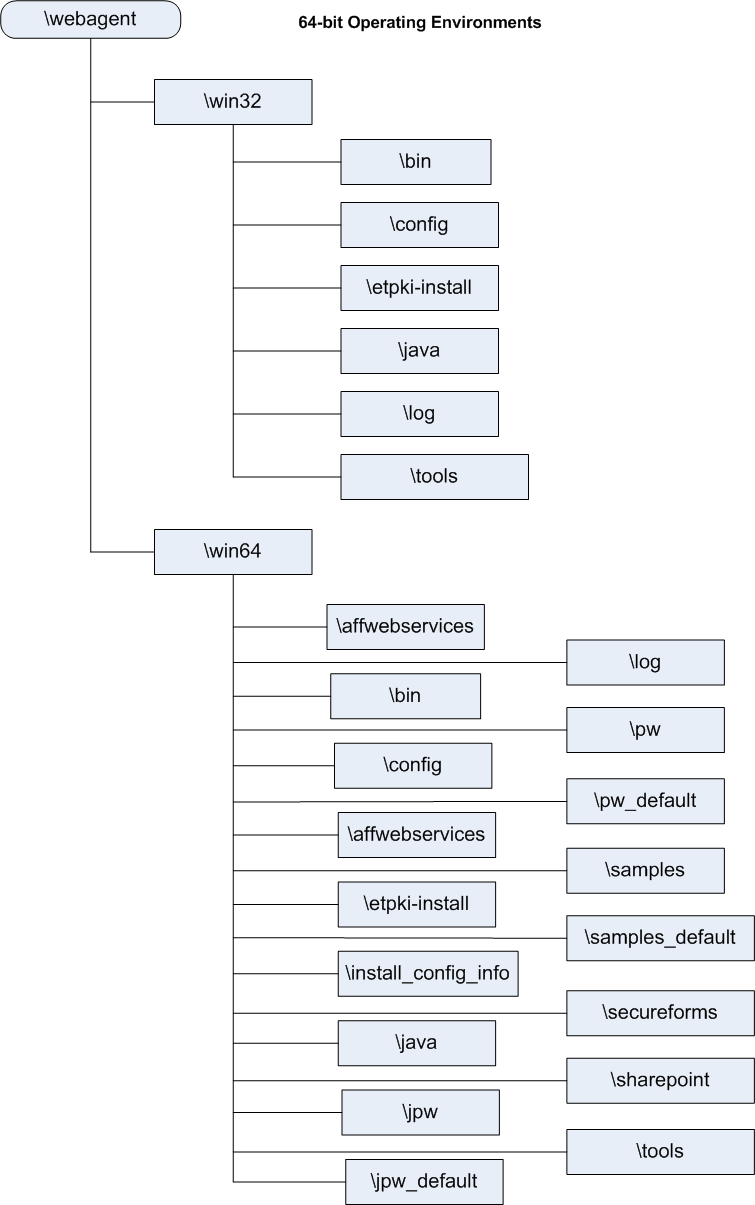
The directory structure added to your IIS web server for your Agent files varies according to the operating environment of your IIS web server. The following directory structures exist:
The following illustration describes how to prepare your Windows operating environment for the SiteMinder agent for IIS:
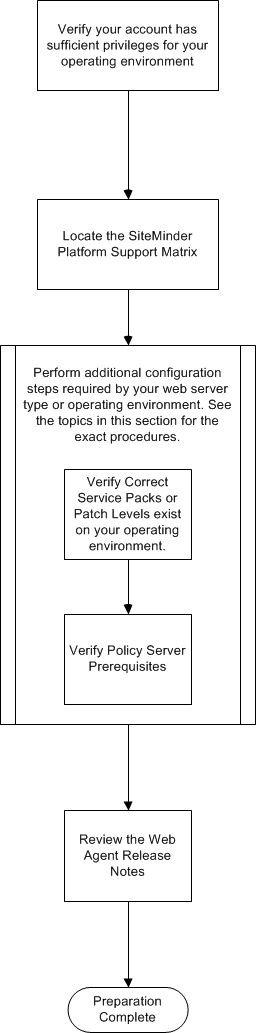
To prepare for an Agent for IIS installation on a Windows operating environment, use the following process:
To install or configure a SiteMinder Web Agent or SiteMinder Agent for IIS on an IIS web server, you need an account with Administrator privileges.
For Windows 2008 systems, do one of the following actions to install or configure a SiteMinder Web Agent or SiteMinder Agent for IIS:
Note: For more information about installing or configuring SiteMinder Web Agents or SiteMinder Agents for IIS on Windows 2008 systems, see the Web Agent Release Notes.
The IIS (web server) role is not enabled by default. Verify that the IIS role is installed and enabled on each Windows system, before installing the Agent for IIS.
Follow these steps:
Use the Platform Support Matrix to verify that the operating environment and other required third-party components are supported.
Follow these steps:
Note: You can download the latest JDK and JRE versions at the Oracle Developer Network.
Technology Partners and CA Validated Products
The latest list of partners and their validated products.
We recommend using Windows Update to verify that your Windows operating environment contains the latest Service Packs and updates, before installing a SiteMinder Agent for IIS.
Your Agent for IIS needs the following information about the Policy Servers to which it connects:
The Administrative UI creates these objects in the Policy Server. We recommend creating them before installing your agent to avoid going between your web server and the Administrative UI interfaces later.
Agents for IIS require the names of the following SiteMinder objects stored the Policy Server:
Contains the settings that the agent uses for subsequent connections to a Policy Server following the initial connection that the agent made.
Identifies the name of a SiteMinder user with the following privileges:
Identifies a password that is associated with the Admin User Name in the SiteMinder Policy Server.
Defines the identity of the Web Agent. This identity establishes a mapping between the name and the IP address of each web server instance hosting an Agent.
When no matching value exists, the agent uses the value of from the DefaultAgentName parameter instead.
Note: This parameter can have more than one value. Use the multivalue option when setting this parameter in an Agent Configuration Object. For local configuration files, add the parameter name and a value to separate lines in the file.
Limit: Multiple values are allowed, but each AgentName parameter has a 4,000 character limit. Create additional AgentName parameters as needed by adding a character to the parameter name. For example, AgentName, AgentName1, AgentName2.
Limits: Must contain 7-bit ASCII characters in the range of 32-127, and include one or more printable characters. Cannot contain the ampersand (&) and asterisk (*) characters. Not case-sensitive. For example, the names MyAgent and myagent are treated the same.
Example: myagent1,192.168.0.0 (IPV4)
The most-recent versions of the Web Agent Release notes are available from the CA Support website. We recommend reviewing them before installing or configuring a SiteMinder agent.
Follow these steps:
|
Copyright © 2012 CA Technologies.
All rights reserved.
|
|