

|
|
|
After starting the Windows Client you need to connect the Windows Client to the z/OS server component. In order to connect the Windows Client to the z/OS server component, you must first define the z/OS server or servers that you plan to use. The Windows Client Host List feature is used to define z/OS server connections.
You can define as many z/OS servers as you want and you can simultaneously connect to as many z/OS servers as you want (as long you have installed and configured the z/OS server component on them).
To define a z/OS host
Note: The following procedure assumes you have started the Windows Client and the Host List dialog is not displayed. If the Host List dialog is already displayed then you can skip step 1.
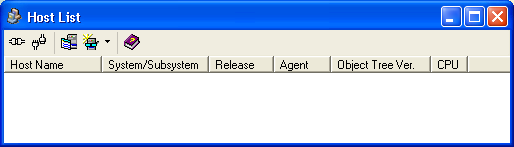
The Host List dialog appears as shown in the following sample.
The Host Definition dialog appears as shown in the following sample.
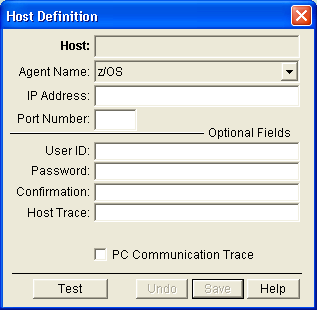
Provides the Host Name displayed in the Host List dialog.
Provides the name of the agent that collects data from the host. Select z/OS if it is not already displayed.
Defines the IP address or server name of the z/OS host to which you are connecting.
Defines the port number of the z/OS host to which you are connecting.
(Optional) Provides the user ID, which is sent to the host in encrypted form. If you do not specify a user ID then you must enter it every time you try to connect the Windows Client to the z/OS host.
(Optional) Provides the password, which is sent to the host in encrypted form. If you do not specify a password then you must enter it every time you try to connect the Windows Client to the z/OS host.
Note: You also have the option of providing the z/OS host user ID and not the password when setting up your Host Definition; this is often done at sites where security policies require Passwords to be changed periodically.
Confirms the password, if you provide a password then you must provide the same password in the confirmation field.
(Optional) Creates a trace on the host of all the messages exchanged between the z/OS host and the Windows Client. For more information about this field click the Help icon.
(Optional) Indicates if the system should save the messages relating to host-client communication in a log file. For more information about this field click the Help icon.
The Windows Client advises you if your connection to the z/OS host is successful.
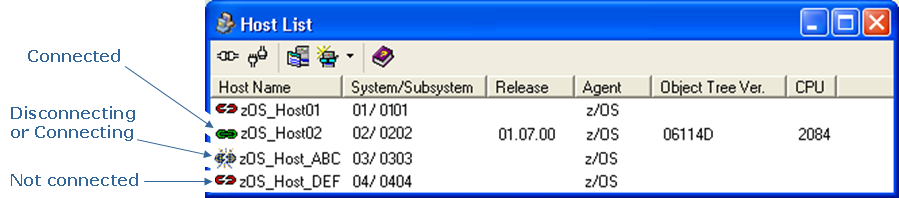
The Windows Client stores the host definition. The new host definition appears in the Host List dialog. The Host List dialog displays all your defined hosts and their connection status.
The following is a sample of the Host List dialog showing the different connection status icons.
| Copyright © 2012 CA. All rights reserved. | Tell Technical Publications how we can improve this information |