

|
|
|
When you inherit from the pattern UISTYLE/FrameWizard, the panel scoped by it has a child site in which the child panels of the wizard are displayed.
You determine the size that the child site in a wizard needs to be by opening each of the panels that are displayed in the site, and noting their size. You record the largest height and width of the child panels, and set the child site to those dimensions.
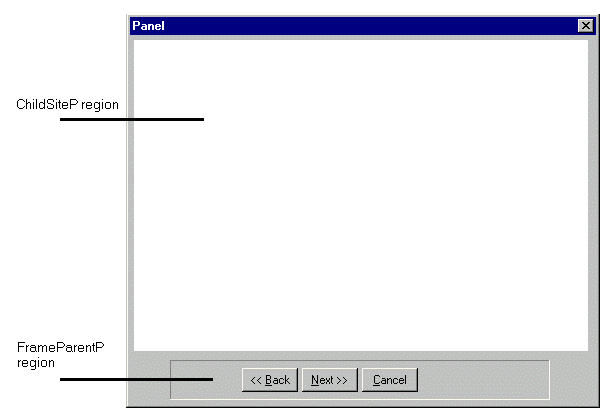
The child site defined on the panel is too small to hold the panel scoped by Task.Edit, which measures 454 by 311 pixels (you find a panel’s size by opening the panel and looking in the Property Sheet). Also, the child site extends to the bottom of the panel, which means that the child panels overlap the buttons unless you move the button region.
To change the wizard parent panel:
This is the child site region, where the child panels appear.
This region is the beveled box that holds the Back, Next, and Cancel buttons.
The panel should look something like this:
| Copyright © 2012 CA. All rights reserved. | Tell Technical Publications how we can improve this information |