

|
|
|
To add functionality to the Project entity:
![]()
Notice that there is no plus sign to the left of the Project entity. This tells you that there are no objects scoped to it.
To add these triples, you must first set the source object type in the Model Editor to Entity. You could change the object type directly. But, when you drag an object from the Object Browser, it sets the object type and shows all of the triples for that object.
This is similar to using the Inspect toolbar button. It changes the Model Editor so that it only shows triples related to the Project entity, changes the object type (assuming it was not already set to Entity), and puts Project in the source object box. The body of the Model Editor is the area of the Model Editor below the Entry Bar that displays existing triples.
Note: The is a verb you use in this step is different from the one that you used to specify inheritance for Project’s fields. There are several verbs that have the same name, but which have a different source and target object. CA Plex only lets you select the verb that matches the target object (in this step, the is a ENT verb). For more information about the types of is a verbs, search for is in the online help index.
![]()
You just created the triple Project is a FOUNDATI/EditDetail. This indicates that Project inherits the structure and functionality of the EditDetail pattern in the FOUNDATION Pattern Library. You can find the FOUNDATION/EditDetail pattern in the Object Browser by making sure that library objects are displayed (by clicking the Show/Hide Library Objects toolbar button) and scrolling down.
For more information about the EditDetail pattern, select it in the Object Browser and press SHIFT+F1.
![]()
For more information about scoped objects, see More About Scope.
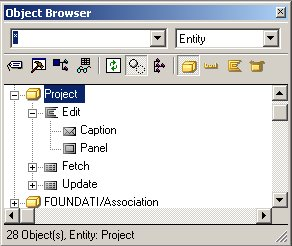
Project inherited one function, Edit, with a scoped panel and a caption, and two views, Fetch and Update. These objects give Project a user interface, and enable it to store data to and retrieve data from a database.
Specifically:
Next, you indicate how the Project entity stores information. Your application uses a relational database, so you need processing that creates and maintains database tables. You set Project to inherit from STORAGE/RelationalTable for that functionality.
Project is a STORAGE/RelationalTable
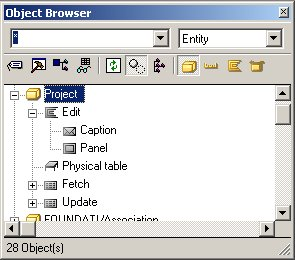
Notice that the Project entity inherited an object called Physical Table from STORAGE/RelationalTable. This defines the table that is created in the database when you generate the application. The fields you defined for the Project entity are stored in this table.
| Copyright © 2012 CA. All rights reserved. | Tell Technical Publications how we can improve this information |