

You have now defined fields for the Project entity and specified the properties of those fields. You have also defined functionality for the Project entity, providing a basic user interface and the ability to write to and read from a database. You are now ready to generate and build the Project entity. This process turns your model into source code (generating) and then turns your source code into compiled objects (building).
After you have generated and built the objects in your model, you can run the program to see what you have created.
To generate and build the Project entity
The Generate and Build window appears. The Message Log pops up when you open the window.
Note: To generate and build a Java application, you must set up the Generate and Build options for Java.
From the Options menu, click Quiet Mode, and minimize the window.
This keeps the Message Log from popping up every time it has a new message.
If the Generate and Build window shows library objects, click the Show/Hide Library Objects toolbar button to hide them.
The Generate and Build window now shows the Project and Employee entities (Employee was already added to your model before you started).
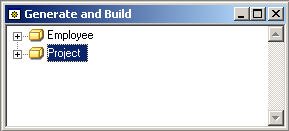
Select the Project entity.
Click the Generate and Build toolbar button.
CA Plex expands the Project and highlights all of the objects that are generated within the Project. Not all of the scoped objects are selected.
A Confirm Generate dialog appears indicating the number of objects that are generated.
CA Plex generates those objects and then summarizes the generation process.
Note: Two warnings appear in the Message Log during the generation and build processes. This is expected and is not a problem.
For more information, see Message Log in this chapter.
CA Plex prompts you to compile and build the objects.
The first Java compile dialog is to compile the database tables and views. The second Java compile dialog is for the coalition of the java functions.
CA Plex opens a new Shell Build window and uses Apache ANT and the Java compiler to build your generated code.
At the same time, the database table is sent to the ODBC data source being used for this sample application. To make the setup easier, CA Plex created this data source automatically during installation together with the underlying Microsoft Jet database.
You can see that your Java build is complete when the message BUILD SUCCESSFUL appears in the Shell Build window. You can close the Shell Build window.
|
Copyright © 2014 CA Technologies.
All rights reserved.
|
|