

If the "My Custom Groups" feature is enabled for your user account, you can place managed items in custom groups to organize them. The groups that appear in your "My Custom Groups" area are visible only to you.
Important! If you create a group for a CA Infrastructure Management Data Aggregator data source, we recommend limiting group membership to 10,000 items. This count includes the children of managed items. Observing this limit keeps reporting time to less than 10 seconds.
Follow these steps:
If your user account has the My Custom Groups feature enabled, you see a My Settings tab on the console toolbar.
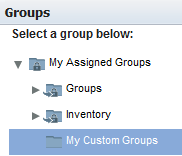
The My Custom Groups page shows a tree view of group structure and a tabbed view of group properties.
Note: The groups that you can see are groups that the administrator selected for you, based on your responsibilities.
The page displays groups in a tree structure.
Note: The custom groups that the administrator created cannot be edited within the My Custom Groups interface. These read-only groups appear as group references; their properties tab shows a path to the original group.
The Add Group window opens.
The New tab is selected by default.
Specifies a name for the group. Do not use the following special characters in group names: /&\,%.
(Optional) Helps you identify the group.
Adds the children of managed items automatically when the items are added to this group. If you disable this option and add a router to the group, the interfaces on that router are not included. Therefore, their data is not visible in drilldown views.
Default: Selected.
If you selected Site as the type, an additional parameter appears:
Identifies a physical location that is associated with the site group, such as a city or a branch office.
The new group appears in the My Assigned Groups tree. No other CA Performance Center user can see this group.
The group contains no items until you add them. You have two options for adding items to a custom group:
|
Copyright © 2013 CA.
All rights reserved.
|
|