

|
|
|
You use icons to build the panel for your graphical monitor.
To define an icon
The Icon List panel appears.
The Icon Editor panel appears.
Specifies the name of the icon.
Describes the icon.
Specifies the height of the icon in lines.
Specifies the width of the icon in characters.
Note: If you change the default size, press Enter to update the shape of the icon in the Edit Area window.
Specify the values you want to display on the icon.
The new definition is saved.
The Icon Editor panel specifies the details of an icon. The operation you are performing is displayed at the top right of the panel, for example, Function=UPDATE.
The panel specifies the following information:
The Edit Area window specifies the values you want to display on the icon.
Example: Icon Editor Panel
This example defines a resource icon.
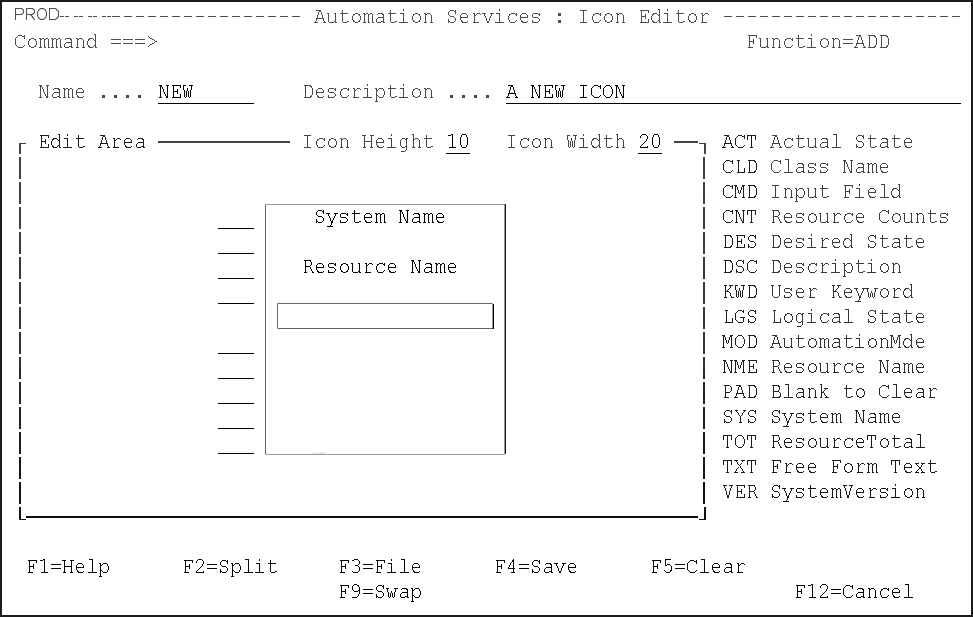
Use the Edit Area window on the Icon Editor panel to specify what you want to display on the icon.
The icon contains the number of lines specified in the Icon Height field. Use the three-character codes listed to the right of the Edit Area window to specify the values you want displayed on the icon. To use a code, enter the code in a line field. You can use the code on any line, irrespective of whether the line is blank or not. Except for the TXT code, executing a code on a line overrides what is already there.
You can type codes in more than one line field, then press Enter to execute the codes.
Pressing F5 (Clear) clears the icon. Use the PAD code to clear a line.
Note: For information about the codes, see the online help.
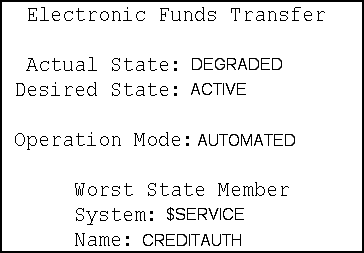
In this example, an icon, EFTPOS, is defined for the group of services and resources that support electronic funds transfer. The finished icon as it appears to an operator is shown in the following figure:
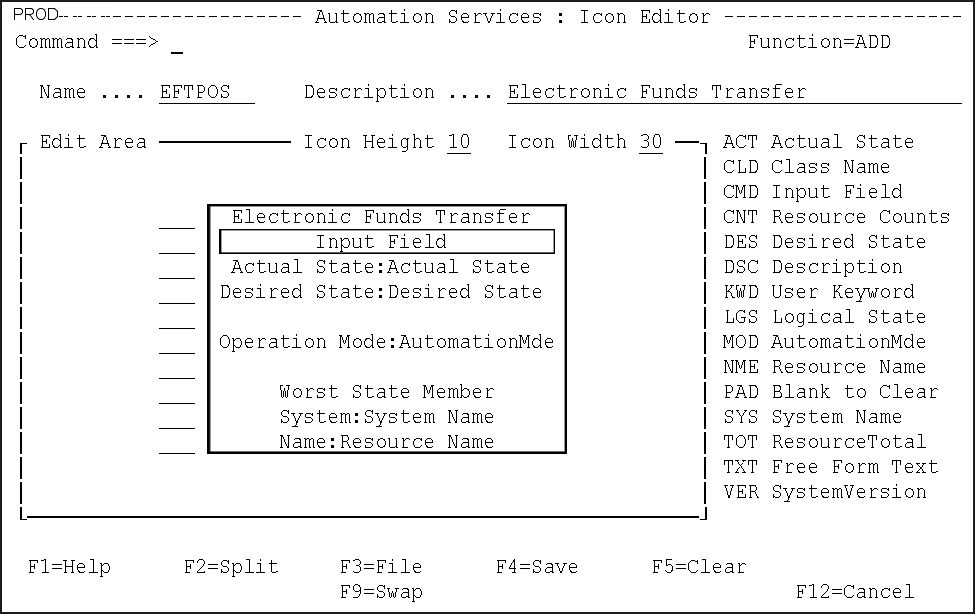
To define the icon
The Icon List panel appears.
The Icon Editor panel appears.
Use steps 5 and 6 to enter the Worst State Member label (line 8).
The following shows the completed Icon Editor panel.
| Copyright © 2010 CA. All rights reserved. |
|