When the first region is created in your environment, two databases are downloaded and can be customized for your environment. Together, these two databases (the Automation Services database and the icon panel library) form the knowledge base.
To build a multisystem environment, you start by linking two regions, and then continue to link in any other regions. The linking process also synchronizes the knowledge bases of these regions.
Notes
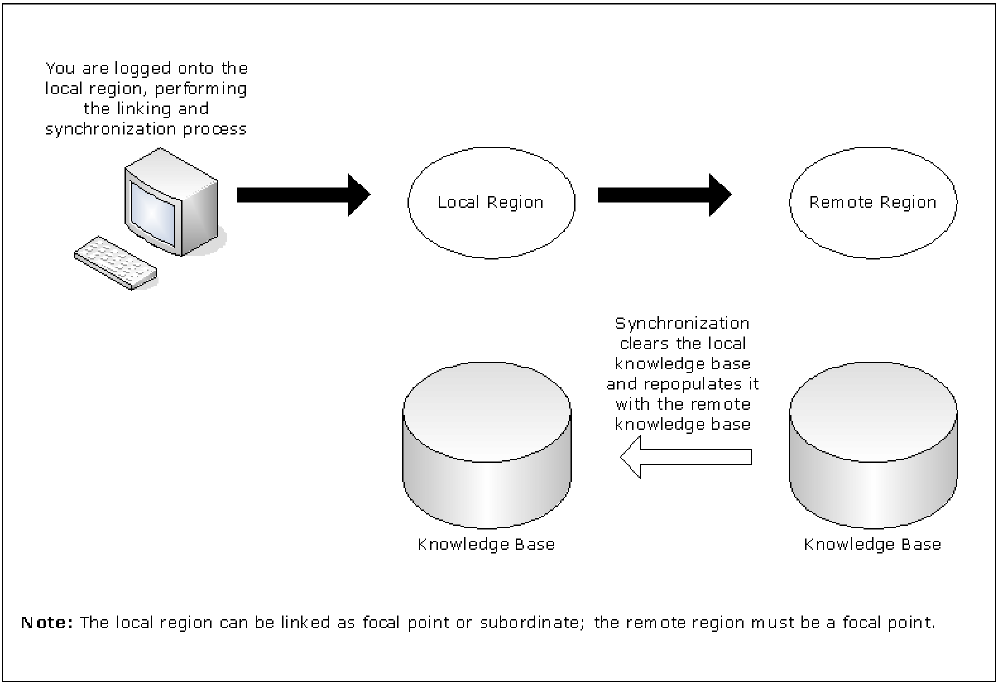
When you link two regions, the local region in which you perform the link operation receives the knowledge base from the remote region. This remote region must be a focal point region. When you link a region into an existing multisystem environment, that region must be a stand-alone region.
Important! During the linking and synchronization process, the knowledge base in the local region is overwritten by the knowledge base from the remote focal region. If the local knowledge base has customized definitions that you want to retain, transmit these definitions to the remote knowledge base before you link the regions. Otherwise, the local knowledge base definitions are overwritten and lost.
Note: If the local region terminates during the linking and synchronization process, the local knowledge base can become corrupted and you cannot restart the region. Replace the corrupted knowledge base with your backup, restart the region, and resynchronize the knowledge base. For more information about backups, see the Reference Guide.
The following illustration shows the link and synchronization operation.

After you link the regions, the knowledge bases are synchronized and remain synchronized. If you change the knowledge base in one region, the changes are propagated to the other regions.
When you establish a region, a UAMS background system (BSYS) user ID for that region is automatically defined. The background user ID comprises the four‑byte region domain ID, followed by the characters BSYS. To establish fully-functioning communication links between regions, the BSYS user ID of each region must be duplicated in each linked region.
During a link and synchronize procedure, any required BSYS user IDs are defined automatically to UAMS, provided that the following conditions apply:
If either of these conditions does not apply, then any required BSYS user IDs must be defined manually to UAMS. The simplest way to do this is to copy the BSYS user ID for the current region from the UAMS User Definition List and update the user ID. To access the UAMS maintenance functions, enter the /UAMS shortcut.
The link and synchronize request is rejected if both of the following apply:
Important! If you use an external security system, you must manually define the BSYS user IDs of the remote systems to your external security system.
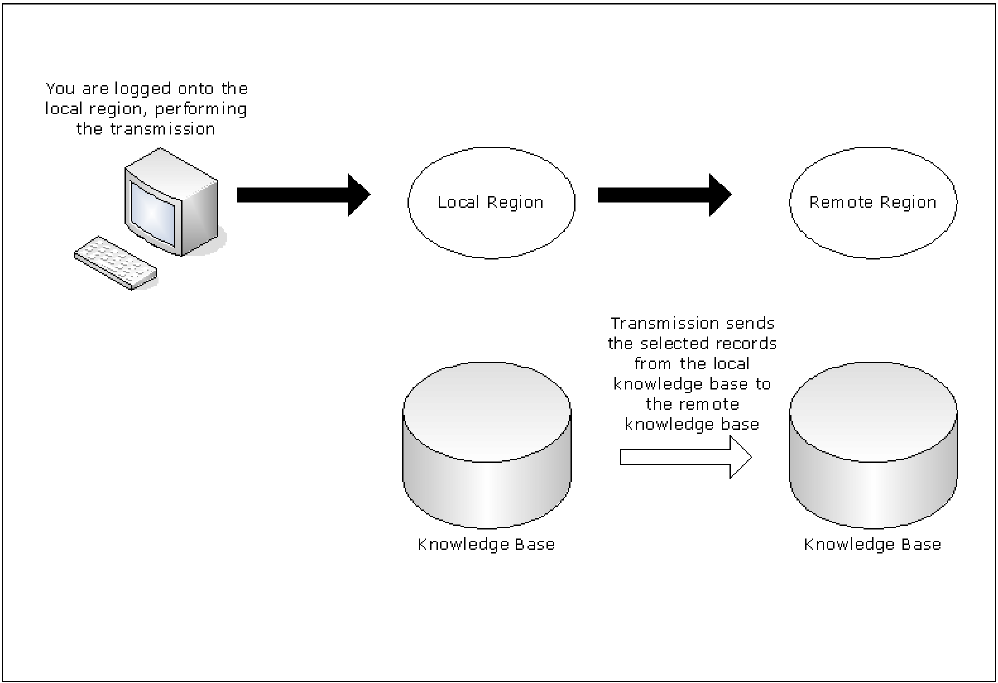
You can transmit (that is, copy) knowledge base records from the local region to a remote region that is not linked to it.
You cannot transmit a system image to a region in which the image is currently loaded.
By specifying the appropriate transmission mode on the Remote System Identification panel, you can specify how to update the records in the remote region.
The following transmission modes are available:
This diagram shows the transmit operation:

To transmit knowledge base records
The Multi-System Support Menu appears.
A Remote System Identification panel appears.
If you specified the TI option, go to step 5. If you specified any other transmission options, go to Step 6.
Note: For information about the fields, press F1 (Help)
If a selection list appears, go to step 9. If the Confirm Transmit panel appears, go to step 11.
A Confirm Transmit panel appears.
A status panel appears, showing the progress of the transmission.
Note: If you choose to exit the status panel, you can check the status of the task by viewing the administration task log (MADMIN.L). Before you exit, note the task number for future reference.
This procedure specifies the access methods that the region uses for communications. You can only enable a method if it is supported on your system.
To specify the communications access methods
The Customizer : Parameter Groups panel appears.
The MULTISYS - Multi-System Options panel appears.
Specifies whether the region uses the VTAM access method.
Specifies whether the region uses the EndPoint Services access method.
Specifies whether the region uses the TCP/IP access method.
Specifies the time to wait for a link to be established.
Default: 60 seconds
Press F6 (Action).
The communications access methods are activated.
Important! Do not add, update, or delete knowledge base records in any linked regions while synchronization is in progress. These changes may not be propagated to the new region. Before you perform synchronization, ensure that you back up the knowledge base.
To link and synchronize regions
The source region contains the knowledge base you want.
The Multi-System Support Menu appears.
This establishes a link between the local region and another region, and updates the knowledge base of the current region.
The Remote System Identification panel appears.
Specifies the ACB name of the remote focal point region to which you want to link this region.
Specifies whether this region is a focal point region or a subordinate region. A focal point region must satisfy the following conditions:
(Optional) If you specified subordinate, specify the name of the system image that is to be used by it.
Important! Each subordinate is assigned a unique system image name, and it can use an image by that system image name only. When you build your environment for a subordinate, you must build the environment under the system image name specified during the linking operation.
Subordinate regions are restricted to loading only system images with the name specified here. Different system image versions can be maintained under the system image name.
(Optional) Specifies the VSAM data set to use to reduce the time for synchronization.
The following fields specify the communication access methods to be used during synchronization. You can select any combination of the access methods; however, you can only select an access method if it is enabled in the MULTISYS parameter group.
(Optional) Specifies whether to use VTAM for communication.
(Optional) Specifies whether to use EPS for communication.
(Optional) Specifies the TCP/IP host name and address of the remote region.
(Optional) Specifies the TCP/IP port number of the remote region.
A confirmation panel appears.
A status panel appears.
Note: Press F3 (Exit) to exit the status panel at any time without affecting the link and synchronize procedure. If you exit early, note the task number for later reference.
While the synchronization procedure is in progress, the Synchronize Database Status panel is refreshed automatically every 10 seconds. This panel can be refreshed manually at any time by pressing the Enter key.
To check the status of the synchronization
The administration task log may contain up to 50 entries at any given time. Each task is allocated a sequential task number (between 1 and 50) as it commences. When the maximum task number is reached, allocation restarts from one and the oldest status records are overwritten. To delete a completed or failed task from the log, apply the D (Delete) action.
Automation Services maintains synchronization between linked knowledge bases by using a staging file.
When a knowledge base update occurs, information about the update is stored in the staging file as follows:
A record stays in the staging file until the update is performed successfully in the destined region. If the region is inactive, the record stays in the staging file until the region is started.
Important! If the staging file becomes full, knowledge base synchronization cannot be maintained and the local region is unlinked automatically. A staging file can become full if a remote linked region remains inactive for an extended period of time. If an extended downtime is planned for a linked region, unlink the remote region before inactivation.
| Copyright © 2012 CA. All rights reserved. |
|