

You can maintain, delete, or create data destinations.
Follow these steps:
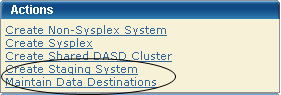
The Maintains Data Destinations dialog appears.
Note: A grayed select box indicates that the data destinations is assigned and cannot be removed. It can be edited.
The Edit Data Destinations dialog appears.
Note: The asterisk indicates that the field is mandatory.
Enter a meaningful Name.
Limits: Maximum 64 characters.
Note: Each data destination name must be a unique name and it is not case-sensitive. For example DATAD1 and datad1 are the same data destination name.
Enter the description.
Limits: Maximum 255 characters.
Select the transmission method.
Default: Shared DASD.
(Shared DASD only) Enter the mount point directory path, which is a directory path that must exist on the target system. The user that is doing the deployment must have write permission to this directory, as well as mount authorization on the target system.
Note: A mount user must have UID(0) or at least have READ access to the SUPERUSER.FILESYS.MOUNT resource found in the UNIXPRIV class.
Limits: Maximum 120 characters
Note: SMS is not mutually exclusive with non-SMS. They can both be specified (usually one or the other is specified though). This is where you specify allocation parameters for the deployment on a target system.
(Shared DASD only) Enter the Storage Class.
Limits: Maximum 8 characters
Example: SYSPRG
(Shared DASD only) Enter the Volser.
Limits: Maximum 6 characters
Example: SYSP01 and SYSP02
Enter the GIMUNZIP volume.
Limits: Maximum 6 characters
Enter zFS Candidate volumes.
Limits: Maximum 6 characters
The zFS candidate volumes let you specify an optional list of VOLSERs used during the allocation of zFS container data sets for USS parts.
The updated data destination appears on the list of data destinations.
Note: Click Cancel to withdraw this change request.
|
Copyright © 2010 CA.
All rights reserved.
|
|