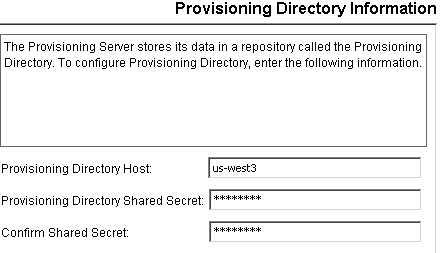

Once you have created the WebSphere cluster, you can install CA IdentityMinder on it. To install the CA IdentityMinder on all cluster members, you use this procedure and the procedures that follow it.
Note: At previous releases of CA IdentityMinder, creating a message store and message engine was a manual process. At this release, you create an empty message store database and supply that database name when you run the CA IdentityMinder installer. WebSphere then populates the message store table, creates the message engine, and deploys the CA IdentityMinder application ear and binaries to each node in the cluster.
Follow these steps:
ca-im-release-win32.exe
ca-im-release-sol.bin
release represents the current release of CA IdentityMinder.
Important! Be sure that you have the collected the information needed by the installer, such as user names, host names, and ports.
Note: If you see options to upgrade the workflow database and migrate task persistence data, enable those options. They appear in some scenarios when your previous installation was CA Identity Manager r12.

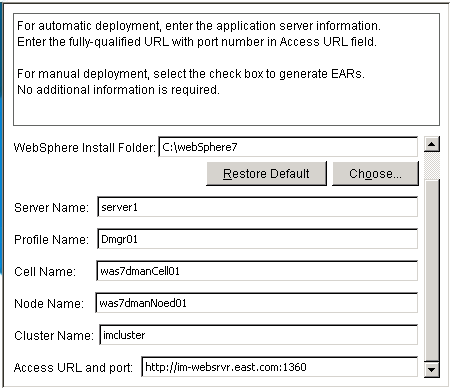
The WebSphere section includes these fields:
The folder or directory where WebSphere is installed. You find this location in the Windows or UNIX file system.
The first cluster member in the WebSphere cluster. You find this name in the WebSphere console.
The deployment manager profile. You find this name in the Windows or UNIX file system at the path:
was_home/profiles/Deployment_Manager_Profile
The deployment manager's cell which can be found in the WebSphere console.
Note: Cell names are case sensitive in all operating systems. Be sure to use the correct case.
A node that contains the Server Name you supplied on this screen. You find this name in the WebSphere console.
Note: Node names are case sensitive in all operating systems. Be sure to use the correct case.
The name of the cluster. You find this name in the WebSphere console.
The URL and port number of the Web Server used for load balancing.

Enter the message store database.
Enter the user who owns the message store database.
For Microsoft SQL Server, enter dbo.
For Oracle, enter the user who owns the message store database.
If any issues occur during installation, inspect the installation logs.
Important! Do not start the cluster yet, as it will not function. Complete the remaining procedures, which conclude with the steps to start the cluster.
|
Copyright © 2013 CA.
All rights reserved.
|
|