
Upgrade Guide › WebSphere Version › Provisioning Components Upgrade › Upgrade the Provisioning Server
Upgrade the Provisioning Server
Important! The Provisioning Server uses an instance of CA Directory to communicate with the Provisioning Directory. Be sure to install or upgrade CA Directory on the Provisioning Server system, using the CA Directory component installer, before upgrading the Provisioning Server.
The component CA Directory installer is located on the CA IdentityMinder media, under CADirectory_x64.
The Provisioning Server upgrade includes the C++ Connector Server, and also performs all connector upgrades by default.
Note the following when upgrading the Provisioning Server:
- Before upgrading the Provisioning Server, be sure that inbound requests are completed. Use View Submitted Tasks to verify these requests are complete.
- Before installing the Provisioning Server, uninstall and reinstall any alternate Provisioning Directories if they exist. For more information, see the Installation Guide.
- If you have more than one Provisioning Server, upgrade the primary first, then upgrade all alternate Provisioning Servers.
To upgrade the Provisioning Server
- Run the CA IdentityMinder installer from the CA IdentityMinder media.
The Upgrade Wizard starts.
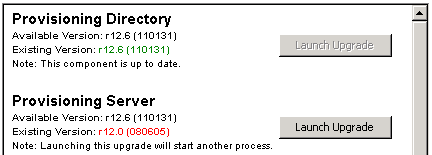
- In the Upgrade Wizard, next to Provisioning Server, click Launch Upgrade.

The Provisioning Server upgrade starts. Note the following:
- If you see a Deprecated Connector Warning, consult the Connectors Guide for migration steps to complete after the upgrade.
- Select the Custom setup type when prompted.
- Select the appropriate Installation Type, depending on which components are installed on the system (Provisioning Server, C++Connector Server, or both).

- You can select a check box during upgrade to indicate Provisioning Directory high availability. If you select this option, supply the hostnames of any alternate Provisioning Directories and specify the primary Provisioning Directory.
- Complete the Provisioning Domain screens.
Note: You may notice a slight delay when you click Next on the first Provisioning Domain screen.

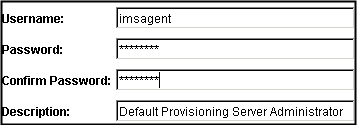
- Enter a password for the domain.

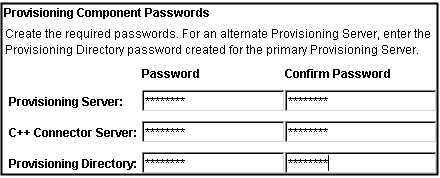
- Supply provisioning components passwords.

- Go through the wizard and enter the information you collected for the upgrade.
Your Provisioning Server is upgraded.
Copyright © 2013 CA.
All rights reserved.
 
|
|


