Previous Topic: Create JDBC ResourcesNext Topic: Set Connection Pool Properties


Edit the Data Source

Follow these steps:

  1. Within the WebSphere Administrative Console, click Resources, JDBC, Data sources.
  2. For Scope, select Node=manualNode, Server=server- name.
  3. Click New to create the data source as follows:
  4. Select the JDBC provider.
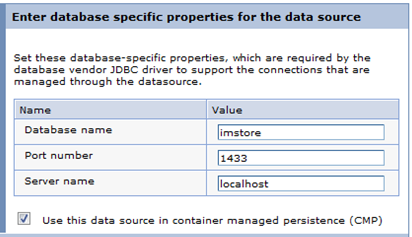
  5. Enter the database specific properties for your environment.

    The user enter the database name, port number, and server name

  6. For Setup security aliases, accept the defaults.
  7. On the Summary page, click Finish.
  8. Save changes directly to the master configuration.
  9. Add custom properties to the Data Source using the following steps:
    1. From the Data sources page, select iam_im Object Store Data Source.
    2. Under Additional Properties, select Custom properties.
    3. Depending on your database, add the following properties
      • SQL: user=<username>, password=<password>, enable2Phase=true, selectMethod=cursor
      • Oracle: user=<username>, password=<password>

      Note: Be sure that the JDBC provider is created as XA.
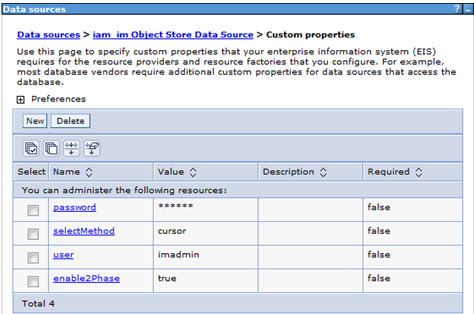
    The custom properties shows four resources.

  10. Save changes directly to the master configuration

    The database schema (SQL scripts) are automatically applied when you restart CA IdentityMinder.
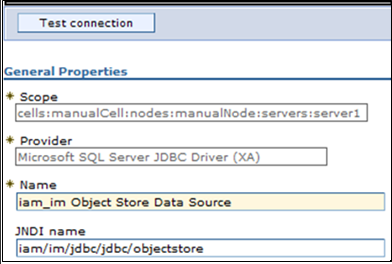
  11. Test the data source connection.

    The custom properties shows four resources. 

    Failures are typically classpath or credentials related. If the test connection passed, then the Data Source configuration is complete.

  12. Four additional data sources need to be configured. Repeat this procedure, but use the data sources and JNDI names in the following table:

Data Source

JNDI Name

iam_im Task Persistence Data Source

iam/im/jdbc/jdbc/idm

iam_im Workflow Data Source

iam/im/jdbc/jdbc/WPDS

iam_im Snapshots Data Source

iam/im/jdbc/jdbc/reportsnapshot

iam_im Archive Data Source

iam/im/jdbc/jdbc/archive