
Upgrade Guide › JBoss Version › Upgrade on a Single JBoss Node › Migrate a Node to a New JBoss › Migrate Task Persistence Data
Migrate Task Persistence Data
This procedure applies only if you are upgrading from CA Identity Manager r12.
You can manually migrate tasks, depending on task state or date range, by running the task persistence data migration tool.
To manually migrate task persistence data
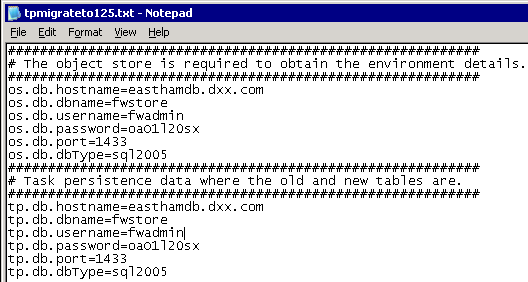
- Find the tpmigration125.properties file in the following location:
admin_tools/tpmigration/com/ca/tp/migratetpto125

- Update this file with the object store and task persistence information for your database.
Note: For any supported version of SQL Server, enter sql2005.

- Be sure that the environment variable JAVA_HOME is set.
- From a command line, navigate to admin_tools/tpmigration and run the task persistence migration tool as follows:
- For Windows:
runmigration.bat
- For UNIX:
runmigration.sh
- Enter the following information:
- For environment protected Alias, enter all.
Note: If you do not specify all, only one environment can be entered.
- For task state, enter All (with a Capital A).
Note: If you do not specify All, only one task state can be entered.
- For the version to migrate from, enter 2 for 12.0.
- Date range for the tasks to be migrated (y/n).
Note: If you choose 'y', enter a Start Date (mm/dd/yy) and End Date (mm/dd/yy).
The migration starts. After the migration completes, the status indicates how many tasks were migrated.
- Be sure to verify that no errors appeared.
- Repeat steps 4 and 5, but use the -pending option instead of All for task state.
Copyright © 2013 CA.
All rights reserved.
 
|
|


