

CA Identity Manager Configuration Guide › CA Identity Manager Environments › How to Configure an Environment for Provisioning › Configure the Inbound Administrator
Configure the Inbound Administrator
For the inbound synchronization to work, create a special CA Identity Manager user called inbound administrator. An inbound administrator is an account that CA Identity Manager uses during synchronization. In the previous releases of CA Identity Manager, the inbound administrator was called the corporate user. No user logs in to this user account; instead, CA Identity Manager uses it internally. Use this procedure for configuring user account with an inbound administrator privileges.
Follow these steps:
- Log in to the environment as the user with the System Manager role.
- Create a user. You can name the user inbound as a reminder of its purpose.
- Choose Admin Roles, Modify Admin Role, and select a role that contains the tasks you use for the synchronization.
- Provisioning Create User
- Provisioning Enable/Disable User
- Provisioning Modify User
Note: If you have not modified the default synchronization tasks, use the Provisioning Synchronization Manager role.
- On the Members tab, add a member policy that includes:
- A member rule that the new user meets.
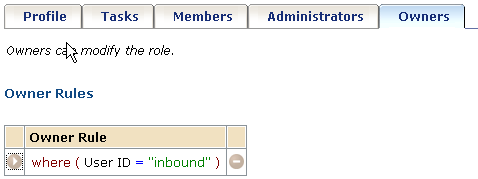
- A scope rule providing access to all users who are affected by provisioning directory changes that trigger the inbound synchronization. The following screenshots shows the Owners tab where you create the owner rule:
- In the Management Console:
- Select the Environment.
- Select Advanced Settings, Provisioning.
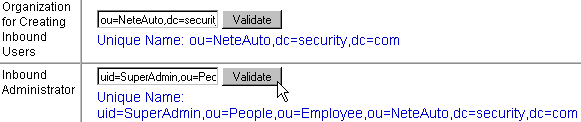
- Complete the Organization for the Creating Inbound Users field if the CA Identity Manager directory includes an organization.
This organization is where users are created when the inbound synchronization occurs. For example, when a user is added to the provisioning directory, CA Identity Manager adds the user to this organization.
- Complete the Inbound Administrator field with the User ID of the user that you created in Step 2.
- Click Validate to confirm the user ID is accepted. As shown in the following example where the complete user ID appears below the user ID entered.
- Modify other fields on the screen.
When you modify, be sure that you understand how the fields interact. For details on each field, click the Help link on the screen.
Copyright © 2014 CA.
All rights reserved.
|
|