Before deploying Identity Manager to the cluster, deploy it in a cluster domain in the Administration Server to verify that it installs correctly. The cluster domain serves as a staging area where you can test Identity Manager and then deploy it to other nodes in the cluster.
When you supply a cluster name during the installation, these primary resources will be configured:
During the installation, the following EARs are installed to that cluster domain at the following root weblogic_home\user_projects\domains\<domain name>\applications.
Note: Make sure that you have the required information for installer screens, such as host names and passwords. If any issues occur during installation, check the installation logs.
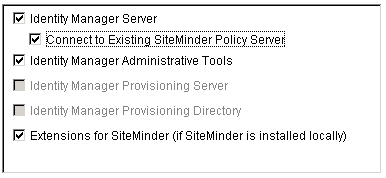
To install Identity Manager on the WebLogic Admin Server
Include IP addresses and hostnames of any remote system that you plan to include during the installation.
ca-im-release-win32.exe
ca-im-release-sol.bin
release represents the current release of CA Identity Manager.
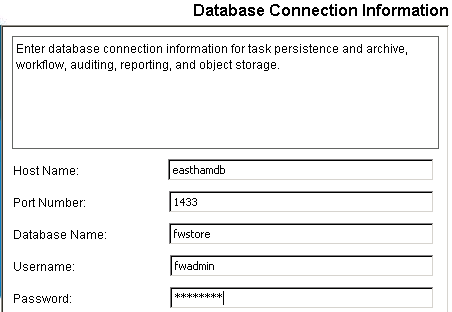
Be sure to provide the existing CA Identity Manager database credentials during the install and that all values from the previous release of CA Identity Manager are replaced with r12.5 SP8 values.
Important! If you are upgrading from CA Identity Manager r12 and you have different database stores for task persistence, workflow, audit, and reports, you will need to update the data sources manually after installation to point to the separate stores.

Note: If you see options to upgrade the workflow database and migrate task persistence data during the installation, enable those options. They appear in some scenarios when your previous installation was CA Identity Manager r12.
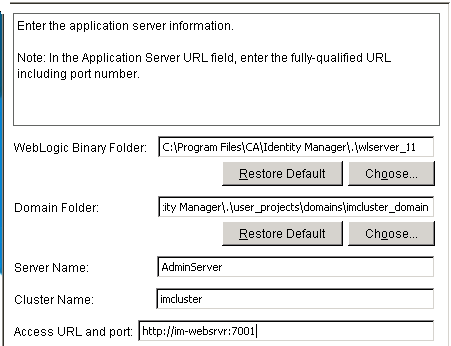
The location of the application server home directory.
The name of the WebLogic domain you created for Identity Manager.
The name of the WebLogic server on which the domain is configured.
The name of the cluster.
Supply the URL and the port number for the web server used for load balancing.


Important! If you are upgrading from CA Identity Manager r12 and you have different database stores for task persistence, workflow, audit, and reports, update the data sources to point to the separate stores.

The installer will install the components you selected and gradually update the progress bar.

When the installation completes, inspect the Install Complete message. If you see errors on the screen, note the path for the logs, which explain the errors.
| Copyright © 2011 CA. All rights reserved. | Email CA Technologies about this topic |