

Once you have uninstalled CA Identity Manager, you can install the new version of CA Identity Manager server.
Note: If you see options to upgrade the workflow database and migrate task persistence data during the installation, enable those options. They appear in some scenarios when your previous installation was CA Identity Manager r12.
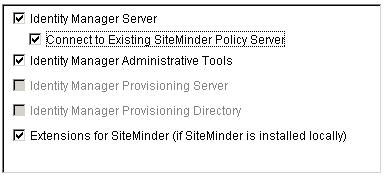
To reinstall the CA Identity Manager Server
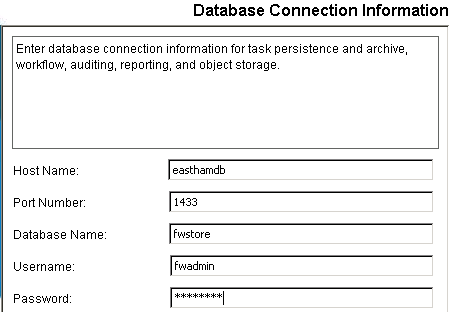
Be sure to provide the existing CA Identity Manager database credentials during the install and that all values from the previous release of CA Identity Manager are replaced with r12.5 SP17 values.
ca-im-release-win32.exe
ca-im-release-sol.bin
release represents the current release of CA Identity Manager.
Important! If you are upgrading from CA Identity Manager r12 and you have different database stores for task persistence, workflow, audit, and reports, you will need to update the data sources manually after installation to point to the separate stores.
The installer will install the components you selected and gradually update the progress bar.

If you are upgrading from CA Identity Manager r12, continue by upgrading the workflow database.
This procedure applies only if you are upgrading from CA Identity Manager r12.
To work with WorkPoint 3.4.2, you update the workflow database, so you can continue to use the workflow processes that you developed in WorkPoint 3.3.
Follow these steps:
This script creates the tables for Workpoint 3.4, adds columns the old tables, and inserts rows into the WP_*_TYPE tables.
This script creates the stored procedures that are required to convert the data.
This script converts the text data to columns and populates the new WP_BULK_DATA table from the old WP_BULK_STORAGE table.
This script creates the tables for Workpoint 3.4.20060927 and inserts rows into the WP_INI and WP_*_TYPE tables.
This script creates the tables for Workpoint 3.4.2.20070625 and inserts rows into the WP_INI and WP_*_TYPE tables.
This script creates the tables for Workpoint 3.4.2.20071218 and inserts rows into the WP_INI and WP_*_TYPE tables.
This script adds tables and rows to support the completion code.
This script updates field lengths and scripts.
This script adds index definitions.
This procedure applies only if you are upgrading from CA Identity Manager r12.
You can manually migrate tasks, depending on task state or date range, by running the task persistence data migration tool.
Follow these steps:
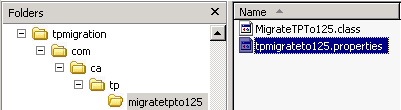
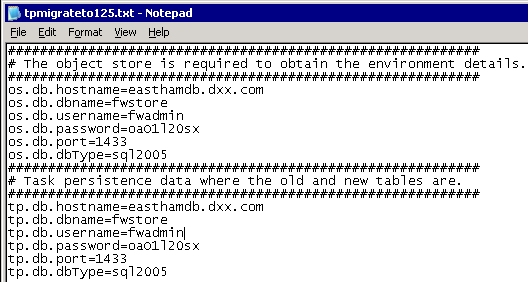
admin_tools/tpmigration/com/ca/tp/migratetpto125
Note: For any supported version of SQL Server, enter sql2005.
runmigration.bat
runmigration.sh
Note: If you do not specify all, only one environment can be entered.
Note: If you choose 'y', enter a Start Date (mm/dd/yy) and End Date (mm/dd/yy).
The migration starts. After the migration completes, the status indicates how many tasks were migrated.
|
Copyright © 2014 CA.
All rights reserved.
|
|