Previous Topic: Lesson ActivityNext Topic: Generating the Application


Define the Window Packaging

Follow these steps:

  1. From the Tree Control, scroll down to the Construction folder and double-click Packaging.
  2. From the Tool Palette, select the Window Packaging Define the Window Packaging icon.
  3. In the Window Packaging diagram, select the EGOLF_SERVICES Business System.
  4. From the Tool Palette, select the Add Load Module… Define the Window Packaging icon. In the (new object) Properties dialog, enter egolfwin and select the Add Psteps… push button. Select each procedure step (Proc Step) and, with all five-procedure steps highlighted, select the OK push button.
  5. In the (new object) Properties dialog, select the OK push button. If you have multiple adds turned on, select the Cancel push button.
  6. Notice that something called a Window Manager (Window Mangr) has been added below the Business System. Every load module (executable) in a Windows environment has a Window Manager associated with it. The Window Manager handles some of the window functionality, as well as things such as flows between other load modules.

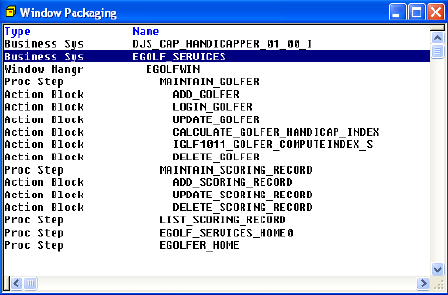
    Select the EGOLFWIN WindowManager and then, from the Main Menu select View, then Expand All. Notice that each procedure step we added appears indented below the Window Manager name. And each action block called by each procedure step appears indented below the procedure step name. Thus, when we generate the code for all of these modules, they will all be linked into one executable called EGOLFWIN.

    Define the Window Packaging

  7. Before we can generate the code, however, we still need to complete the packaging by assigning source code member names to all of the modules and trancodes to the procedure steps. This one executable is going to have the equivalent of five entry points. Trancodes are used to specify a particular entry point. In a Mainframe environment, these trancodes would correspond to those registered with the TP Monitor. For other environments, they can be any unique name. We can assign trancodes and source member names manually, or we can let the Toolset complete the packaging for us. We will do the latter.

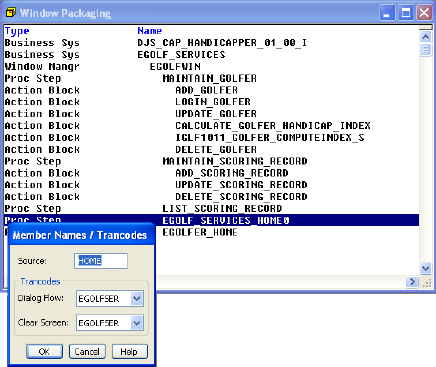
    Select the Window Manager EGOLFWIN. Then, from the Tool Palette, select the Complete Define the Window Packaging [packaging] icon.

  8. In the Window Packaging diagram, double-click the EGOLF_SERVICES_HOME0 procedure step and make note of the Dialog Flow Trancode name. More than likely it is called EGOLFSER. We will need to know this when we begin testing. Change the Source: from P1 to HOME and select OK.

    Define the Window Packaging

  9. Save your model.