

Installing CA Gen on the Windows Platform › Using the CA Gen Product Browser › Install Product Software
Install Product Software
The CA Gen installation wizard installs CA Gen features to your Windows system. The wizard verifies if the user ID performing the installation has Administrator privileges. It checks your PC environment and gives you options with prompts based on your operating system and the type of installation you choose.
Notes:
- Before beginning the install, close all open applications and windows.
- You configure CA Gen features before using them.
Follow these steps:
- From the CA Gen Product Browser main menu, click Install Products.
- Click Software.
- Click Next.
- Read the license agreement and click I Agree.
- Select one of the following setup options and click Next:
- Typical
-
Installs a predetermined set of product features. The features that are selected by default in the Custom installation are the set of features that are included in a Typical setup. See Step 8 for the default features list and continue with Step 6.
- Custom
-
You select the features to install. If you chose Custom, continue with Step 8.
- Accept the default path or click Change to create a new one. Click Next to continue.
- Click Install to install the selected CA Gen features on your system.
CA Gen is installed and ready to use.
- When you chose Custom, you can select the CA Gen features to install and change the installation directory.
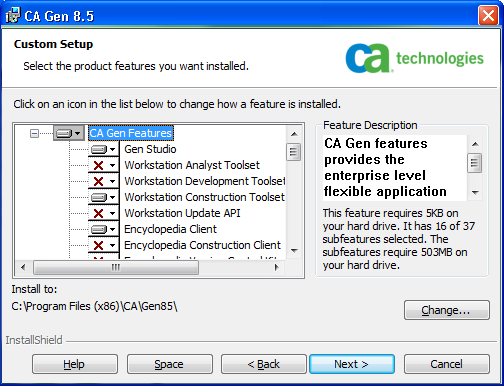
- Select the CA Gen features you need to install and click Next.
- Click Install to install the selected CA Gen features on your system.
CA Gen notifies you when the installation completes.
- Click Finish. CA Gen is installed and ready to use.
More information:
CA Gen Features
Copyright © 2015 CA Technologies.
All rights reserved.
|
|