Previous Topic: How to Modify CA Audit Policies to Send Events to CA Enterprise Log Manager

Next Topic: Modify an Existing CA Audit Policy to Send Events to CA Enterprise Log Manager

Configure the SAPI Collector Adapter to Receive CA Access Control Events

Use this procedure to configure the SAPI collector adapter to receive CA Access Control events from a CA Audit implementation.

You can modify CA Audit policies that use Collector actions to send events to a CA Enterprise Log Manager server in addition to, or in place of, sending events to the CA Audit collector database. Configure this service before you modify CA Audit policies to verify that no events are lost.

(You can configure a SAPI Router service in a similar way. If you use both the Router and Collector services, be sure that the ports listed are different, or that the port mapper service controls them.)

To configure the SAPI collector service

  1. Log into the CA Enterprise Log Manager server as an Administrator user and select the Administration tab.

    The Log Collection subtab displays by default.
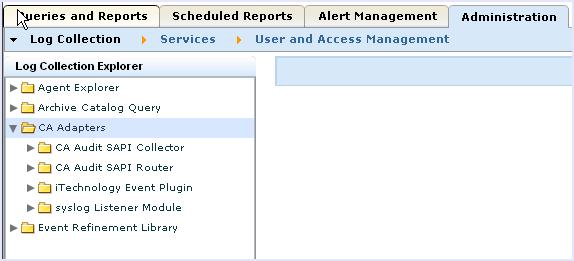
  2. Expand the CA Adapters entry.

    This picture shows the Administration tab with the Log Collection Explorer pane's options, and the CA Adapters expanded.

  3. Select the SAPI Collector service.

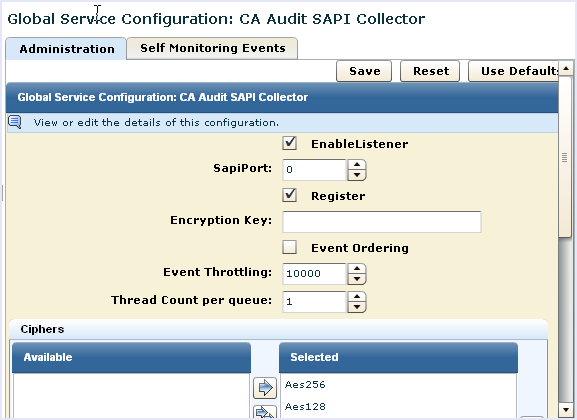
    This picture shows the CA SAPI Collector configuration dialog.

  4. Select the EnableListener check box and set the SapiPort value to a value that matches what CA Audit uses.

    The default CA Enterprise Log Manager value, 0, uses the Portmapper service to map the ports. If you have a port defined in CA Audit, use that setting here.

  5. Accept the other field defaults, and scroll down to the list of Mapping Files.

    If you select the Register check box, specify a SAPI port value.
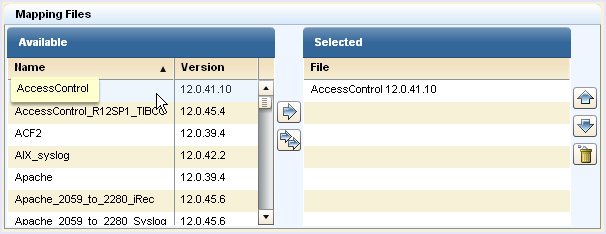
  6. Add the Access Control mapping file entry if it is not present, and remove the other mapping file selections from the list of Selected mapping files.

    This picture shows the available and selected mapping files for the CA SAPI Collector service configuration.

  7. Click Save.