When planning what alerts to send to CA NSM, identify query results that would be of interest to the network operations center. For example, consider queries that detect configuration changes. The following example illustrates how to send a scheduled alert based on the Configuration Change Detail query. This alert specifies CA NSM as the SNMP trap destination.
To send SNMPv3 traps to CA NSM
The SNMP Version 3 Security Parameters dialog appears.
Important: The entries on this dialog must match the settings in snmpv3.dat that you configured to enable CA NSM to receive SNMP traps from CA Enterprise Log Manager alerts. The recommended setting follows:
*.*.*.* *:* <username>:AuthPriv:MD5:<password>:DES:<password>
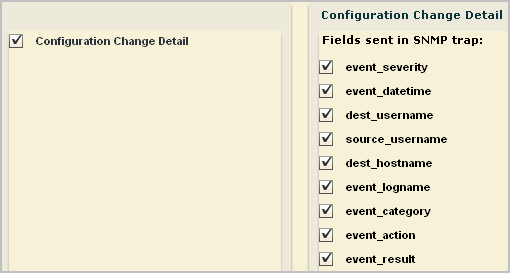
In this example, when you select Configuration Change Detail, the fields for that query are displayed as selected. Optionally, you can clear any field you do not want included as a trap.
Important! When you create a custom MIB for this alert, be sure to define a trap with the fields you select here and in the order shown.

The initial nodes of the Custom Trap ID are predefined in the CA-ELM.MIB. The final node number is unique to a trap defined in a custom MIB, where the trap reflects a unique set of fields. A custom MIB file defines the traps sent by the CA Enterprise Log Manager alerts that you defined. In the custom trap referenced by the Custom Trap ID, the fields are listed in the same order as the fields sent by the alert. If the OID for the trap in the custom MIB is 1.3.6.1.4.1.791.9845.3.63, select 63 from the number spinner for Custom Trap ID. Or, if you define the alert first, add a trap in your custom MIB for 1.3.6.1.4.1.791.9845.3.63 that defines the query fields you selected.
The job appears on the Action Alert Jobs list with the configured job name.
| Copyright © 2011 CA. All rights reserved. | Email CA Technologies about this topic |