

This step is used while testing a traditional web application to send and receive HTTP(S) requests. Requests can include GET parameters and POST parameters and optionally, embedded images as a response. You can also record the HTTP steps using the Website Proxy Recorder.
The HTTP/HTML Request step has a default name using this convention: HTTP(s) ("GET" or "POST") (leaf of URL). An example is HTTP GET rejectCard.jsp. You can change step names at any time.
You can manually execute the HTTP/HTML step at design time (similar to the WS step). When you select Actions, Replay through here, DevTest saves the step responses so the step editors can display the response values.
When you add this step to a test case, the step editor includes the following tabs:
Specify the information that is used to construct the URL on the URL Transaction Info tab.
You can set up the URL transaction information with either of the following options:
Specify URL in parts
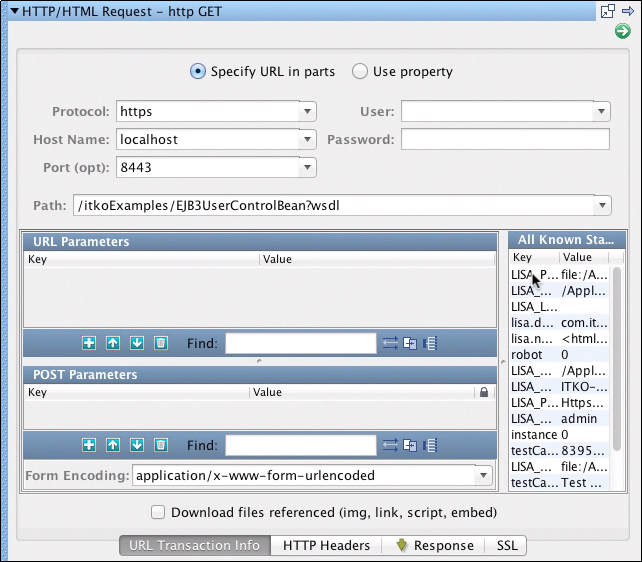
Select the Specify URL in parts option (default) to specify the URL in its essential pieces.
The protocol that is used to communicate with the web server. The default is http.
The host name of the web server. Use the property SERVER or enter hostname or IP address of your application server. The host name can be a domain name, such as www.mycompany.com or an IP address, such as 123.4.5.6. For a local web server, use the host name localhost or the IP address 127.0.0.1.
(Optional) If necessary, use the PORT property or the port on the web server that is used to access the web server. For example, the port that is required to access the Apache Tomcat web server by default is 8080.
The path to the file to access. For example, if the URL to access is http://localhost:8080/mysite/index.jsp, enter mysite/index.jsp in the Path field.
Enter if a user ID is required for the application server.
Enter if a password is required for the application server.
The property governs the Encoding drop-down: lisa.supported.html.request.encodings=ISO-8859-1, UTF-8, Shift_JIS, EUC-JP, Windows-31J
You can change the comma-separated list to include the encodings to support. The underlying JVM must also support all encodings in this list. If a web page uses an encoding that is not supported in the list, then the drop-down entry is blank. If you save in that situation, DevTest replaces the encoding with the DevTest default (file.encoding key in lisa.properties). Also, if you do not select an encoding when creating a HTTP/HTML Request step, then the DevTest default encoding is assumed.
GET (or URL) Request Parameters: these request parameters are passed as part of the URL, and so they are exposed to the user in address bar of the web browser.
POST Request Parameters. The request parameters are passed as part of the body of the page request. They are not exposed to the user in the address bar of the web browser.
During a step execution, parameters are URL encoded as they are sent. The MIME type that is used is application/form-urlencoded.
All known properties, such as test case properties, data sets, and filters, are listed.
If this element is selected, the step downloads web page images into the test environment. If you do not select this check box, no images are downloaded.
The following table describes other functions that are part of the toolbar that is available on the URL Parameters and POST Parameters sections.
|
Field |
Icon |
Description |
|
Add |
|
Add a request parameter |
|
Up |
|
Move an existing parameter up in the list of parameters |
|
Down |
|
Move an existing parameter down in the list of parameters |
|
Delete |
|
Delete an existing parameter |
|
Find |
|
Find text |
|
Auto-Generate a Filter |
|
From the referring step to make this parameter dynamic. Create a new filter to auto-populate this property at run time. For more information on filters, see the Filters section. |
|
Apply selected All Known State property |
|
Apply state to the parameter. For more information on applying state, see the All Known State section that follows. |
|
Auto Apply all Known State properties |
|
Apply all state to all properties possible by patterns. For more information on applying state, see the All Known State section that follows. |
All Known State
All known properties, such as test case properties, data sets, and filters, are displayed in the All Known State panel.
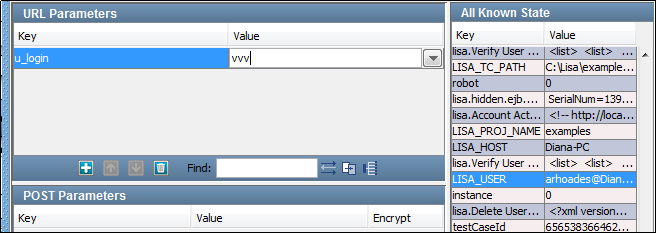
You can assign the values of properties to URL request parameters.
For example, to assign the value of the LISA_USER data set key to the u_login request parameter in the previous example:
A warning message opens asking you to confirm the impending change.
The new property is displayed in the URL Parameters pane.
If all the names of the URL Parameter keys equal the names of the All Known State keys, you can click Apply to All to assign all the properties to the associated parameters quickly.
Use Property Option
If the Use property option button is selected, you can specify the following parameters:
Specify a property that contains the connection information.
If this element is selected, the step downloads web page images into the test environment. If you do not select this check box, no images are downloaded.
On the HTTP Headers tab, create any custom HTTP headers.
To create a request parameter in either section, click Add ![]() and change the key and value to the target values.
and change the key and value to the target values.
On the Response tab, view the HTTP response that the server returns when this test was recorded. You can view:
The SSL tab lets you enter information for either single or multiple SSL certificates.
Using a Single SSL Certificate
Enter the following information:
The name of the keystore file where the client identity certificate is stored. The file can be in JKS or PKCS format.
Password for the keystore file.
The keystore attribute that defines the alias that is used to store and retrieve the private key for the server.
An optional password for the key entry if using a JKS keystore, and key has a different password from keystore.
Using Multiple SSL Certificates
To use multiple certificates on one step, store your SSL information in a data set. The following example shows how you can use a data sheet to store information about multiple certificates.
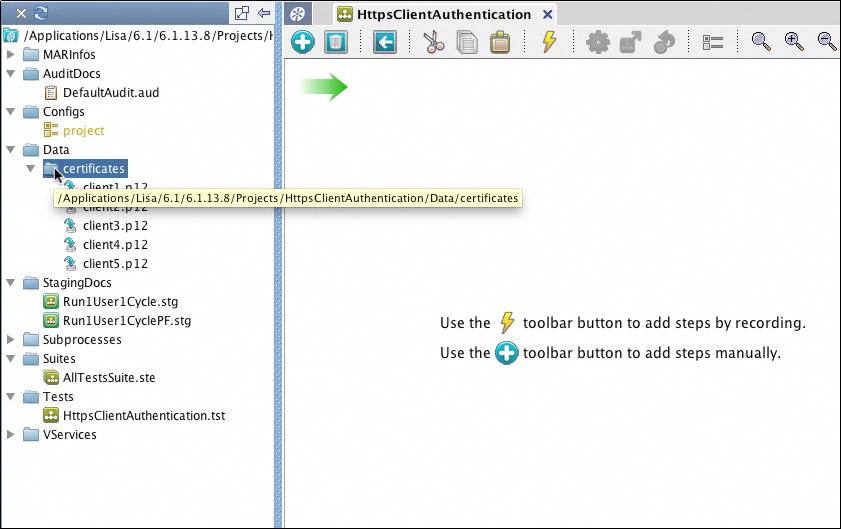
In this example, the demo server is running in the background and it has been configured to require client-side authentication. The demo server accepts five certificates. The keystore files for those certificates are in the project structure in a Data with the name certificates. These keystore files are pkcs12 keystores.
Next, an HTTPS Request step is added and https is specified as the protocol and the port and path are entered.
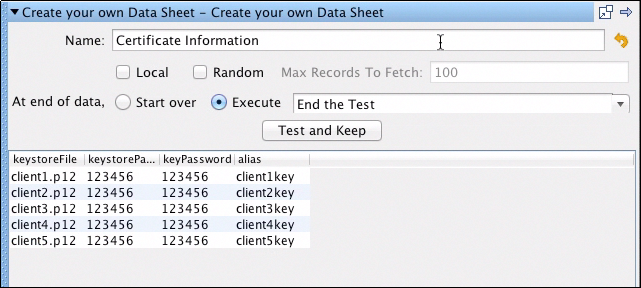
To ensure this process works with all the certificates and only run the test once, a data set is created for this test step. Use the Create your own Data Sheet data set to create the data set. The data set has the name Certificate Information and it is configured to run through the data set rows once, and then exit. Each certificate has five certificates and four parameters. When all the information is complete, use the Create Data Sheet Skeleton button to open the editor.
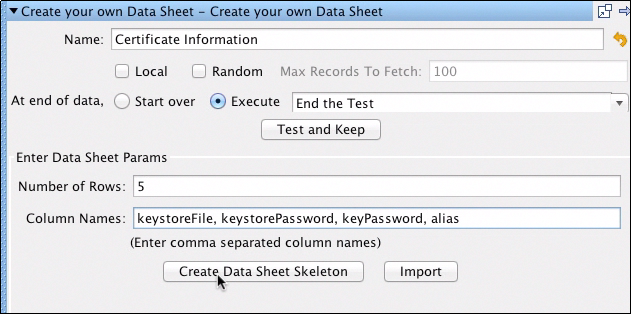
For keystoreFile, we use the short file name of the keystore so that relative paths can be used later. To encrypt the password columns, right-click the column label and select Encrypt.
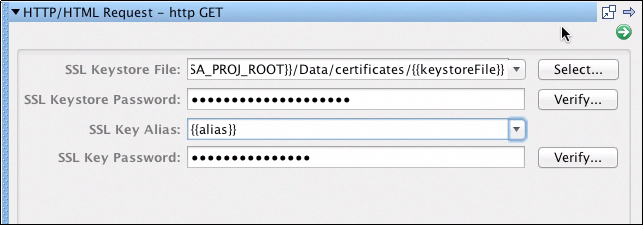
Return to the HTTP step and select the SSL tab. Use property substitution for the variables. For the password fields, enter {{keystorePassword}} and {{keyPassword}}.
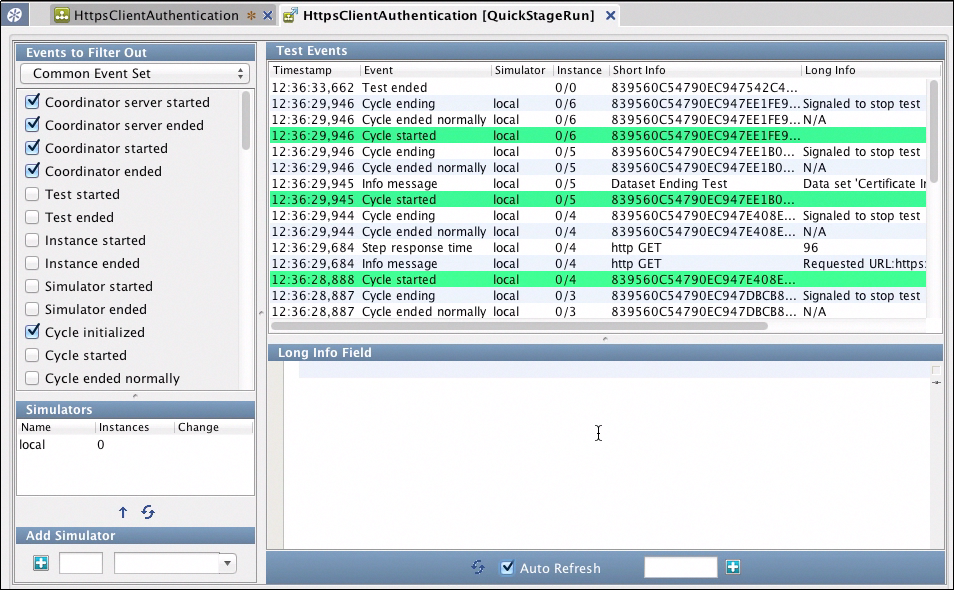
The test is staged with Stage a Quick Test, and you can see that all of the tests completed successfully. All five certificates were tested against the demo server and client authentication was successful for all of them.
|
Copyright © 2014 CA Technologies.
All rights reserved.
|
|