

Getting Started › CA Application Test Tutorials › Tutorial 3 - Filters and Assertions
Tutorial 3 - Filters and Assertions
In this tutorial, you modify the test case that was created in Tutorial 2 to include a filter and an assertion.
For an introduction to filters and assertions, see Filters and Assertions in Using CA Application Test.
Tutorial Tasks
In this tutorial, you:
- Save an existing test case with a new name
- Add an assertion to a test step
- Add a filter to a test step
Prerequisites
- You have completed Tutorial 2 - Data Sets.
- DevTest Workstation is open.
Step 1 - Create a Test Case from an Existing Test Case
In this step, you open tutorial2.tst and save it as tutorial3.tst.
Follow these steps:
- Open the tutorial2.tst test case in the My Tutorials project.
- From the menu bar, select File, Save As.
- In the File name field, enter tutorial3.
- Click Save.
The tutorial3 test case is created and saved under the My Tutorials project.
Step 2 - Change Action of Test Step
Change the Next Steps action of both test steps so that DSstep1 is the next step. Only the first step reads from the data set.
Follow these steps:
- In the model editor, select DSstep1.
- In the Step Information tab, change the Next step to DSstep1.
With this action, the output goes back to the same step DSStep1. For the time being, alert icons appear next to DSStep2.
- In the model editor, double-click DSstep2 and change the Output Log Message as follows:
Date contains 1999. It is: {{month}}/{{day}}/{{year}}.
Note: The curly brackets are important. The test case runs correctly only if they are included.
- Click
 Save.
Save.
Step 3 - Add an Assertion
You can add various types of assertions to a test case. In this procedure, you add an XML assertion with the name Ensure Result Contains String.
The assertion logic is:
- If the response contains the string 1999, then the DSstep2 step is run next.
- If the response does not contain the string 1999, then the DSstep1 step is run next.
Follow these steps:
- In the model editor, select DSstep1.
- Open the Assertions tab.
- Click
 Add.
Add.
- From the XML submenu, select Ensure Result Contains String.

- The new assertion that is applied to DSstep1 is added to the Assertions tab.
The assertion editor opens.
- In the assertion editor, do the following:
- In the If list, select True.
- In the then list, select Go To: DSstep2.
- In the Log field, enter The string 1999 was found.
- In the Contains String field, enter 1999.
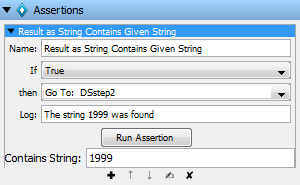
- Click Save.
Step 4 - Test the Assertion
To determine whether the assertion works as expected, use the Interactive Test Run (ITR) utility.
Follow these steps:
- Start a new ITR session.
- In the Execution History pane, click Automatically execute test
 .
.
- When the test is complete, click OK.
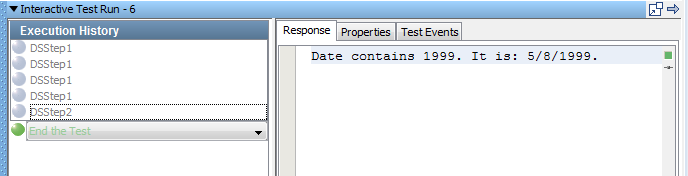
- Review the Response tab.
Note: The DSstep2 step is executed next when DSstep1 encounters a date in which the year is 1999.
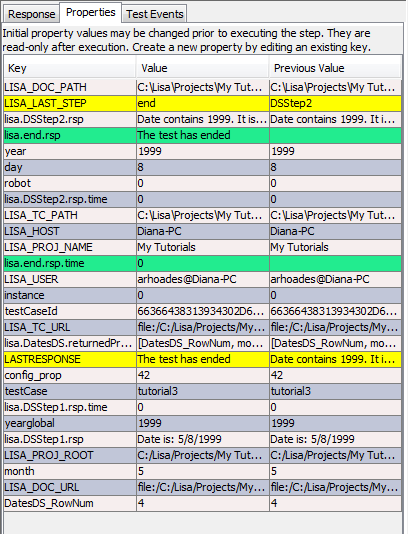
- Click the Properties tab and review the behavior of the properties.
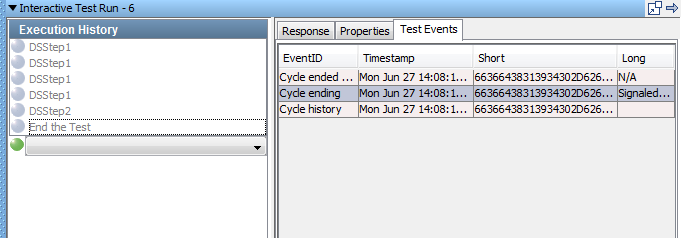
- Click the Test Events tab and review the events that were generated.
Step 5 - Add a Filter
You can add various types of filters to a test case. In this procedure, you add a utility filter with the name Store Step Response. This type of filter lets you save the step response as a property.
Follow these steps:
- In the model editor, select DSstep1.
- Open the Filters tab.
- Click Add.
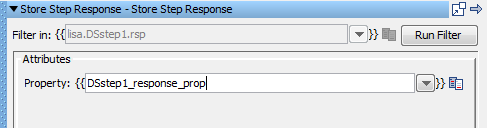
- From the Utility Filters submenu, select Store Step Response.
The filter editor opens.
- In the filter editor, set the property name to DSstep1_response_prop.
This property is where the step response is stored.
- In the model editor, double-click DSstep2 and add the following text to the end of the output log message:
The value of DSstep1_response_prop is: {{DSstep1_response_prop}}.
- Click Save.
Step 6 - Test the Filter
To determine whether the filter works as expected, use the Interactive Test Run (ITR) utility.
Follow these steps:
- Start a new ITR session.
- In the Execution History pane, click Automatically execute test .
- When the test is complete, click OK.
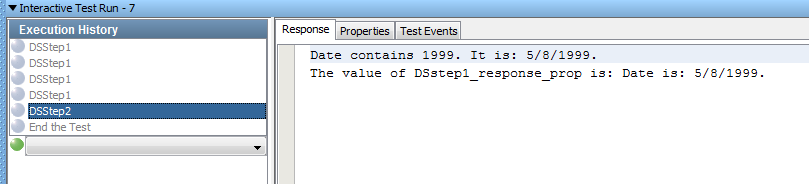
- Review the Response tab.
The DSstep2 test step now displays the additional text that you added to the output log message.
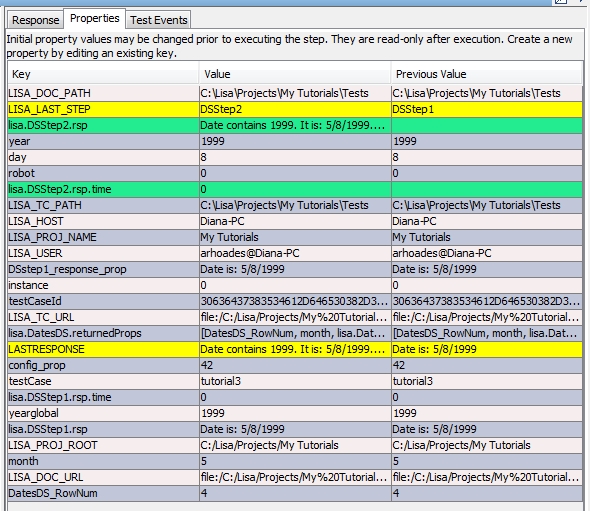
- Click the Properties tab and observe where the DSstep1_response_prop property is created and modified.
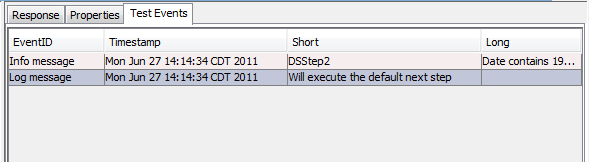
- Click the Test Events tab and review the events that were generated.
Tutorial 3 - Review
In this tutorial, you:
- Took a first look at filters and assertions.
- Opened and modified an existing test case.
- Learned how to add a simple assertion.
- Learned how to add a simple filter.
- Used the Interactive Test Run utility to validate that the assertion and filter worked as expected.
More Information
DevTest provides filters and assertions to cover most of the situations that you encounter in your test case development. If no appropriate filter exists, DevTest provides a mechanism for developing custom filters and assertions through the Software Developers Kit (SDK). See Using the SDK for more information.
Copyright © 2014 CA Technologies.
All rights reserved.
|
|