After creating the user-defined metadata that is needed to integrate Content Collector with CA DataMinder, you must apply that metadata to CA DataMinder task route(s).
- Launch the IBM Content Collector Configuration Manager.
- Click the Task Routes button to open the Task Routes pane
- Click the
 New button to create a new CA DataMinder task route. You must base the new task on one of the CA DataMinder task route templates.
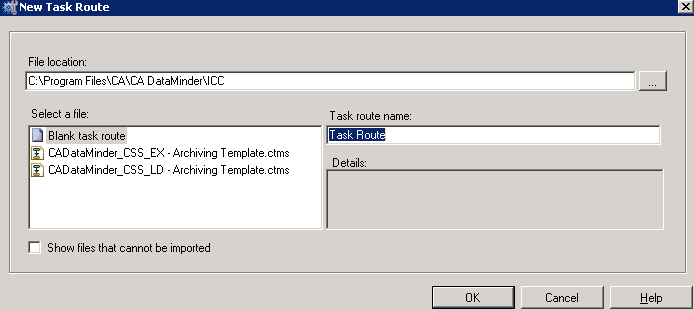
The New Task Route dialog displays.

- Click the browse button ("...") to the right of the File location field.
The Browse For Folder dialog appears.
- Browse to the \CA\CA DataMinder\ICC subfolder below the 64-bit CA DataMinder installation folder and click OK to close the dialog.
The CA DataMinder task route templates are listed in the Choose a Template tab of the New Task Route dialog.
- Choose a task route template and click OK.
For example, select the template for Exchange emails:
CA DataMinder_CSS_EX_Archiving Template.ctms
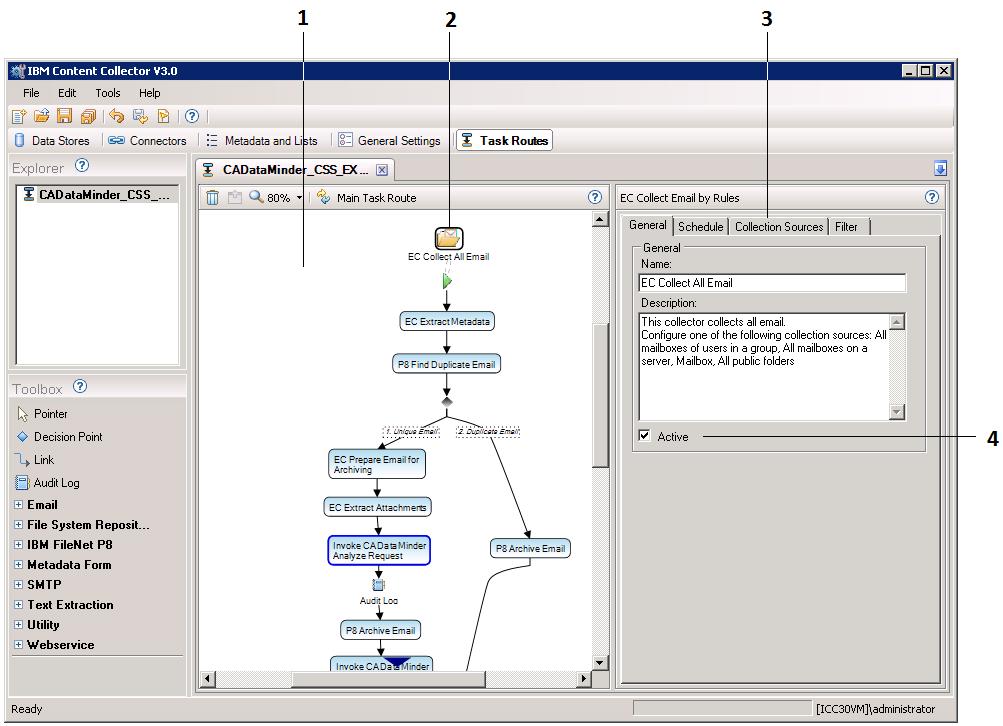
The new task route displays:

Task Route screen: 1 Individual tasks in task route. 2 Task collector. 3 Task properties. 4 Activate check box.
- Click the following task to view its properties in the right-hand pane.
Invoke CA DataMinder Analyze Request
Edit the task properties for the Analyze Request.
- Click the following task to view its properties in the right-hand pane:
Audit Log
Edit the task properties for Audit Log #1.
Note: This is the Audit Log task that immediately follows the CA DataMinder Import Analyze Response Metadata task. It is the first of two Audit Log tasks.
- Click the following task to view its properties in the right-hand pane:
Invoke CA DataMinder Commit Request
Edit the task properties for the Commit Request.
- Click the following task to view its properties in the right-hand pane:
Audit Log
Edit the task properties for Audit Log #2.
Note: This is the Audit Log task that immediately follows the CA DataMinder Import Commit Response Metadata task. It is the second of two Audit Log tasks.
- Switch to the Error Task Route and click the following task to view its properties in the right-hand pane:
Invoke CA DataMinder Rollback Request task
Edit the task properties for the Rollback Request.
- Now configure the task collector (‘SC Collect All Email’; see the previous screenshot). Click the collector to view its properties in the right-hand pane.
- In the Schedule tab, specify how often the task runs.
- In the Collection Sources tab, specify the email source, typically a Journal or Mailbox. For example, enter a mailbox SMTP address such as sales@unipraxis.com.
- Click File, Save All to save the new task route.
- Now activate the task route. Click the collector to view its properties in the right-hand pane.
In the General tab, select the Activate check box to activate the task (see the previous screenshot).
- Confirm that the IBM Content Collector Task Routing Engine service has started on the host server.


