

As a resource manager or application administrator, create roles first as placeholders for the resources that your projects require. Then, create the resources that you hire to fill the demand that the role allocations represent. Finally, assign your resources to the right project teams.
For example, create a role for a field technician and then create resources for your staff and contractors. You can create an advanced role for a lead field technician with more skills. Create a nonlabor equipment role whenever a project requires machinery. Then create a resource entry for each available piece of equipment that your company owns or leases.
The application uses the financial properties of the resource to apply the correct rates and costs to their work transactions as they are processed. To post to CA Clarity PPM and appear in financial pages and reports, enable the financial properties for a resource. The financial actuals are visible in the product only for resources that are financially enabled.
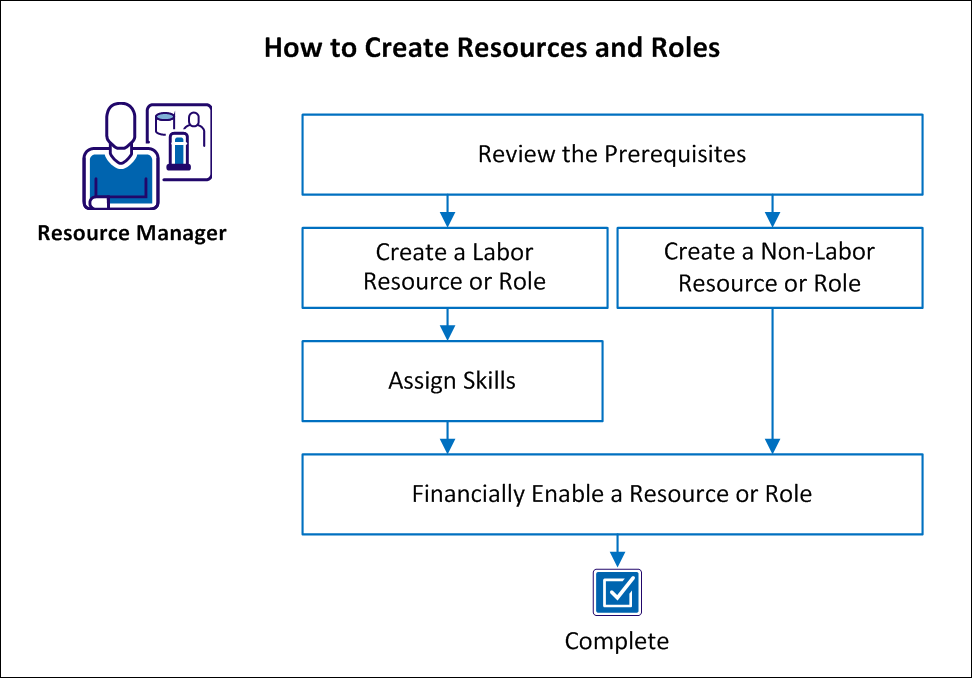
The following graphic shows the steps for creating resources and roles.
Follow these steps:
Verify that your administrator has satisfied the following prerequisites:
You can create a labor resource using either the Home or Administration menus. When you create a labor resource from the Home menu, your administrator can activate their user status and assign rights and login credentials.
Follow these steps:
Indicates the primary role for the resource. Roles can change from investment to investment. A primary role lets other CA Clarity PPM resources see at a glance the primary area of expertise of a resource.
Defines the category that identifies the area of expertise of the resource.
Example: Software Development or Product Marketing.
Specifies whether the resource works for an outside company.
Default: Cleared
Defines the number of hours in a business day that the resource is expected to work. The availability number is automatically multiplied by five, which is the number of days in a standard working week.
Default: 8
Note: This field is mandatory and must be greater than zero for the Labor type of resource or role. ETC is based on the availability. An expense type of resource or role that is assigned to a task does not have a default ETC.
Specifies a code that is used for the resource in financial transactions.
Indicates the tracking method used to enter time for this resource.
Values:
Default: Clarity
Specifies if the resource can use timesheets to track time that is spent on task assignments. When cleared, the resource cannot log time on any project.
Default: Selected
Specifies the resource for inclusion in datamart. When cleared, the resource is not added in datamart.
Default: Cleared
Identifies the name of the person creating the resource.
Default: The resource currently logged in.
Indicates the default booking manager for this labor resource.
You can create nonlabor resources and roles including equipment, material, or expense. Create a role as a placeholder in a project to help you plan for tasks and estimate the scope of work.
Follow these steps:
Specifies the role one-level higher than this role in a hierarchy.
Example: The Application Developer role is a parent to the Web Developer role.
Indicates the primary role for the resource. Roles can change from investment to investment. A primary role lets other CA Clarity PPM resources see at a glance the primary area of expertise of a resource.
Defines the category that identifies the area of expertise of the resource.
Example: projector, server, truck
Specifies whether the resource works for an outside company.
Default: Cleared
This field represents the number of hours in a business day that the resource is expected to work. The availability number is automatically multiplied by five, which is the number of days in a standard working week. ETC is based on availability calculations. A resource or role of type expense that is assigned to a task does not have a default ETC.
Default: 8
Note: This field is mandatory and must be greater than zero only for the Labor type of resource or role. Material and equipment (but not expenses) can also have an availability value.
Identifies the name of the manager with access rights to perform duties such as setting the allocation for this resource.
Default: The resource currently logged in.
Identifies the name of the person creating the resource.
Default: The resource currently logged in.
Indicates the default booking manager for this labor resource.
You can use skills to describe the talents a labor resource or role possesses for project tasks. Defining the skills of labor resources is helpful to other users who want to assign the most qualified resources to roles on projects.
Follow these steps:
The Resource Skills page appears showing the skills for the selected resource or role.
The Select Skills page appears showing all of the skills available in the skills hierarchy for all resources and roles.
Note: To add a skill to the skills hierarchy, contact your administrator.
You can financially enable any resource or role that is involved with financial transactions. Enabling the resource or role includes associated financial data in features such as financial planning and forecasting.
Follow these steps:
Indicates whether the financial attributes for a resource or role are enabled to record financial management activities against an investment.
Specifies a user-defined value that groups transaction types for financial processing of the resource or role.
Categorizes financially enabled resources and roles for financial processing.
Refers to the percentage of the targeted billing rate that is billable. Enter the target percentage billable for this resource, if applicable.
|
Copyright © 2015 CA Technologies.
All rights reserved.
|
|