

How to Upgrade CA CSM
How to Upgrade CA CSM
You perform the following tasks to upgrade CA CSM:
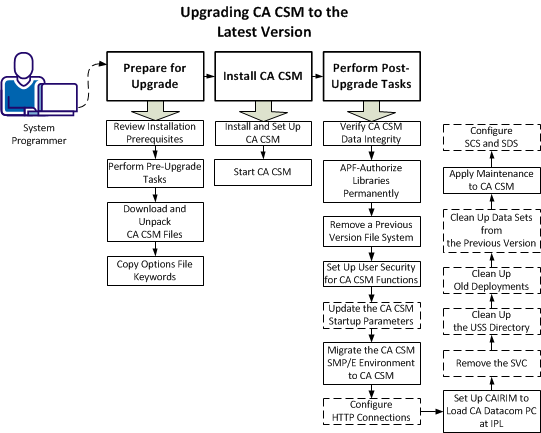
- Prepare for upgrade:
- Review installation prerequisites.
- Perform pre-upgrade tasks.
- Download and unpack CA CSM files.
- Copy options file keywords.
- Install CA CSM:
- Install and set up CA CSM.
- Start CA CSM.
- Perform post-upgrade tasks:
- Verify CA CSM data integrity.
- APF-authorize libraries permanently.
- Remove a previous version file system.
- Set up user security for CA CSM functions.
- (Optional) Update the CA CSM startup parameters.
- Migrate the CA CSM SMP/E environment to CA CSM.
- (Optional) Configure HTTP connections.
- Set up CAIRIM to load CA Datacom/MSM PC at IPL.
- (Optional) Remove the SVC.
- (Optional) Clean up the USS directory.
- (Optional) Clean up old deployments.
- (Optional) Clean up data sets from the previous version.
- Apply maintenance to CA CSM.
- (Optional) Configure SDS and SCS.
After you complete these tasks, you complete the upgrade of CA CSM to the latest version. You can start using CA CSM.
Note: The upgrade process does not affect data in your previous version of CA CSM in any way. A new CA CSM environment is set up with an upgraded database. The previous version CA CSM mount points for the products that are managed using CA CSM are still used after the upgrade. If you can run the latest CA CSM version successfully, you should not use the previous version anymore.
Copyright © 2015 CA Technologies.
All rights reserved.
|
|