Previous Topic: How the Installation Process WorksNext Topic: Prepare for Installation


How to Install CA CSM

You perform the following tasks to install CA CSM:

This picture shows the process of installing CA CSM.

  1. Prepare for installation:
    1. Review installation prerequisites.
    2. Set up USS paths.
    3. Review options file keywords.
    4. Download and unpack CA CSM files.
    5. Specify installation and setup options.
  2. Install CA CSM:
    1. Install and set up CA CSM.
    2. Start CA CSM.
  3. Configure FTP and HTTP connections:
    1. FTP session options.
    2. FTP proxy settings.
    3. HTTP proxy settings.
  4. Perform post-installation tasks:
    1. APF-authorize libraries permanently.
    2. Set up CAIRIM to load CA Datacom/MSM PC at IPL.
    3. Set up user security for CA CSM functions.
    4. (Optional) Update the CA CSM startup parameters.
    5. Configure CA CSM.
    6. Migrate the CA CSM SMP/E environment to CA CSM.
    7. (Optional) Clean up the USS directory.
    8. Apply maintenance to CA CSM.
    9. (Optional) Configure SDS and SCS.

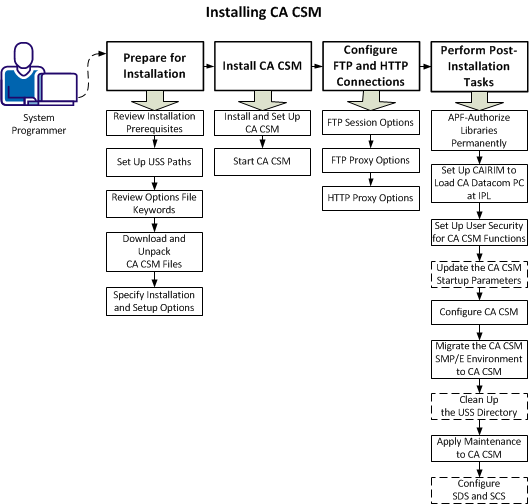
After you complete these tasks, you complete the installation of CA CSM. You can communicate the URL and appropriate login credentials to users and start using CA CSM.