

Follow these steps:
The wizard opens.
The Add to Reports Folder dialog box opens.
Note: Each report will be specific to the values entered for each of the parameters in the parameterized report.
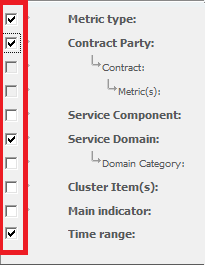
The following XML code was created by selecting the parameters shown in step 2 above. Specific values for each of the three parameters (Metric_Type, Customer, Service_Domain) must be inserted in order to run the code.
<REPORT_PARAMETERS xmlns="">
         <REPORT_ITEM>
             <REPORT>
                <PARAMETERS>
                    <METRIC_TYPE IS_MANDATORY="N"></METRIC_TYPE>
                    <CUSTOMER IS_MANDATORY="N"></CUSTOMER>
                    <SERVICE_DOMAIN IS_MANDATORY="N"></SERVICE_DOMAIN>
                </PARAMETERS>
                <TIME IS_MANDATORY="Y">
                   <FROM_BEGINING>
                      <TIME_UNIT></TIME_UNIT>
                   </FROM_BEGINING>
                 </TIME>
             </REPORT>
          </REPORT_ITEM>
</REPORT_PARAMETERS>
Note: Time parameters are listed separately from the others.
|
Copyright © 2013 CA.
All rights reserved.
|
|