

Consider an example scenario where all of the hardware infrastructure devices in a customers' environment have individual targets set upon them for their availability requirements. Using the standard modeling approach this would be quite a difficult task to achieve and would involve a lot of logical grouping for the devices and management using the resource model. To add to the complexity, the targets for these devices can change over time. These target values are updated in CA Business Service Insight by a translation script as the details are stored in an external CMDB (see Translation Script Best Practice Examples for the translation script example)
In this instance the Metric could be as follows:
% of availability per hardware device.
One way to effectively model this is to use the 'Custom Attributes' feature along with one of the other key features, 'Dynamic Targets'. Both of these can be used with a clustered Metric to achieve the desired results. Adding the service level target to the resource directly allows the business logic to compare the service level of each resource (hardware device) against its own target. A clustered Metric provides the individual service compliance for each piece of hardware using a single Metric.
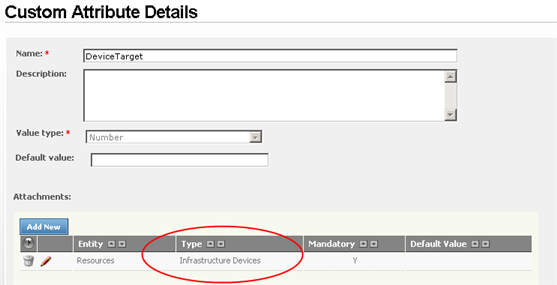
Therefore, it is necessary to first create the custom attribute by adding it to the resource type of these devices (where all devices are a resource of type 'Infrastructure Device'). The custom attribute created is called the 'DeviceTarget', and can be added from the menu at Service Catalog > Custom Attributes. Note, that when creating the custom attribute, you must link it to the resource type(s) which require it.
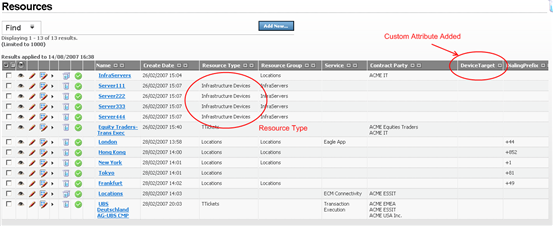
Now, when viewing the resources in the system, it can be seen that the new custom attribute is available for the resource type that it was linked to.
And the individual resources have a new field which can be updated.
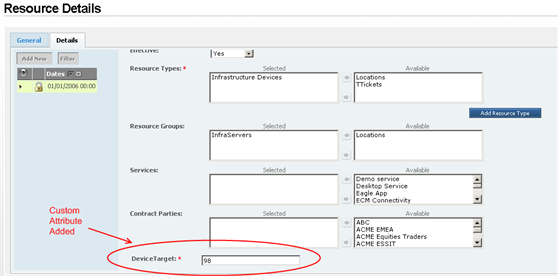
In this example, this field would normally be inserted/updated by the translation script.
Now that each of the resources has a target specified against it, you can develop the logic to perform the required calculation (after committing the resource changes). The following sample code shows how to extract the custom attribute value from the resource (in bold).
Option Explicit

Dim TotalTime
Dim OutageTime
Dim PeriodStart

Sub OnRegistration(dispatcher)
   dispatcher.RegisterByResource "OnDeviceOutageEvent", "DeviceOutageEvent", _
      Context.ClusterItem
End Sub

Sub OnLoad(TIME)
   TotalTime = 0
   OutageTime = 0
End Sub

Sub OnPeriodStart(TIME)
   TotalTime = 0
   OutageTime = 0
   PeriodStart = TIME
End Sub

Sub OnPeriodEnd(TIME, isComplete)
   TotalTime = Tools.NetTime(PeriodStart, TIME)
End Sub

Sub OnDeviceOutageEvent(eventDetails)
   OutageTime = OutageTime + Tools.NetTime (eventDetails ("OutageStartTime"), _
      eventDetails ("OutageEndTime"))
End Sub

Function Target
   Target = eventDetails.CustomAttribute ("DeviceTarget")
End Function

Function Result
   If TotalTime > 0 Then
      Result = (TotalTime - OutageTime) / TotalTime
   Else
      Result = Null
   End If
End Function
|
Copyright © 2013 CA.
All rights reserved.
|
|