Previous Topic: Tasks

Next Topic: Edit Task Properties

Create Tasks

You can create tasks from the following pages:

You can create a task on the Backlog page.

Follow these steps:

  1. Open the Backlog page and select the product for which you want to create a task.
  2. View the user story for which you want to create a task.
  3. Scroll to the Tasks subsection and click New Task.

    The New Task page appears.

  4. Complete the fields and save.

    See the Sprint Backlog & Charts procedure for more information.

You can create a task on the Sprint Backlog & Charts page.

Follow these steps:

  1. From the user story section of the Sprint Backlog & Charts page, select the user story or issue for which you want to create a task.
  2. Click New Task.

    The Create/Edit Task pop-up appears.

  3. Complete the requested fields.
  4. Click Save and Close to return to the user story, or Save and New to create a task.

You can create tasks from the User Story Detail page.

Follow these steps:

  1. With the User Story Detail page open, click New Task.

    The Task Edit page appears.

  2. Complete the following fields:
    Title

    Defines the name of the task.

    Required: Yes

    Status

    Specifies the current state of the task.

    Values:

    • Planned
    • In Progress
    • Completed
    • Closed

    Default: Planned

    Description

    Defines the purpose of the task and provides additional relevant information.

    Assignee

    Specifies the team member responsible for completing the task.

    Default: The assignee for the user story, if specified.

    Type

    Defines the task type.

    Values:

    • Implementation
    • QA
    • Doc
    • Design
    • Other

    Default: None

    Estimated Hours

    Defines the number of hours estimated to complete the task. This includes hours already logged for the task.

    Hours Worked

    Displays all the hours logged for the task.

    Team

    Specifies the scrum team assigned to complete the task.

    Default: The scrum team assigned to the user story, if specified.

  3. Do one of the following:

You can create new tasks on the virtual wall.

Follow these steps:

  1. Click the CA Agile Vision menu and select Virtual Wall from the Sprint Tracking menu.
  2. Click New Task for the user story to which you want to add a task.

    A new task card is added to the user story.

  3. Click the name of the task on the task card.

    The Task Detail page appears.

  4. Click Edit and complete the following fields:
    Title

    Defines the name of the task.

    Required: Yes

    Status

    Specifies the current state of the task.

    Values:
    • Planned
    • In Progress
    • Completed
    • Closed

    Default: Planned

    Description

    Defines the purpose of the task and provides additional relevant information.

    Assignee

    Specifies the team member responsible for completing the task.

    Type

    Defines the task type.

    Values:
    • Implementation
    • QA
    • Doc
    • Design
    • Other
    Estimated Hours

    Defines the number of hours estimated to complete the task. This includes any hours already logged.

    Hours Worked

    Displays the number of hours already logged for the task.

    Team

    Defines the task type.

    Values:

    • Implementation
    • QA
    • Doc
    • Design
    • Other

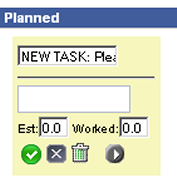
You can create a task in place on the Virtual Wall.

This procedure enables you to quickly add a task without leaving the Virtual Wall.

Follow these steps:

  1. Click the Navigation menu and select Sprint Backlog & Charts from the Planning menu.
  2. Display the details for the sprint that the user story is a part of, and go to Virtual Wall.
  3. Click New Task for the user story to which to want to add a task.

    A new task card is added to the user story.

  4. Double-click the task card below the name.

    The task card redisplays with fields that can be edited.

    Graphic of a task card with editable fields

  5. Complete the fields:
    1. Clear the top field and enter a task title.
    2. Enter the name of the team member assigned to the task in the second field.
    3. Enter the number of hours estimated to complete the task.
    4. If the task is already started, enter the number of hours worked. You must be a product team member. The hours worked are added to the Task Worklog with work date and user name details.
    5. If the task is already started, click the right arrow button to change the task status from Planned to In Progress.
  6. Click the check button to save your settings.